Let’s talk about why weatherstripping, whether it’s the simple peel-and-stick kind or the fancy molded stuff on a Ford truck door, can turn brittle and start shedding bits everywhere. If you’re starting to feel like you’re in a never-ending battle to keep your weatherstripping in one piece, you’re definitely not alone.
Honestly, it’s a pretty common problem—especially if you live somewhere with wild weather swings or your car spends most days parked in the sun. Even the best brands and the “heavy-duty” stuff wear out eventually. But understanding what’s behind all the cracking and falling apart means you can fix it right—and make sure your next set lasts much longer.
What Causes Weatherstripping to Crack and Deteriorate?
Weatherstripping seems simple, but it’s constantly exposed to a laundry list of things bent on destroying it. You might picture it as just boring rubber, but it’s really your house’s (or car’s) front line of defense against whatever’s going on outside. So what exactly is wearing it out?
The main culprit is exposure to sunlight and UV rays. Think about how a rubber band left in direct sun shrivels up—not so different from what happens to weatherstripping after months (or years) getting baked by the sun. UV rays break down the oils and chemicals that keep rubber flexible, leaving it dry and cracked.
But that’s just one part. Temperature swings play a huge role, too. If you live where it’s freezing in winter and boiling in summer, weatherstripping expands and contracts over and over again. That constant movement puts stress on the material, which eventually leads to cracks and crumbling.
Let’s not forget chemical exposure. If you clean your doors or windows with harsh cleaners, or if your car’s weatherstripping gets splashed with gasoline or oil, those chemicals can break down the material much faster. Sometimes, even the *wrong* replacement adhesive can start the deterioration early. So, in short, weatherstripping has a tough job—and sometimes, it just wears out from all directions at once.
How Can You Tell If Weatherstripping Is Failing?
Spotting a problem early with weatherstripping can save you a lot of headaches. But knowing when it’s actually failing—versus just a little surface dirt—isn’t always obvious at first. So, what should you look for?
Visual signs are the biggest giveaway. If you see any of these, it’s time to pay attention:
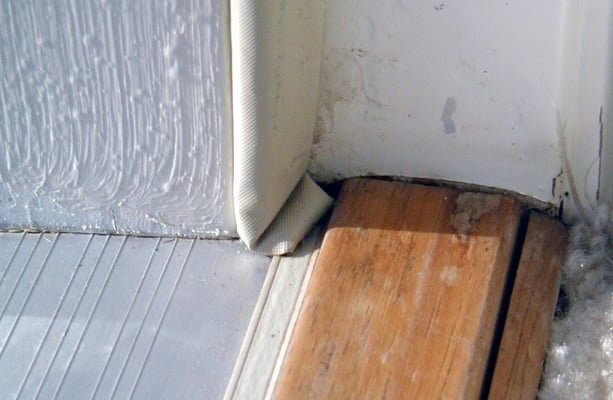
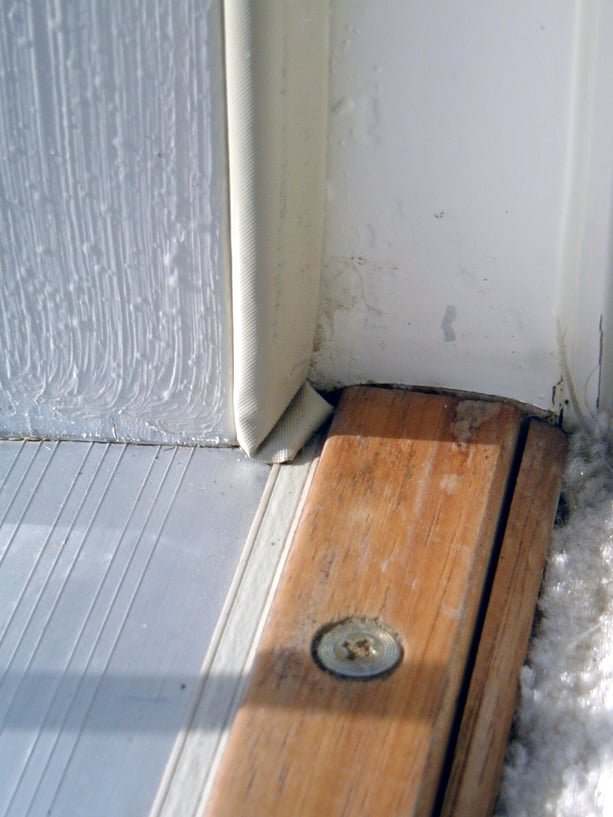
- Cracks, splits, or missing chunks in the material (rubber, foam, or felt)
- Flattened or deformed areas where the weatherstripping no longer “springs back”
- Gaps between the door/window and the frame, especially if you can see daylight through them
Feeling a draft or hearing extra noise can also be a hint. If suddenly your living room feels cold next to a closed window, or your car door lets in wind noise it never did before, broken down weatherstripping is usually the cause.
Then there’s the water test. Let me explain: during a rainstorm, check for water trails or even a little puddle inside by the door or window edge. That’s a sure sign the weatherstripping isn’t doing its job anymore. You might even notice more insects sneaking inside—another side effect of old, cracked strips.
Does the Type of Weatherstripping Matter?
Here’s the thing: not all weatherstripping is created equal, and knowing what you’ve got is half the battle. There are several common types, each with its own strengths and weaknesses.
Foam tape is the cheapest and easiest to install. It’s great for DIY fixes, but it breaks down quickly—especially if exposed to sun or friction. Rubber bulb strips and EPDM seals (the kind you see around car doors like on a Ford F-150) can last longer, but they’re not immune to sun, heat, and time.
Vinyl weatherstripping is stiff and water-resistant, but it gets brittle in cold weather. Metal-backed weatherstripping lasts the longest, but it’s tricky to install and usually used on older doors and windows.
So, if your weatherstripping is cracking and falling apart, check what kind you have. If it’s a cheap foam or vinyl, replacement is probably overdue. Upgrading to a higher-quality rubber or a better-fitting style can save you time (and frustration) next time around.
Common Mistakes That Shorten Weatherstripping Life
You might be wondering: if weatherstripping is meant for the elements, why does it break down so fast? Honestly, sometimes we make it harder on ourselves without realizing it.
Incorrect installation is a big one. If the strips are stretched too tightly or cut too short, they’re stressed from day one. They won’t absorb movement or seal against drafts, and they’ll start cracking way sooner than they should.
Wrong cleaning products can also wreak havoc. Bleach, ammonia, and many household cleaners strip away the protective oils and leave the material brittle. Even car detailers with harsh solvents can be a problem. Stick to mild soap and water to keep weatherstripping soft and flexible.
Another mistake: ignoring damage until it’s severe. A little crack may seem harmless, but moisture can sneak in, freeze, and split the weatherstripping even more. The sooner you spot and fix problems, the less likely you are to face a big draft, stubborn leak, or expensive repairs down the road.
Why Weatherstripping Matters for Energy Efficiency
Let me put it simply: weatherstripping may seem boring, but it’s a silent hero for your comfort—and your wallet. When it starts cracking and falling apart, you’re not just dealing with a nuisance. Your energy bill might start creeping up, or your place might feel chillier than it should, even with the heat cranked.
A tight seal keeps your heated or cooled air inside—where it belongs. So when those seals break down, it’s a bit like leaving a window cracked open all winter or summer. Your furnace or air conditioner has to work overtime, burning more fuel or electricity to keep the temperature steady.
If you’ve ever wondered why your room is always drafty no matter how high you turn the heat, old weatherstripping is often to blame. Swapping it out for new, high-quality material can make an immediate difference. Sometimes it’s the cheapest fix for comfort and energy savings—way more effective than just plugging in another space heater.
How to Replace Weatherstripping (Step by Step)
Replacing weatherstripping isn’t complicated, but you’ll have a much better result if you go slow and do it right. Here’s how most people tackle it:
- Remove the old weatherstripping. Gently peel it away. For stubborn bits or adhesive residue, use a putty knife or adhesive remover.
- Clean the surface. Wash away dust, debris, or old glue with mild soap and water. Let it dry completely before adding new material.
- Measure and cut your new weatherstripping. Lay it along the frame, mark your lengths, and cut with scissors or a utility knife—don’t stretch it or you’ll cause premature wear.
- Apply the new strip. Peel off any adhesive backing and press it firmly into place. For non-adhesive types, press them into grooves or fasten them as directed.
- Test the seal. Close the door or window. You should feel resistance (but not too much) and notice no light or drafts coming through.
Pro tip: If you’re syncing up a whole row of windows, do one at a time so you don’t get mixed up about sizes or orientation. Double-check each one before calling it done. It’s not a race—take your time, and you’ll have a much longer-lasting result.
Weatherstripping Maintenance Tips for Longer Life
Once you’ve put in the effort to pair and reset your weatherstripping, you want it to last. Maintenance isn’t complicated—think of it as a quick system check every now and then.
- Clean gently. Wipe down weatherstripping every few months with soapy water and a soft cloth. Avoid strong chemicals or rough scrubbing, which can degrade the material.
- Inspect regularly. Look for cracks, loose spots, or flattening—especially after a season of tough weather. Reset or replace anything that looks tired.
- Lubricate if needed. Some car door weatherstripping stays flexible longer with a little silicone spray (never oil or WD-40). This helps prevent sticking—and keeps the seal tight.
If you live somewhere with wild temperature shifts, check more often. The faster you catch problems, the easier they are to fix. A little maintenance goes a long way toward avoiding a total replacement later.
When Should You Call a Pro?
Most weatherstripping jobs are easy DIY fixes, but there are times when a pro’s help is worth it. Maybe you’ve got a tricky old door, custom windows, or a car with built-in sensor wires you don’t want to mess with. Or maybe your new weatherstripping just won’t stay put, no matter how much you try to troubleshoot or reset it.
Pros have the right tools to cut precise strips, pair the correct material with your exact window or door type, and code special adhesives suited for tricky surfaces. They can spot frame problems you might miss, like warped wood or worn-out seals that go beyond just the weatherstripping.
If you’re not sure, or your first attempt didn’t work, there’s no shame in getting help. The main thing is keeping your home or car sealed up tight—and sometimes, a pro can make all the difference.
If your weatherstripping is cracking and falling apart, you’re not alone—almost everyone deals with it sooner or later. The good news? With a bit of know-how and the right materials, you can reset your seals, stop those drafts, and stay comfortable year-round.
A little care and attention, plus some smart troubleshooting, can keep your next round of weatherstripping looking (and working) way better. Whether you’re dealing with a home, a Ford truck door, or universal rubber seals, tackling the problem now means you’ll worry less about cold breezes, rattling windows, or tricky leaks in the future.