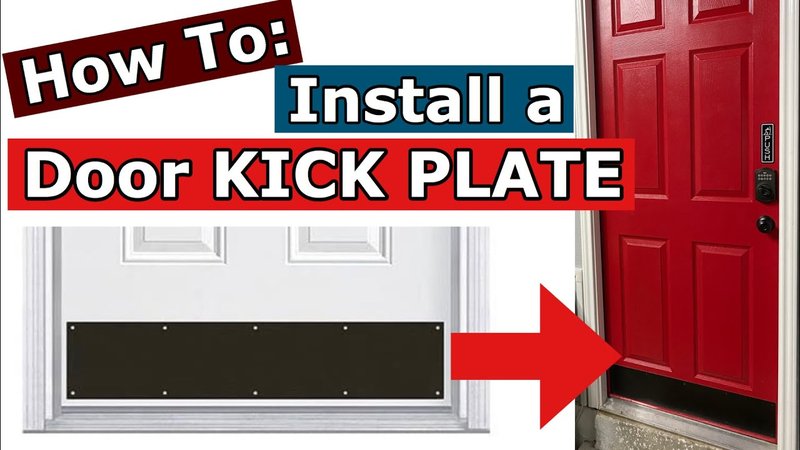
If you’re using a name-brand kick plate like Schlage, Kwikset, or Baldwin—or even a universal fit—the same issue can crop up, whether it’s for a fancy new solid wood door or a trusty old steel one. But why won’t the kick plate lie flat? What’s making that neat line you want look wavy or uneven? That’s what we’ll get into here, looking at the possible reasons (from warped metal to door surface quirks), easy fixes, and how to avoid the problem next time.
What Is a Kick Plate and Why Does It Need to Sit Flush?
First off, let’s get clear on what a kick plate is actually for. A *kick plate* is a flat metal (sometimes plastic or brass) sheet that you screw onto the bottom part of a door. Its main job? To protect your door from scuffs, muddy shoes, banging luggage, or even the odd pet paw.
But here’s the thing: It’s not just about function. If your kick plate isn’t sitting flush—
meaning its entire back is pressed evenly against the door—you’ll end up with gaps, visible screws, or even spots that collect dirt and grime. It won’t just look off; it can also make your door harder to clean and, over time, cause the plate to bend, rattle, or scratch the finish.
If you have a remote-controlled smart lock or door hardware, a flush kick plate helps keep the look clean and professional. No matter the brand—like when pairing a Schlage kick plate with a Kwikset lock—getting it to sit flat makes a difference in style and longevity.
Common Reasons Kick Plates Don’t Sit Flush
There’s nothing quite like spending twenty minutes lining up the plate, locking in the screws, and then noticing it’s born with a *gap*. So, why does this happen? There are a few culprits:
- Bent or Warped Kick Plate: Some plates, especially cheaper or thin-gauge ones, arrive already a bit warped. Even a slight bend can keep the plate from lying flat against the door.
- Uneven Door Surface: Many doors, especially older wooden ones, aren’t perfectly flat. Raised grain, layers of peeling paint, or existing dents will stop the plate from making full contact.
- Screw Placement or Overtightening: Believe it or not, screwing too tightly can twist or bow the plate out of shape—especially in the middle.
- Debris or Old Adhesive: Sometimes old glue, weatherstripping, or paint chips keep the plate from resting flush, making installation uneven from the start.
So, if your *kick plate isn’t sitting flush* after you install it, don’t beat yourself up. Odds are at least one of these things is working against you.
How to Check for a Warped or Damaged Kick Plate
Before blaming your door or your own handiwork, it’s worth checking if the kick plate itself is the problem. Set the plate down on a flat surface—a kitchen table or countertop works perfectly. Do you see gaps, or does it rock when you press on the corners? That’s a dead giveaway the plate is already warped.
Sometimes, bending can happen in the packaging or even during shipping. Even plates from top brands like Baldwin or Schlage aren’t immune. If you spot a bend, carefully try to flatten it by hand or with a rubber mallet, but don’t force it. Aluminum and brass are soft and can kink if you go too far.
If your kick plate is beyond hope, you might want to reset and order a new one—or, if it’s only a slight bend, you can sometimes code a fix by adding a thin adhesive pad behind the gap to help fill the space.
Tip: Always inspect your kick plate for bends or dings *before* installing. Fixing it on your workbench is way easier than on the door.
How Door Surface Issues Mess with Kick Plate Installation
Even the best, most pristine kick plate can look wonky if your door’s surface isn’t playing nice. Take a close look at the bottom panel of your door. Is it totally flat? Or do you feel ridges, dents, or areas where old paint or caulk have built up?
For wooden doors, you might find:
- Wood grain popping up from moisture or age
- Peeling paint or multiple paint layers
- Leftover glue from a previous plate or weatherstrip
Steel or composite doors sometimes have factory seams, textured finishes, or chips that get in the way. All of those little bumps and ridges will keep your kick plate from syncing up completely flush.
The solution? Before trying to pair the plate, grab a putty knife and gently scrape off any high spots or leftover gunk. If it’s really uneven, a quick sanding or a little wood filler might be needed. Take your time here—prep is half the battle.
Installation Mistakes That Make Kick Plates Stick Out
You might be wondering: Is it possible you did everything right, but it still looks wrong? Here’s where technique comes in. The most common mistakes when installing a kick plate are all about the screws.
Let me explain:
- Overtightening Screws: When you sink a screw too hard, the plate can “oil can”—that is, bow out in between the fasteners. Be gentle; stop as soon as it’s snug.
- Uneven Tightening: Screwing down one side all the way before the other can create a twist. Always start by lightly threading all screws, then tighten them in sequence, a little at a time.
- Missing Screws or Uneven Spacing: Not all plates come with pre-drilled holes. If you drill your own, make sure they’re evenly lined up so the plate pulls in flush.
Honestly, if you treat installation like pairing a remote—syncing things up step by step, instead of rushing—you’ll get a much better fit.
How to Get Your Kick Plate to Sit Flush: Step-by-Step
Ready to fix your un-flush kick plate? Here’s a troubleshooting routine you can follow, whether you’re dealing with a universal plate or one from a specific brand.
- Remove the Plate: Unscrew and take off the plate completely.
- Clean the Door Surface: Scrape away dirt, old adhesive, paint chips, or splinters.
- Check the Kick Plate: Lay the plate flat and look for warps. Gently bend it flat if you can, or replace if needed.
- Test Fit: Hold the plate in place and see if it sits flat now. If not, look for bumps or gaps, and mark them.
- Sand or Fill High Spots: Sand down problem areas, or fill in deep dents with wood filler and let dry.
- Install Properly: Start all screws loosely, then tighten gently and evenly in a crisscross pattern.
- Check and Adjust: Step back and look for gaps. If needed, loosen and re-tighten screws for a better fit.
This process is a bit like resetting a remote—you want everything paired up just right for the best results.
Comparing Kick Plate Materials and Their Flush Fit
You might not realize it, but the material of your kick plate makes a huge difference in how easily it sits flush. Some materials are more forgiving than others. Here’s how the main ones stack up:
| Material | Pros | Cons |
| Aluminum | Light, resists rust, easy to install | Prone to bending, can warp in shipping |
| Brass | Durable, looks fancy, resists scratching | Heavier, may dent, pricey |
| Stainless Steel | Very sturdy, won’t rust, holds shape | Harder to drill, can look industrial |
| Plastic/Vinyl | Flexible, easy fit, cheap | Looks less premium, may crack over time |
If flush fit is your top priority, *stainless steel* may actually be the easiest to work with—less likely to warp, though a bit less forgiving to drill if you need new holes. Aluminum is the most common, but it takes a gentle touch when installing.
When It’s Worth Calling for Help
Sometimes, despite your best troubleshooting, things just won’t line up. Maybe your door slab itself is warped, or you’re dealing with a tricky old door that’s seen better days. Here’s when it’s smart to call a pro:
- You find serious rot, swelling, or structural cracks in the door itself.
- The kick plate just won’t sit flat, even after sanding and resetting.
- You need to code a custom plate for a non-standard size, or want the hardware to sync perfectly with high-end door hardware.
A professional can trim, fill, or plane the door for a flush fit, or recommend a better kick plate material. Sometimes, a brand-specific solution—like a Schlage or Baldwin OEM plate—might be the only way to get things to pair up right.
Don’t feel bad if you need help—sometimes, flush isn’t possible without serious tweaking, and that’s okay.
How to Prevent Kick Plate Problems in the Future
Most of us don’t think about the kick plate until it starts bugging us, but a little prep can save so much annoyance later. Here’s what you can do before your next install:
- Measure your door carefully—don’t just eyeball it. Universal plates are handy, but exact fit is better.
- Order a sturdy plate from a reliable brand, even if it costs a few bucks more. Schlage, Baldwin, and similar brands tend to arrive undamaged more often.
- Prep your door’s surface well—scrape, sand, and clean for the best “pairing” between door and plate.
- Install using all provided screws, tightening evenly and not too tight. Think of it like syncing your remote—steady, even steps make all the difference.
- Check your work from every angle before calling it done. If you spot a gap, it’s easier to reset now than after months of annoying rattling.
A flush kick plate not only looks sharp but helps keep your door protected for years. It’s one of those details that really does make a difference, even if most folks don’t notice it until it goes wrong.
Wrapping Up: Getting Your Kick Plate Flush and Fabulous
A kick plate that won’t sit flush can be surprisingly frustrating—but you’re not alone, and you’re not doing anything wrong. Whether it’s a slightly warped plate from shipping, a lumpy old door, or an installation slip-up, the fix is usually within reach. Take your time, prep well, check the plate’s shape, and go easy on those screws. If, after all this, your plate still isn’t playing nice, don’t hesitate to call for backup.
A flush kick plate is the unsung hero of a tidy, protected door. Get it right, and every time you head out or come home, you’ll appreciate that little bit of extra polish—no remote control required.
