Whether you’ve got a Schlage, Kwikset, Yale, or any other brand of front door handleset, a stuck thumb latch is surprisingly common. It doesn’t matter if it’s a classic mechanical style or a newer design—once it starts sticking, it can throw off your whole routine. If you’re finding yourself jiggling, wiggling, or even arguing with your doorknob every time you come and go, let’s break down why this annoying latch problem happens, what causes it, and—most importantly—how you can fix it.
How a Handleset Thumb Latch Works (In Simple Terms)
Let’s start with the basics. A *handleset thumb latch* is that little lever above or on the handle of many exterior doors. When you press down, it connects to a piece inside the door (called the latch or “latch bolt”), which pulls back and lets your door open. In brands like Schlage or Kwikset, the design is similar: push down on the thumb latch, the inside mechanism pulls the latchbolt, door opens. Easy, right?
Here’s the thing: this process relies on a few moving parts inside the lock working smoothly together:
- Thumb latch lever (what you press)
- Connecting rod (links lever to latchbolt)
- Return spring (pops the lever back up)
- Latchbolt (the part that actually holds the door shut)
If any of these pieces get stuck, worn, or out of alignment, you’re left with that annoying “stuck down” feeling. Sometimes it’s a simple fix (like a bit of oil); other times it hints at something deeper, like a bent rod or worn-out spring.
Common Reasons Your Thumb Latch Is Sticking
You might be wondering why this happens in the first place. Honestly, there are a few usual suspects. Here’s what typically causes a thumb latch to stick in the depressed position:
- Dirt and debris: Over time, tiny bits of grime or dust can work their way inside the lock, making everything move less freely. Even a little gunk can gum up the works.
- Lack of lubrication: Just like a bike chain, these lock parts need a little oil to move smoothly. If they dry out, friction increases, and your thumb latch might not bounce back up.
- Broken or weak return spring: The return spring is what pushes the latch back into place. If it snaps or loses tension, the latch will just stay down.
- Misalignment or loose parts: If screws work loose or something shifts inside your door (especially after lots of use or slamming), the parts might not line up, causing friction or binding.
You’ll see these same issues whether you have a Yale, Defiant, or a more generic brand. Each of these problems sounds small, but they can make your front door lock feel stubborn or even impossible to use.
How to Troubleshoot a Sticking Handleset Thumb Latch
Let me walk you through some simple troubleshooting steps. Even if you’ve never touched a screwdriver, you can try these before calling in a locksmith.
- Check for visible debris: Shine a flashlight at the thumb latch and the opening. If you see dust, wood shavings, or gunk, gently blow it out or brush it away with an old toothbrush.
- Test the movement: Press the thumb latch slowly and watch it. Does it move at all? Spring back halfway? Listening for any scraping or grinding sounds can reveal where it’s sticking.
- Light lubrication: Try a quick spray of silicone-based lubricant (like WD-40 Specialist or Tri-Flow) right at the base of the thumb latch and inside the keyhole. Don’t drown it—just a little.
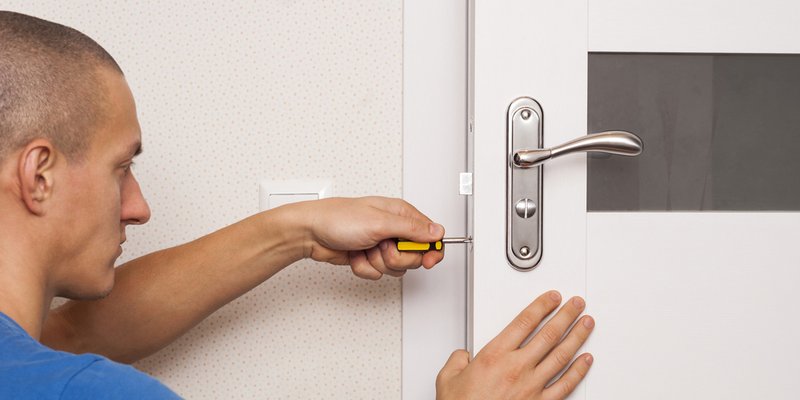
- Check for loose screws: On the inside of your door, gently tighten the mounting screws around the handle. Loose screws can let the internal parts shift, causing drag.
If the latch springs back up after this, you’re golden! If not, the problem might be inside the lock mechanism, or the spring itself could be broken.
When Should You Disassemble Your Handleset?
If basic troubleshooting doesn’t solve the problem, the next step is to take things apart and check inside. This sounds scarier than it is—I promise you don’t need to be a pro.
Here’s what you’ll usually need:
- A Phillips screwdriver
- Maybe a flat-head screwdriver (for prying gently)
- A towel or bowl to keep screws from rolling away
Before you do anything, *make sure your door is unlocked* and open, so you don’t accidentally lock yourself out.
Taking the handleset apart gives you a chance to see if anything is bent, broken, or just plain worn out. Look for a tiny return spring near the thumb latch lever—if it’s snapped or missing, that’s likely your culprit.
If the spring’s broken, you might be able to buy a replacement online, but sometimes it means getting a whole new handleset (especially with older or budget brands). Don’t force any parts—if something seems stuck, a tiny dab of oil can help.
Identifying Brand-Specific Issues (Schlage, Kwikset, and Others)
Some brands are known for certain quirks. For example, with Schlage and Kwikset handlesets, the return spring is pretty sturdy, but the connecting rod can loosen after a year or two of heavy use. Yale and Defiant often use a different internal mechanism—sometimes the thumb latch just slips out of its slot, needing a nudge back into place.
Here’s a quick look at some common handleset brands and their quirks:
| Schlage | Strong springs, but connecting rods sometimes loosen or wear out. |
| Kwikset | Springs can get gunked up with dust; thumb latch pins may slip out. |
| Yale | Unique internal levers; latch may misalign if door swells or shrinks with weather. |
| Generic/Defiant | Less robust springs; sometimes the whole mechanism needs replacing after just a few years. |
If you know your brand, you can even search for repair videos online—just add your model number for more targeted help.
What To Do If the Spring Is Broken or Missing
Here’s the tough part: if you take your handleset apart and find the spring in pieces, you’ve got a call to make. Some models let you swap out the spring itself—these are often available in lock repair kits online for brands like Schlage and Kwikset. For others, replacement isn’t possible, and you’ll need to get a whole new handleset.
You might be wondering, “Can I just bend a little paperclip or pen spring to fit?” Honestly, not a great idea—door lock springs are designed for just the right tension and shape. A homemade fix might work for a few days, but it’s not reliable (and can actually make things worse).
If you’re not ready to buy a new handleset, double-check your warranty—sometimes, major brands will send a replacement part for free, especially if the lock is only a year or two old.
Is It Ever Worth Replacing the Whole Handleset?
Let me be real: sometimes it’s just easier to start fresh. If your door handleset is old, corroded, or starting to look worn, a new one isn’t just a quick fix—it can make your door feel brand new again. Modern handlesets often work more smoothly, use better internal springs, and add a little boost to your curb appeal.
Some things to consider when deciding:
- Age: If your handleset is over 10 years old, replacement often makes sense.
- Cost: Sometimes finding the right part (especially with off-brand models) costs more in time and money than buying new.
- Security: Newer locks often have better pick resistance and improved durability.
A universal handleset is usually compatible with any standard pre-drilled door, but check your door’s thickness and backset length before ordering.
Tips for Preventing Future Sticking Problems
Nobody wants to deal with a sticky lock twice. Luckily, a little bit of care can keep your thumb latch moving smoothly for years.
- Lubricate every 6–12 months: Use a silicone spray—not greasy oils like WD-40 regular, which collect dust.
- Tighten screws: Give all mounting screws a quick check every time you clean the door.
- Keep it clean: Dust and dirt build-up is the enemy. Give the thumb latch and surrounding area a wipe-down whenever you notice grime.
- Avoid slamming: Slammed doors put extra stress on all parts of the lock, speeding up wear and tear.
A little maintenance goes a long way—think of it like brushing your teeth, but for your front door.
When to Call a Professional Locksmith
I get it—sometimes you just want a pro to handle it. If your handleset thumb latch is still sticking after cleaning, lubricating, and even after you’ve peeked inside, it’s probably time to bring in a locksmith. They’ve got the right tools, plus access to OEM parts and replacement springs you won’t find at the local hardware store.
Locksmiths can also help if:
- The door doesn’t open or close smoothly even when the latch is unstuck.
- You notice damage to the door frame or strike plate.
- Your handleset is antique or high-security, and you want it fixed without replacing the whole thing.
Honestly, it’s worth it for the peace of mind—especially if you’ve struggled with the issue for weeks.
Don’t feel bad for calling a locksmith. A sticky handleset can be frustrating, but a pro can often get it working again in minutes—and sometimes, that’s just the simplest path forward.
If you’ve ever had to wrestle your door open in the rain, you know how nice it is to have everything working like new.
Wrapping Up: Getting Your Thumb Latch Moving Again
A thumb latch that sticks in the depressed position can be a real headache, but most problems come down to dirt, a lack of lubrication, or a worn-out spring. With a few basic troubleshooting steps—and maybe a little courage to open up the lock—you can usually get things working again. If not, a new handleset or a quick visit from a locksmith will solve the problem for good.
Take care of your handleset, and it’ll take care of you. That satisfying “click” every time you open the front door? With a little know-how, it’s just a couple of steps away.