
Here’s the thing: doors are meant to keep the outside where it belongs. But just like a cheap umbrella in a windstorm, the smallest seal problem can turn the best door into a leaky mess. Maybe you just noticed water sneaking in around your Schlage or Kwikset lock, or maybe the bottom threshold is soaked. Either way, a leaky exterior door isn’t something to ignore—it can cause water damage, mold, and warped floors if left unchecked. Let’s break down what’s really going on and how a good seal check (and a few simple fixes) can make all the difference.
What Causes Exterior Doors to Leak During Heavy Rain?
If your door starts leaking every time it pours, it’s easy to blame “bad luck” or heavy wind. But there’s usually a simple root cause. Water is persistent—it only needs a tiny gap or crack to get inside. Most exterior doors are designed with multiple layers of weather stripping, a threshold, and sometimes even drip caps, all working together like a team to block out rain.
When one of these team members fails, water finds an opening. It could be a worn-out rubber seal, cracked caulking around the frame, or an unlevel threshold. Even a door that “looks” closed can have hidden gaps. Sometimes, shifting foundations or bad installation can twist the frame just enough to cause problems. And if your door is older or the brand is less weather-resistant, the materials themselves may not hold up as well to storms.
Sometimes, even new doors leak if the seal or sweep was never installed correctly in the first place. Here’s a tip: if your door passes the eye test but still lets water in, try turning on a flashlight inside at night—if you spot light peeking through the frame, water can get in there too.
How to Inspect Door Seals for Leaks
You might be wondering, “How do I even check if my door seal is the problem?” Good news—seal checks are simple and don’t need fancy tools. First, look closely at the edges of the door, especially the bottom and the side where water pools. Press on the weatherstripping—if it feels brittle, cracked, or has pieces missing, that’s a red flag.
Next, close the door and look for daylight along the edges. Even a tiny sliver of light means water can sneak through. Run your hand along the frame to check for drafts; if you feel a breeze, water will follow. Sometimes, you’ll see obvious signs like dirt streaks, swelling, or even black mold—these show exactly where leaks have been happening.
If you’re feeling thorough, grab a garden hose and gently spray the door from outside while someone checks inside for drips. Think of it as a mini “rainstorm simulation.” Just be careful not to flood the area, especially if you already know there’s a leak.
The Role of Thresholds and Door Sweeps
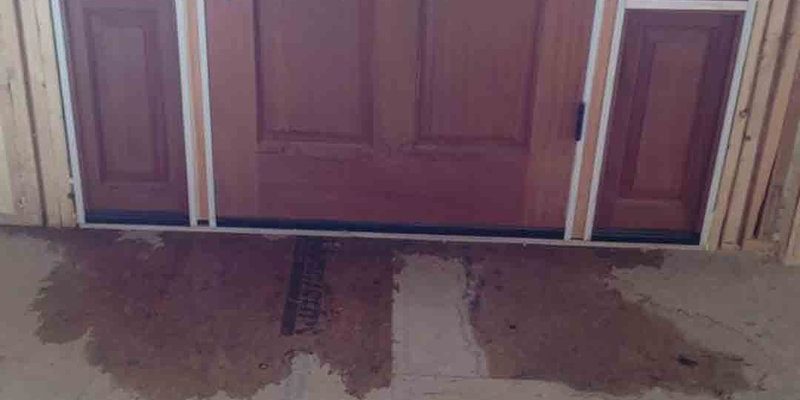
The bottom of the door is the most common culprit for leaks—right where the door meets the threshold. The threshold is the metal or wooden strip you step over when coming inside. It should sit flush with the bottom of your door, leaving as little gap as possible (without making the door impossible to open).
Over time, thresholds can settle, crack, or get worn down. If your door sweep (that rubber or brushy bit at the bottom of the door) is missing, torn, or hard as a rock, it won’t press tightly against the threshold, and water will pour right through. Honestly, even a brand-new door can leak if the sweep isn’t the right size or has gaps at the corners.
If you see a line of water along the interior tile or wood just inside the threshold, start by checking the door sweep and threshold alignment. You may need to adjust the threshold screws (if adjustable) or replace a damaged sweep. This is usually easier and cheaper than you’d expect.
Weatherstripping: Types and Replacement Tips
Weatherstripping is the flexible seal that runs along the sides and top of your exterior door frame. It comes in foam, rubber, felt, and even magnetic forms—each with its own pros and cons.
- Foam strips: Cheap and easy to install but can compress over time and lose their seal.
- Rubber or vinyl: More durable, often found on higher-end doors like Therma-Tru or Pella. They stay springy longer but can crack in harsh weather.
- Felt: Old-school style that’s best for interior gaps, not exterior doors exposed to rain.
- Magnetic: Usually found on steel doors for a super-tight seal, but they don’t always fit wooden frames well.
When replacing weatherstripping, pull off the old material and clean the surface before sticking or nailing the new one in place. Measure twice and cut once—it should fit snugly but not squish so much the door won’t close. If you’re seeing leaks after a DIY weatherstripping job, double-check for gaps at the corners or uneven height along the frame.
Frame and Sill Damage: When to Worry
Seals and sweeps only work if the frame is in good shape. Over the years, wood rot, swelling, or cracking can break the tight fit that blocks water. You might see soft spots, peeling paint, or even small mushrooms growing in the worst-case scenario. Aluminum and vinyl frames can also warp or crack, especially around older screws or nails.
Honestly, if you poke the door jamb and your finger sinks in, it’s time to call a pro. Some brands—like Jeld-Wen or Andersen—offer repair kits, but massive rot usually means replacing the frame or sill. A sagging threshold lets water funnel right under the door, no matter how good your seals are.
If the water seems to be coming up from below or around the sides, not through the opening itself, frame or sill damage is likely your issue. In those cases, sealing won’t help until you repair the underlying problem.
Flashing, Caulking, and Exterior Fixes
Sometimes, the leak isn’t from the door at all—it’s from above or around it. Properly installed doors have metal drip caps and flashing above the frame to channel water away. If these are missing or bent, rain can run straight down the wall and sneak behind your frame, showing up inside as a “leaky door.”
Check the outside of your door for cracked or missing caulking around the trim. Water follows the path of least resistance—even a pinhole opening can soak the inside wall over time. Use high-quality, paintable exterior caulk to reseal these gaps. For bigger issues, you may need to reinstall flashing or trim.
If you just patch the inside and skip the exterior, you’ll play endless whack-a-mole with leaks. Always fix the outside first!
When to Call a Professional for Door Leaks
DIY fixes can handle many seal and sweep problems, but some situations need a pro’s touch. If you’ve replaced everything and water still pours in, or you spot major rot, warped doors, or gaps you can’t close, it’s time for expert help. Professional installers have tools to check the frame, replace thresholds, and even reset the entire door if needed.
Also, if your door is under warranty (many major brands cover problems with installation or defects for years), don’t risk voiding it with your own repairs. Keep documentation and call the manufacturer or installer for advice.
Honest opinion: If you see widespread water marks, warped flooring, or signs of mold, don’t wait. The longer you delay, the more expensive the fix.
Upgrading Your Exterior Door: Is It Worth It?
If your door has been an issue for years, or you live in an area with frequent storms, it might be time to upgrade. Today’s doors—whether you pick steel, fiberglass, or composite—come with better seals, stronger framing, and improved water resistance. Some even have built-in adjustable thresholds and multi-point locking to pull the door snug against the frame.
While replacing a door isn’t cheap, it can save a lot of headaches (and repair bills) in the long run. Look for brands with a strong reputation for weather-resistance, and make sure installation includes proper flashing and caulking outside.
If you rent or aren’t ready to replace, focus on high-quality weatherstripping, a sturdy door sweep, and regular seal checks. Sometimes a $30 fix does more than a $5000 replacement—if you’re careful.
Leaks around exterior doors during heavy rain are more common than you’d think, but they’re rarely mysterious. Most problems come down to a failed seal, missing sweep, or a worn-out threshold—little details that let water slip inside. By taking time to check each part of your door, from the weatherstripping to the frame and the flashing outside, you can find where the trouble starts.
The best fix is always a strong, continuous seal—from top to bottom and inside to out. Don’t ignore the small stuff: a simple seal check can mean the difference between a dry entryway and a soggy disaster. With a little attention (and the right materials), your exterior door can stand up to the next heavy rain—no leaks, no worries.