Here’s the thing: weatherstripping is a crucial line of defense, but it’s not a miracle fix for every draft. If your front, side, or back door keeps letting in gusts after you’ve installed new seals, you’re not alone. Let me explain what else might be going on, and what you can do to finally get your exterior door truly tight and energy efficient.
How Weatherstripping Is Supposed to Work
Weatherstripping is like giving your door a soft, compressible gasket that hugs the frame whenever you close it. The basic idea is simple: it’s a barrier that fills gaps between the moving parts of your door and the fixed frame, stopping air, water, dust, and even noise from sneaking in or out.
When installed correctly, *weatherstripping* compresses just enough to close off tiny spaces. It should be continuous around the sides and top, with a threshold or door sweep along the bottom. Different types—like adhesive foam tape, rubber gaskets, or metal strips—have their own strengths. For example, a Frost King EPDM rubber weatherstrip might be more durable and flexible than the peel-and-stick variety by 3M, but both rely on a proper fit to work.
But here’s where things get tricky. If your door isn’t square, the frame’s warped, or the weatherstripping isn’t applied just right, you’re still going to get leaks. Weatherstripping can only do so much if the door is working against it, or if there are gaps bigger than it can handle.
Common Reasons Why Doors Leak Air Even After Weatherstripping
You might be wondering, “How can air still be leaking in? I followed the instructions and bought a good brand.” Honestly, there’s a whole stack of reasons your exterior door is stubbornly drafty, even with new weatherstripping:
- The door or frame isn’t straight. Old houses settle, wood warps, and cheap doors bend. Even a brand-new seal can’t block a gap that’s too big or uneven.
- Poor installation or wrong type. Sometimes the weatherstripping doesn’t match your door or wasn’t pressed down tightly enough to stick. If you’re using a foam strip where you need heavy rubber or vice versa, it won’t work as well.
- Worn out thresholds or sweeps. The bottom of the door is often the main culprit. If your threshold is cracked, bent, or too low, or the door sweep is missing, air will whistle in along the floor no matter how perfect the upper weatherstripping is.
- Missed spots or gaps in coverage. Even a tiny section you missed can become a highway for cold air. Look for corners, the hinge side, or tricky lock areas where weatherstripping might not reach.
It’s a bit like troubleshooting a leaky pipe: fixing one spot may just reveal another weakness along the line.
How to Check for Air Leaks Around Your Door
Before you start ripping out your weatherstripping or blaming the brand, it helps to find out exactly where the leak is coming from. Here’s a step-by-step way to check:
- Feel with your hand. On a breezy day, slowly move your hand around the entire edge of the door, both inside and out. Any cold sensation means air is moving.
- Look for light. At night, have someone shine a flashlight from one side while you stand on the other in the dark. If you see any beams of light sneaking through, there’s your leak.
- Use the paper test. Shut the door on a thin strip of paper. If you can pull it out easily, the seal is too loose there.
- Try smoke or incense. Hold a lit stick or candle near the edges. If the smoke gets pulled or pushed, air is moving through that spot.
Finding the leak is half the battle. Once you know where the weak spots are, you’ll have a much easier time fixing them.
When Weatherstripping Alone Isn’t Enough
Sometimes it’s not about the weatherstripping at all. If your door isn’t fitting right in the frame—maybe it’s sagging on its hinges, warped from moisture, or the threshold has shifted—no seal is going to get you a perfect fit. Doors, especially wood ones, can move with the seasons or after years of regular use. Even a high-end product like M-D Building Products’ door seals won’t fix a badly hung or loose door.
“Think of weatherstripping like a Band-Aid. It’ll stop a little bleeding, but if the problem’s deeper, you need to address the cause, not just cover it up.”
If your door looks crooked or you can see daylight anywhere around the frame, it might be time to adjust, shim, or even replace damaged hardware. Sometimes, a simple tightening of the hinge screws or adding a new threshold makes all the difference.
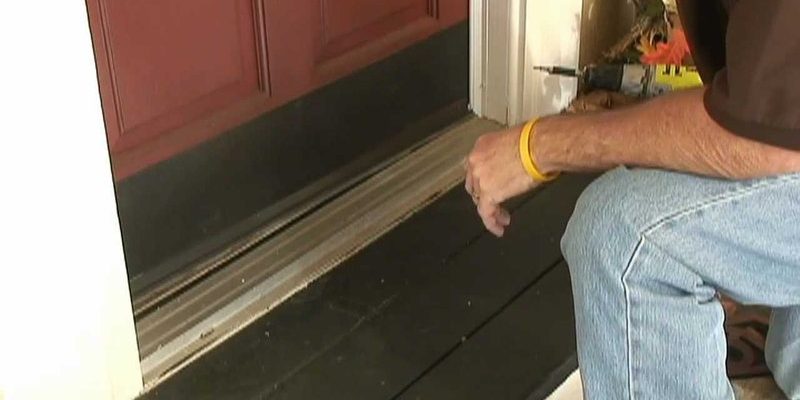
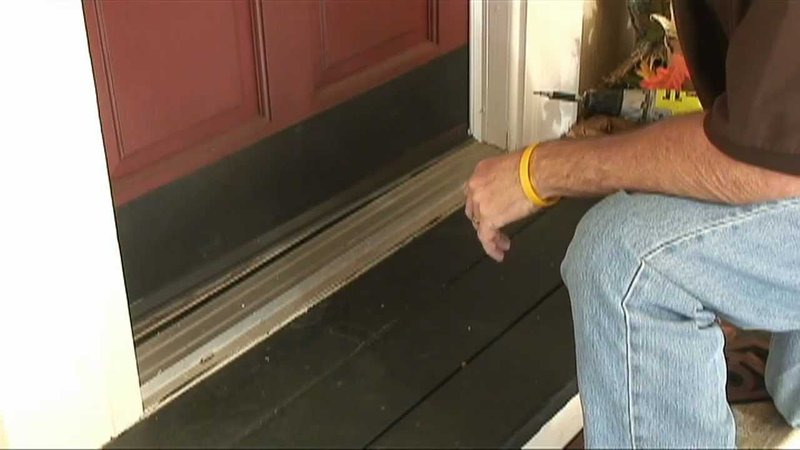
How Door Sweeps and Thresholds Impact Air Leaks
Most people focus on the sides and top, but the bottom of your exterior door is the hardest place to keep sealed. The constant movement, foot traffic, dirt, and moisture take a toll fast. Even if you buy top-tier weatherstripping, a worn-out or missing door sweep can make all that effort pointless.
A door sweep is basically a thin rubber or bristle strip that attaches to the bottom of the door and drags lightly over the threshold. The threshold itself (the raised piece at the bottom) can be aluminum, wood, or vinyl, and sometimes even adjustable. If either is damaged, dirty, or the wrong fit for your door, there’s no way to seal out drafts.
- Check for cracks or gaps in your threshold. If it’s loose or worn out, replace or repair it.
- Inspect your door sweep. If it’s torn, missing bristles, or not making contact, install a new one. There are universal options, but make sure it matches your door’s size and swing.
Don’t forget: thresholds and sweeps work together with weatherstripping to create a full seal. Missing one is like leaving a window open a crack.
Problems With Door Alignment and Hardware
Alignment is a sneaky culprit when it comes to air leaks. Over time, the weight of your door can pull its hinges loose, or the whole frame can move slightly due to settling or weather changes. This makes gaps wider or uneven, and even the thickest weatherstripping can’t fill them.
- Check hinge screws. If they’re loose or stripped, tighten them or use longer screws for a firmer fit.
- Examine the latch and strike plate. If your door wiggles when closed, adjust the strike plate or add a shim so it pulls tightly against the seal.
- Look at the door corners. Gaps at the top or bottom corner are often a sign the door is hanging crookedly.
If fixing the hinges and latch doesn’t solve the problem, your door frame might be warped. Sometimes, adding shims behind the hinges or adjusting the threshold can improve things. In rare cases, replacing the door or frame is the only real fix.
Choosing the Right Weatherstripping for Your Door
Not all weatherstripping is created equal. Honestly, using the wrong material or size is one of the main reasons people keep having leaks, even after a fresh install.
- Foam tape: Cheap and easy, but it compresses over time and may not work for wide gaps.
- Rubber or silicone: More durable, flexible, and tends to provide a tighter seal. It’s a good choice for big or uneven gaps.
- Metal (like bronze or aluminum V-strip): Lasts ages but is trickier to install and can look clunky on some doors.
Brand matters a bit—Frost King, 3M, and M-D Building Products are reliable choices—but matching the size and type to your actual door is what counts most. Don’t be afraid to take measurements or bring a sample when shopping for replacements.
DIY Fixes and When to Call a Pro
If you enjoy a little troubleshooting, most air leaks around exterior doors can be fixed with some patience and the right supplies. Replacing weatherstripping, installing a better door sweep, or tightening hinges are all projects you can do yourself with simple tools.
But if you’ve tried everything—quality seals, adjusting the door, fixing hardware—and your door is still leaking air, it might be time for a professional. A pro can check the frame for deeper problems, recommend solutions, or even suggest a new door if yours is beyond saving.
Sometimes, just getting a second set of eyes on the problem can reveal something you missed. There’s no shame in calling for backup, especially when your comfort and energy bills are on the line.
Wrapping It Up: Getting Your Door Airtight
If your exterior door is leaking air even after weatherstripping, don’t get discouraged. Air leaks can be stubborn, but with a slow, patient approach—and a willingness to check door sweeps, hardware, alignment, and your weatherstripping type—you’ll usually find (and fix) the real problem. Sometimes it’s a quick DIY job; other times, you’ll want expert help. Either way, knowing what to look for puts you in control. So go ahead—give your door some attention, and enjoy a toastier, quieter home year-round.