It doesn’t matter if you’re a weekend DIYer or just swapped out door handles for the first time—the sinking feeling is the same: you did everything by the book, but now your exterior door hardware is loose. Honestly, there’s no single reason this happens, and it’s not always your fault. Sometimes it comes down to tiny oversights or the quirks of the door itself. Let me break down why your door hardware might feel like it’s one bad day away from falling off, and how you can fix it for good.
What Causes Exterior Door Hardware to Loosen Up?
There are a few usual suspects behind loose exterior door hardware. Most often, it’s about installation—sometimes a single step was missed, or a screw didn’t grab as firmly as you thought. Sometimes the issue hides in the door material itself, or with the way the handle or lock design interacts with repeated door use.
You might be wondering: isn’t this just about tightening screws? Sure, that’s part of it, but usually, it’s not the only thing going on. Think about it: a door gets pulled and slammed dozens of times a day. Each time, small vibrations can start to shake things loose. If your door is wooden, humidity and temperature shifts can change the material just enough to loosen everything you so carefully installed.
Another common culprit is misaligned or improperly paired hardware. If the inside and outside parts of the lock set aren’t syncing up perfectly, things won’t fit together tightly, no matter how much you crank down the screws. Brands like Kwikset, Schlage, and Yale each have their unique quirks—some require a very specific code or sequence for installation or pairing, while others rely on universal fittings that can feel wobbly if the fit isn’t exact.
The Problem with Overtightening or Undertightening Screws
Here’s the thing: when installing a lockset or a handle, it’s tempting to grab the screwdriver and crank until your arm hurts. But overtightening can actually cause more harm than good. Screws can strip their holes, especially on softer wood or hollow-core doors. Once the hole is stripped, the screw never grips as tightly again—it’s like trying to reset a remote by pressing the wrong sequence over and over, hoping for a different outcome.
On the other hand, if you left things just a little too loose during installation, you’ve created a small gap that will only get worse over time. The repeated motion of opening and closing the door acts like a constant “jiggle test,” loosening things more with every swing. You need just the right amount of torque to keep things in place—much like pairing a remote with a garage door opener: too little or too much, and nothing works as it should.
Honestly, it’s easy to get it wrong. Most instructions just tell you to “tighten until snug,” but what does that even mean if you’re new to this? If you can still turn the handle or lock plate with light pressure, or if you see the screw head spinning uselessly, you’ve got a problem to fix.
How Door Material and Age Play a Role
Not all doors are created equal. Exterior doors, in particular, suffer a lot of abuse from weather changes, humidity, and temperature swings. A solid wood door can swell up during a humid summer, which squeezes hardware and may even make it impossible to sync the inside and outside pieces. Come winter, the wood contracts, and suddenly the hardware feels loose no matter how much you tighten it.
Steel and fiberglass doors aren’t immune either. With these materials, the hardware might not seat as deeply, meaning the screws or bolts might not grab the way you expect. If you’re installing a smart lock system or a branded electronic deadbolt, sometimes the provided hardware isn’t long enough for thicker, insulated doors, resulting in a handle that never quite feels stable.
Older doors are a special case. Over years (or decades), the material around the mounting holes can wear out. Every time you reset, pair, or swap out hardware, you’re subjecting the holes to a little more stress. After enough cycles, screws just don’t “bite” anymore. In these cases, even universal hardware or reinforced kits may only be a temporary fix. Sometimes you need to fill oversized or stripped holes with wood filler or epoxy, let it set, and then redrill—basically giving your hardware a fresh start.
Common Mistakes During Hardware Installation
Let me explain something that trips up even experienced DIYers: the instructions are rarely as clear as they should be. Maybe you skipped a step because the bag of parts had “extras,” or you thought a support plate wasn’t really necessary. Other times, you use a power drill at high speed, only to realize that you’ve stripped a screw or chewed up a predrilled hole beyond repair.
- Incorrect screw length: Using screws that are too short means they won’t reach into the solid part of the door.
- Wrong pairing or alignment: If the inside and outside parts of the lock aren’t perfectly lined up, you’ll never get a tight fit, and the deadbolt may not operate smoothly.
- Forgetting the support plate: Some hardware kits come with a metal or plastic plate that goes between the lock and the door, spreading the pressure and preventing wobbles. Skip it, and you’ll often pay the price later.
- Not tightening in the right order: Handles, collars, and plates need to be tightened in a specific sequence, just like syncing the steps on a universal remote—miss a step and things won’t work as designed.
You might also come across brand quirks. For example, some Schlage locks require a precise code sequence to reset or sync the electronics during installation. If you rush this step, or don’t fully snap everything into place, the hardware can feel loose or unreliable—even though all the screws look tight.
Effects of Weather, Use, and Time on Exterior Door Hardware
Even if you install everything correctly, the world isn’t always kind to exterior doors. Every slam, every sudden gust of wind, and every kid who yanks the handle too hard adds up. Over time, these little shocks can knock things loose, especially on doors that see a lot of traffic.
Humidity and rain can cause wood doors to swell, while dry spells make them shrink, as mentioned before. This constant movement can “walk” hardware loose over a few months, especially if it wasn’t perfectly snug to start with. Fiberglass or steel doors expand and contract less, but they can still develop play in the mounting points if the hardware wasn’t matched or installed correctly.
The story doesn’t end there. Sun exposure can cause the exterior side of the door to get hot and expand, sometimes more than the inside. That puts uneven pressure on the lock or handle—like a teeter-totter that’s always leaning to one side. Eventually, something’s gotta give, and often that’s the hardware coming loose.
How to Fix Loose Exterior Door Hardware (Step-by-Step)
If your exterior door hardware is loose after installation, don’t panic. Fixing it is usually straightforward if you go step-by-step. Here’s what I’d do:
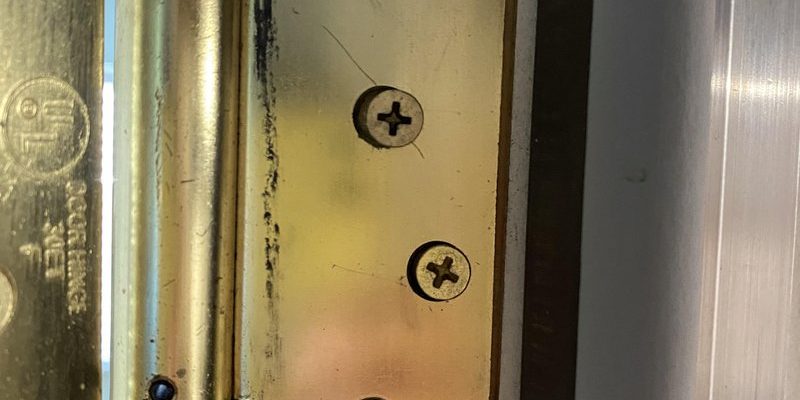
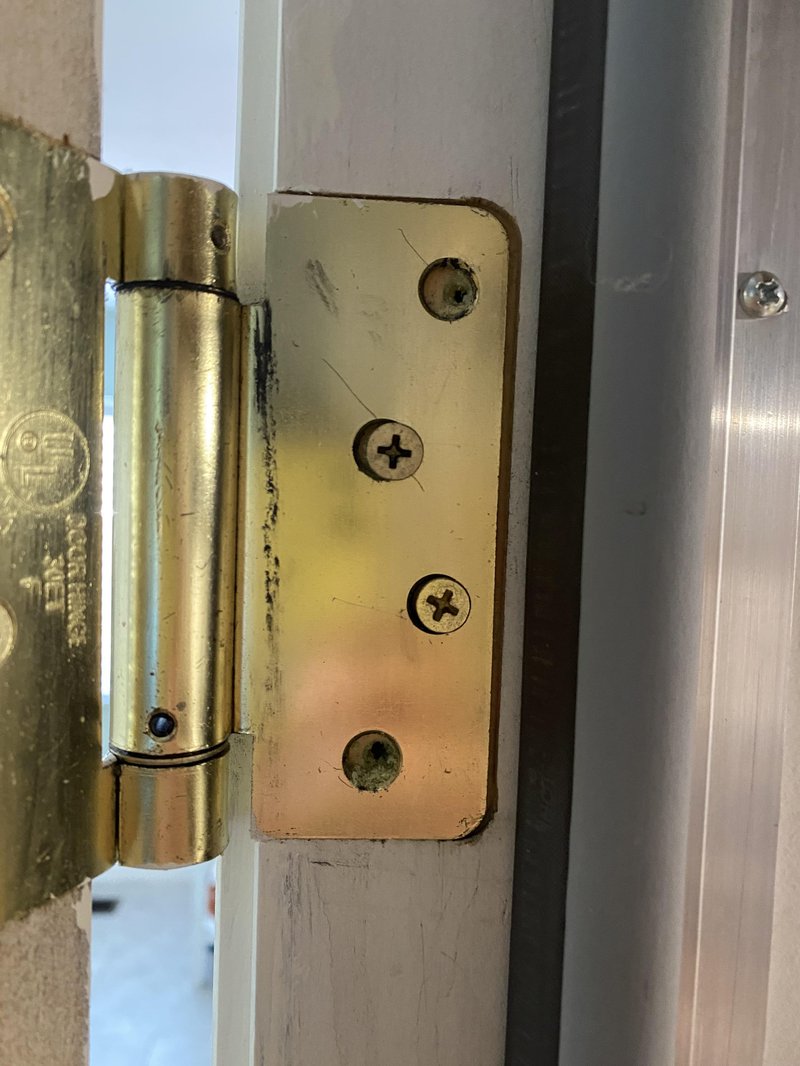
- Check all visible screws and bolts. Use a screwdriver—not a power drill—to gently tighten each screw. If any just spin in place, that hole may be stripped.
- Remove the hardware if needed. Take everything off and inspect the holes. Are they oversized, splintered, or stripped? Use wood filler, matchsticks with glue, or a specialized repair kit for badly worn holes. Let it set, then redrill a pilot hole.
- Reinstall the hardware, piece by piece. Make sure to align the interior and exterior parts perfectly. Insert screws by hand at first to ensure everything “syncs” up before tightening.
- Don’t overtighten. Stop when the hardware is snug and doesn’t move, but before the screws start to indent or strip the material. If you’re not sure, tighten until just snug, then test the handle or lock for movement.
- Test after installation. Open and close the door several times, working the handle and lock as you go. Listen and feel for any movement or clicking that shouldn’t be there.
If you’re dealing with a smart lock or a brand-specific electronic model, follow the pairing and sync instructions carefully. Sometimes, loose hardware comes from not resetting or calibrating the electronic components correctly.
When to Consider Replacing or Upgrading Hardware
Sometimes, no matter what you do, the hardware just won’t stay tight. You might have inherited a door that’s been through a few too many installations, or maybe the hardware itself is low quality. In those cases, it might be more effective—and honestly, less frustrating—to upgrade the hardware altogether.
Upgrading isn’t just about style. Newer hardware systems, especially those from trusted brands like Schlage or Kwikset, often include reinforced mounting plates, longer screws, and better support for thicker doors. You might also consider a smart lock with a better-designed installation process, which can avoid many common issues with loose fits and misalignment.
Universal hardware can be tempting because it fits almost any door, but sometimes “universal” means “almost, but not quite.” If you’ve tried everything else and your hardware still wiggles, it could be time to choose hardware that matches your specific door thickness, material, and use case.
Final Thoughts on Troubleshooting Loose Exterior Door Hardware
Dealing with loose exterior door hardware after installation can be a hassle, but it’s rarely something you can’t fix. Most of the time, it’s a blend of how the hardware was installed, the door’s age and material, and the wear and tear that comes from daily use. A few careful adjustments—sometimes filling a stripped hole, sometimes swapping out a part—usually do the trick.
Keep in mind that even the best hardware from brands like Kwikset, Schlage, or Yale will need a little TLC over time. Checking and tightening things once or twice a year can help you catch problems before they turn into bigger issues. Your door hardware is the first line of defense for your home, so it’s worth making sure it stays rock-solid for as long as possible.