Let’s dive into why pilot holes are so crucial. If you’ve ever tried to screw something into wood without a guide, you likely found it tricky, right? That’s where pilot holes come in. They give your screws a clear path, making them easier to drive in, while also minimizing splitting or cracking of the wood. This article will explore the ins and outs of pilot holes for door hardware, helping you understand not just the “how,” but the “why” behind this important practice.
What Exactly is a Pilot Hole?
A pilot hole is a small hole that you drill into a material before driving in a screw. Think of it as a guide that makes the screw’s job easier. By providing a neat little path for the screw to follow, you reduce the risk of damaging the wood or misaligning your hardware.
Generally, pilot holes should be about 75% of the screw’s diameter. For instance, if you’re using a 1/8 inch screw, you’d typically drill a pilot hole that’s around 3/32 inches. This size strikes a balance that provides enough guidance without making it too loose, which can cause the screw to strip or wobble.
Here’s the thing: when you skip this step, you’re not just risking the integrity of the door hardware. You’re also making it harder on yourself. Imagine trying to force a square peg into a round hole—it’s messy, frustrating, and often leads to more problems. In the case of door hardware, it can lead to misalignment and unexpected repairs.
Why Use Pilot Holes for Door Hardware?
Using pilot holes makes the installation process smoother and more precise. They help ensure that your door hardware is aligned correctly, which is crucial for both function and aesthetics. Nobody wants a door that doesn’t close properly or a handle that’s off-kilter!
Additionally, pilot holes prevent the wood from splitting. When you drive a screw into a piece of wood, there’s a chance the fibers may crack under pressure. This is especially true for hardwoods like oak or maple. By drilling a pilot hole first, you relieve some of that pressure and guide the screw in safely.
Moreover, if you’re working with older or softer wood, the risk of splitting becomes even more pronounced. In these situations, having a pilot hole is not just a good idea; it’s almost mandatory. You might be wondering if it really makes a difference. Well, when you’re trying to take on a project that involves multiple screws, the last thing you want is for one tiny oversight to unravel your hard work.
How to Drill a Pilot Hole
Drilling a pilot hole isn’t rocket science, but it does require some care. Here’s a simple step-by-step guide to help you get it right:
- Choose the Right Drill Bit: Select a drill bit that matches the size you need for your screw (usually about 75% of the screw’s diameter).
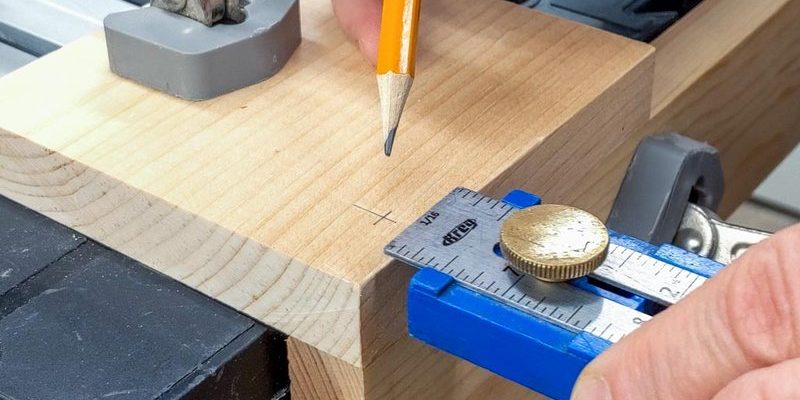
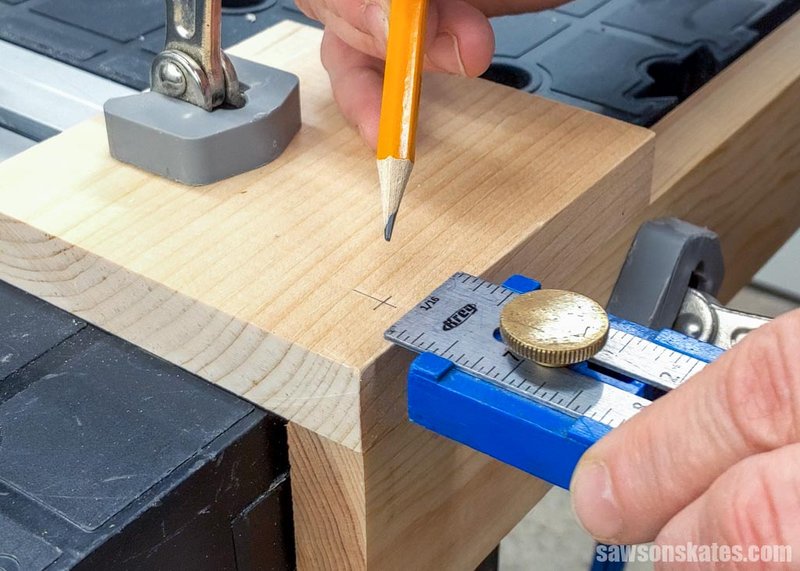
- Mark Your Spot: Use a pencil to mark where you want to drill. A clear mark ensures precision.
- Drill at a Straight Angle: Hold the drill bit perpendicular to the surface. This helps keep your screw aligned correctly.
- Drill to the Right Depth: Go deep enough for the screw but not so deep you can see through the other side! A good rule of thumb is to drill about the same depth as the screw’s length.
Taking the time to drill a proper pilot hole can save you hours of frustration later on. Not only does it make it easier to drive in your screws, but it also adds longevity to your installation.
Common Mistakes to Avoid
Even seasoned DIYers can make mistakes when it comes to pilot holes. Here are a few pitfalls to watch out for:
1. Drilling Too Small: If your pilot hole is too small, it won’t guide the screw properly and could lead to stripped heads. Always ensure your pilot hole size matches the screw.
2. Forgetting the Depth: If you don’t drill deep enough, your screw may not hold securely. On the flip side, drilling too deep can compromise the wood. Aim for a happy medium!
3. Using the Wrong Bit: Not all drill bits are created equal. Using a bit that’s not suited for the material you’re working with can cause all kinds of headaches. Make sure to match the bit to your screw size.
4. Not Marking Your Spot: It’s easy to drill off-center if you don’t have a clear mark. A quick pencil mark can be a game-changer.
By being mindful of these common mistakes, you can ensure your pilot holes contribute to a successful door hardware installation.
When to Skip the Pilot Hole
There are times when you might think about skipping the pilot hole, especially with smaller screws or softwoods. However, proceed with caution. In most cases, it’s better to drill a pilot hole as insurance against potential problems like splitting or misalignment.
If you’re working with very soft wood or using self-tapping screws, you might get away without a pilot hole. But be aware that even softwoods have their weak spots, especially around knots or imperfections. So, while it may be tempting to skip this step in certain situations, it’s generally wise to err on the side of caution.
Remember, spending a minute or two on a pilot hole can save you from hours of frustration during the installation process.
Understanding the importance of pilot holes for door hardware is key to achieving a successful installation. Not only do they make the process smoother, but they also help protect your materials and ensure everything lines up perfectly. Whether you’re a novice or an experienced DIYer, taking the time to drill pilot holes can elevate your work from mediocre to professional-looking.
Next time you tackle a door installation project, remember that small steps like drilling pilot holes can lead to big improvements. It’s all about making life easier for yourself and achieving the best results. Happy drilling!