Think about it this way: hinges are like the unsung heroes of your home. They work quietly behind the scenes, allowing doors to swing smoothly. But when rust sets in, they can become stiff and noisy, turning that harmonious door into a stubborn one. Today, we’re going to tackle how to troubleshoot rust on those hinges, clean them up, and prevent rust from making a comeback—keeping your doors functional and looking great.
Why Do Door Hinges Rust?
You might be wondering, *why would rust even form on the hinges in the first place?* Well, hinges are usually made of metal, which, as we all know, is susceptible to rusting. Rust forms when iron or its alloys come into contact with moisture and oxygen over time. So, if your interior doors are near a bathroom or kitchen, or even subject to high humidity, they might be more prone to rusting.
Another sneaky culprit of rust is the lack of proper lubrication. Hinges need to be oiled every now and then to keep them functioning smoothly. When they go without care, water can settle in cracks and crevices, breeding rust. Think of it like a garden that needs watering—if you don’t tend to it, things start to wilt.
Lastly, paint or other coatings can also wear off over time. When that happens, the exposed metal is left vulnerable. So, if you notice rust forming, it’s not just an aesthetic issue; it can lead to structural problems down the line, making it crucial to address it sooner rather than later.
Identifying Rust on Door Hinges
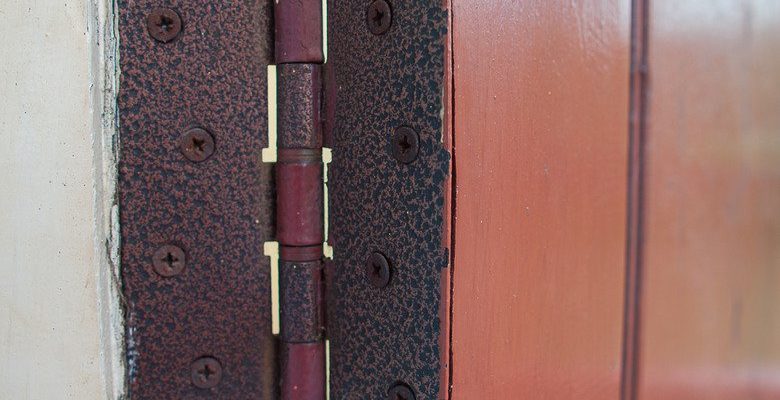
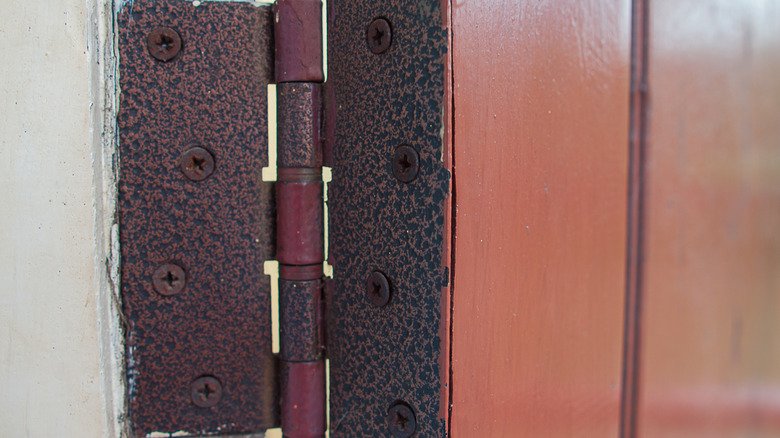
Spotting rust on door hinges is usually pretty straightforward. You’re likely to notice it as a reddish-brown discoloration on the metal. But rust can also be sneaky—sometimes it shows up as a flaky texture or even a slight swelling of the metal. Here are a few signs to look out for:
- Color Change: Rust often appears as reddish-brown patches.
- Flaking: Look for areas that seem to be crumbling away.
- Stiffness: If your door isn’t swinging smoothly or is squeaking, that’s a big clue.
- Moisture: Check for signs of dampness or water spots nearby.
When you notice these signs, it’s time to roll up your sleeves and get to work. Ignoring them won’t make the rust disappear; in fact, it can worsen, leading to more significant issues. You might think, *”Isn’t it easier to just replace the hinges?”* While that’s an option, cleaning and maintaining your current hinges can save time and money.
Cleaning Rusty Hinges: Tools You’ll Need
Before diving into the cleaning process, gather your tools. Having the right items makes everything easier and more effective. Here’s a quick list of what you’ll need:
- White Vinegar or Lemon Juice: Natural rust removers.
- Baking Soda: Another excellent rust-fighting ingredient.
- Soft Cloths: For scrubbing and drying.
- Old Toothbrush: Perfect for those tight spots.
- Lubricant Oil: To keep your hinges moving smoothly post-cleaning.
Having everything ready allows you to work efficiently. Rust can be stubborn, but with the right tools, you’ll transform those rusty hinges back to their shiny selves.
Step-by-Step Guide to Cleaning Rust Off Hinges
Ready to tackle that rust? Let’s go through a simple step-by-step guide. This will help you clean your hinges effectively and efficiently.
1. Remove the Hinges: The best way to clean them is by taking them off the door. Unscrew the hinges gently and place them on a soft cloth or workspace. If they’re stubborn, a bit of penetrating oil can help loosen things up.
2. Apply Vinegar or Lemon Juice: Soak a cloth in white vinegar or lemon juice, then wrap it around the rusty areas. Let it sit for about 30 minutes. The acidity helps break down the rust.
3. Scrub with Baking Soda: After soaking, sprinkle baking soda on the rusted areas. Use an old toothbrush to scrub gently. The combination of vinegar and baking soda can be magical for rust removal.
4. Rinse and Dry: Once you’ve scrubbed away the rust, rinse the hinges with water to remove any residue. Dry them thoroughly with a clean cloth. Moisture is the enemy of metal!
5. Lubricate: After everything’s clean and dry, apply a good-quality lubricant oil to the moving parts of the hinge. This prevents future rust and keeps your door operating smoothly.
Preventing Rust on Door Hinges
Once your hinges are clean and shiny, it’s time to think about prevention. *How can you keep rust from coming back?* Here are a few tips:
- Regular Maintenance: Set a reminder every few months to check and clean your hinges.
- Keep Dry: Wipe down any moisture after cleaning to avoid rust’s return.
- Use Door Mats: Placing mats at entry points can help reduce the amount of water that gets tracked inside.
- Oil Hinges Regularly: Apply a bit of lubricant every few months to keep them functioning well.
It’s like keeping a garden tidy—regular care can prevent bigger problems later. The effort you invest now will pay off in long-lasting, rust-free hinges.
When to Replace Hinges Instead of Cleaning
Sometimes, despite your best efforts, hinges are too far gone. Here are signs that it might be time to consider a replacement rather than cleaning:
- Severe Damage: If the metal is flaking away and there’s little left to grab onto, replacement is likely your best bet.
- Constant Sticking: If you find yourself oiling hinges every few weeks and they still stick, it might be time for new ones.
- Corroded Beyond Repair: A hinge that has extensive rust damage may compromise the security and functionality of your door.
If you decide to replace, choose hinges made from stainless steel or other rust-resistant materials to prevent future issues.
Rust on interior door hinges is not just an eyesore; it can lead to bigger issues if left unchecked. Fortunately, with a bit of care and regular maintenance, you can easily keep them in tip-top shape. Remember to clean them regularly, lubricate to prevent moisture, and keep an eye out for signs of excessive wear and tear.
By taking these small steps, you ensure that your doors continue to swing smoothly for years to come. So, grab your tools and get started! Your hinges (and your doors) will thank you for it.