If you’ve ever sat in a quiet room and heard a random squeak or rattle coming from your PC, gaming console, or even an old ceiling fan, you know how frustrating it can be to track it down. It’s like playing detective, only instead of clues, you’re following tiny, annoying noises—half the time wondering if you’re going a little bit crazy. Here’s the thing: those odd sounds aren’t just an irritation; sometimes, they’re an early warning that something in your hardware is about to go wrong.
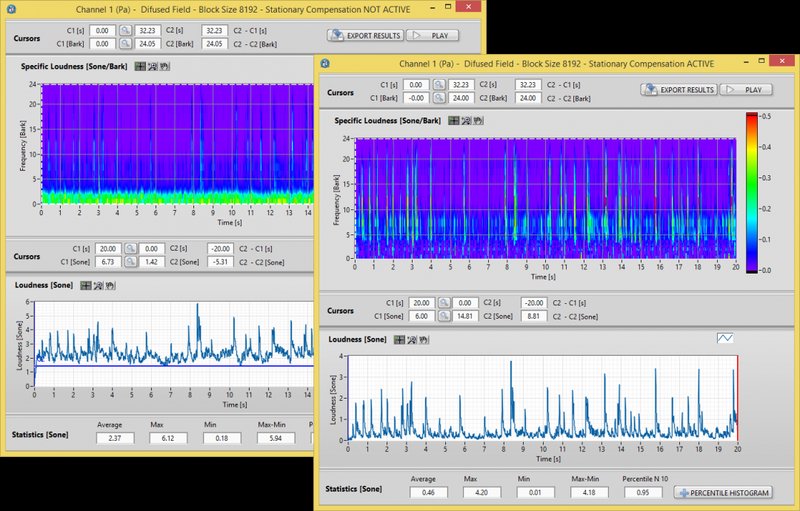
That’s where a sound meter can help. Instead of using guesswork or hoping the noise will “just go away,” a sound meter gives you real data about where noises are coming from and how loud they are. Think of it as a stethoscope for your gear—whether you’re dealing with a PC case fan, a rattling hard drive, or even an off-brand remote vibrating on a hard surface. No tech wizardry required, just a bit of patience and the right tool.
What Is a Sound Meter and Why Should You Use One?
Let me explain: a sound meter (sometimes called a decibel meter) is a device that measures sound levels in the air. Mostly, it gives you a reading in decibels (dB), which is just a fancy way of saying “how loud is that noise?” It doesn’t care if it’s a bird chirping, your neighbor’s dog, or, in our case, an annoying squeak inside your PC or remote control.
So, why should you use a sound meter for hardware troubleshooting? Here’s the main reason: our ears aren’t always great at pinpointing the exact source of a noise, especially with modern electronics packed tightly into metal and plastic cases. With a sound meter, you can move the sensor around and watch the numbers go up as you get closer to the racket. It’s a bit like playing a cold/hot game, but with hard numbers.
Plus, there’s something comforting about evidence. When you can measure the noise, you don’t have to rely on “it sounds like it’s coming from the hard drive, maybe?” You’ll know exactly which component is acting up, and you can take action with confidence. If you’re using a universal remote and it buzzes or vibrates when you use certain buttons, the meter helps reveal whether it’s a battery issue, loose part, or internal malfunction.
Common Hardware Issues That Cause Squeaks and Rattles
Let’s get real—electronics and appliances are full of moving parts, connections, and sometimes, less-than-perfect manufacturing. Here are some classic culprits that might be making those squeaks or rattles in your devices:
- Fans: Computer case fans, GPU fans, or even the tiny fans in projectors tend to wear out, get dusty, or wobble over time.
- Hard drives: Older spinning drives can rattle if they’re loose, or if their internals are wearing down. That’s a sign to back up data pronto!
- Loose panels or screws: If a screw isn’t tight, even a little vibration can make a big noise—think about a remote’s battery cover or the side panel on a PC case.
- Internal remotes/controls: Some off-brand remotes or universal remotes may have poorly fit buttons or battery trays. They can creak, squeak, or rattle with every press or shake.
Here’s why this matters: tiny noises sometimes point to bigger problems. A fan that rattles today may stop working tomorrow, leading to overheating. A squeaky motor can be a safety issue in appliances. Using a sound meter helps you spot where a problem starts, so you can fix it before it gets worse.
How to Use a Sound Meter for Troubleshooting Hardware
Ready to go hands-on? You don’t need fancy skills—just a steady hand, a bit of patience, and a basic sound meter (they’re available in standalone devices or even as smartphone apps, though real meters are usually more reliable).
- Power up the device: Turn on your PC, remote, or whatever hardware is making the noise. Make sure it’s in normal use mode, since some noises only happen during specific tasks (like a hard drive working hard or a remote syncing).
- Turn on your sound meter: Set it to a range that makes sense. For most home troubleshooting, 30–130 dB is plenty.
- Move slowly around the device: Hold the meter close to different spots—top, sides, back, battery compartment. Watch the numbers carefully. As you get closer to the noise source, you’ll see spikes in the decibel reading.
- Isolate components: Try gently pressing on parts (like a side panel or battery cover) to see if the noise changes or stops. That’s often a giveaway. If the noise disappears, you’ve likely found your culprit!
If you want to go a step further, try running your device with and without certain parts (like with the side panel off your PC, or with the battery removed from a remote) to compare readings. This side-by-side approach helps confirm your findings.
Tips for Getting Accurate Sound Meter Readings
The key to good troubleshooting is accuracy. Here are some simple tricks to make sure your sound meter isn’t just picking up background noise or misleading you:
- Pick a quiet time: Try to do your testing when the room is as quiet as possible. Turn off the TV, close windows, and ask chatty roommates to give you a minute.
- Hold steady: Shaky hands can cause jumps in the readings. Rest your hand or the meter on a stable surface for more reliable results.
- Repeat for confirmation: Get a reading, move away, then come back and check again. Consistency is what you’re looking for, not just a single spike.
- Compare with and without load: Some noises only happen under stress. For a PC, run a benchmark or heavy background task; for a remote, try pressing different combinations of buttons or codes.
Honestly, it’s easy to be fooled by other sounds in the environment, especially if you’re excited to finally catch that rattle. Patience pays off—double-checking your results means you won’t waste time fixing the wrong thing.
What to Do Once You Find the Source of the Noise
So you’ve tracked down the squeak—now what? Here’s a simple plan for making things right:
- Tighten things up: If you find a loose panel, screw, or battery cover, grab a screwdriver and snug it down. For remotes, check that the battery is seated correctly.
- Clean and lubricate: Dust and grime often cause fans and moving parts to squeak. Use compressed air to blow out debris, or a tiny drop of safe lubricant on fan bearings (not on electronics themselves!).
- Replace worn parts: If a component like a fan keeps rattling after cleaning, it might just be time for a new one. For remotes, swapping out old batteries or upgrading to a sturdier model is sometimes the only answer.
You might be tempted to ignore the noise if it’s minor. But be careful—a squeak is often a “check engine light” for hardware. Fixing it early saves you from bigger headaches, like device failure or data loss, down the road.
Alternatives and Comparisons: When a Sound Meter Isn’t Enough
Sometimes, a sound meter is just one piece of the puzzle. Other tools or strategies can help you narrow things down, especially if the noise is faint or only happens in short bursts.
- Stethoscope-style tools: Mechanics use these to pinpoint internal noises in engines. You can do the same for electronics, pressing the probe right onto suspect parts. It’s precise, but not as quantitative as a meter.
- Thermal cameras: Overheating parts often make more noise. A cheap thermal camera attachment for your phone can highlight hotspots—helping you spot fans or drives working overtime.
- Manual inspection: Don’t underestimate your senses. Press and wiggle different parts, especially panels or battery contacts, and see if you can feel or hear the change. For remotes, swapping brands or models (like changing from off-brand to a name-brand universal remote) can also reveal if the issue is with the remote itself or the device it’s controlling.
If you’re still stuck after all this? Sometimes, asking for help on a tech forum or calling in a repair pro is the smartest move. There’s no shame in it—sometimes hardware just has a mind of its own.
Keeping Your Hardware Quiet: Prevention Tips
The best troubleshooting is the kind you rarely have to do. Here’s how to avoid those squeaks and rattles before they start:
- Regular cleaning: Dust and debris are quiet killers (and not so quiet when they clog up fans!). Use compressed air to keep everything clean inside and out, whether it’s a PC, remote, or other gadget.
- Check for loose parts: Every couple of months, give your devices a once-over. Tighten screws and make sure panels, batteries, and covers fit snugly.
- Use quality gear: Sometimes, it’s worth spending a little extra for a quality remote or accessory. Off-brand remotes might save money at first, but a sturdy brand-name option often lasts longer and is less likely to rattle or squeak.
- Stay on top of updates and resets: In some cases, a software glitch (like a universal remote out of sync or stuck in a wrong code cycle) can cause odd noises or vibrations. Resetting or re-syncing your remote can solve those invisible issues.
Taking these steps not only cuts down on noise but also keeps your gear working better, longer. Prevention is boring—but it beats frantically hunting for that mystery squeak late at night.
Final Thoughts: Why a Sound Meter Is a Handy Addition to Your Toolkit
In the end, tracking down hardware squeaks and rattles is part detective work, part troubleshooting, and a little bit of patience. A sound meter turns the process from wild guesswork into something you can actually measure. With it, you’re in control—able to pinpoint, confirm, and fix problems before they become real headaches.
Whether you’re working with a noisy PC fan, a creaky universal remote, or any other gadget that just won’t stay quiet, you don’t have to put up with it. The right approach (and a trusty sound meter) turns annoying mysteries into easy fixes. Your ears—and your sanity—will thank you.
