Here’s the thing: painted-over exterior door hardware is more common than you might think, especially on older homes or after a fast DIY paint job. Whether you have a Yale deadbolt, Schlage smart lock, or a classic Kwikset handle, paint doesn’t care about brands—it can gum up the works on any hardware. Let’s walk through why this happens, how it messes with your door’s performance, and—most importantly—what you can actually do about it (without replacing everything or making things worse).
Why Paint Causes Problems for Exterior Door Hardware
Most folks don’t realize how much precision goes into the moving parts of a door lock or handle. When paint seeps into crevices, it can dry hard as stone. Suddenly, a simple twist or push becomes a chore. If the paint covers a keypad, it can even block the buttons, making any kind of code entry impossible. The biggest issue? Paint doesn’t just sit on the surface—it wedges itself into all the edges and moving slots.
Honestly, the trouble isn’t just that the lock looks funky. Painted hardware can stop working altogether. Over time, the buildup acts like a kind of glue, holding parts together that are supposed to slide, rotate, or spring back. You might notice your lock gets “sticky,” the latch won’t retract all the way, or that you need to wiggle your key or remote fob just to make something happen.
Some people try to force things or scrape the paint off with a knife. That can work in a pinch, but it’s a risky move—scratching up the hardware or damaging the finish. Modern door hardware, especially smart locks, can be super sensitive. One wrong move and you could break a sensor, crack a keypad, or mess up your syncing. This is why it’s so important to understand why paint is a problem before you reach for the nearest tool.
If you’re dealing with a lock that’s not responding, a stuck handle, or a remote that can’t connect, don’t panic. Most of the time, the solution doesn’t mean buying all-new gear or calling a pro right away. But it does mean taking your time, using the right tools, and knowing a little about how these mechanisms work under the hood.
Identifying Which Parts Are Actually Problematic
Let me explain: not all painted hardware is doomed. Sometimes, only a thin layer is stuck on the surface and a gentle cleanup is all it takes. Other times, the paint has seeped deep inside the mechanism, blocking critical moving parts. Before you grab your toolbox, it’s smart to look closely and figure out where the real trouble lies.
Start with the parts you touch most: the keyhole, the handle lever, and any buttons or keypads. Is the paint just on the outside, or is it clogging up the edges? Try turning the knob or pressing the keypad. If you feel any resistance, hear grinding noises, or see that buttons are stuck, that’s your first clue. With remote-controlled smart locks, check if the battery compartment or any sensors have been painted over too.
Don’t forget the hinges. Painted hinges can squeak, drag, or get stuck mid-swing. Open and close the door slowly, watching where the paint flakes or sticks. Sometimes, that resistance means paint has filled in the pin slots or glued the leaves of the hinge together. You might be able to spot this just by looking, but a flashlight can help.
If you’re not sure how deep the problem goes, gently press along the seams of the hardware with a plastic tool or even a fingernail. If paint chips off easily, you’re probably dealing with a surface issue. If it feels rock-solid or you see cracks where paint has filled the gaps, it’s likely affecting the working parts underneath.
Here’s an important tip: take photos before you start. This helps you remember how everything fits together and lets you check your progress as you clean or repair. It also comes in handy if you eventually need to replace a specific piece or get help from a hardware store pro.
Tools and Materials You’ll Need for Safe Paint Removal
You might be wondering—can I just grab some paint thinner and go to town? Not so fast. Many types of door hardware, especially the fancy ones with electronics or sensors, don’t play well with harsh chemicals. The wrong solvent can ruin finishes, melt plastic parts, or even short out circuit boards in smart locks.
The good news: most jobs only need a few basics. Here’s a quick list of tools and materials that are safe for troubleshooting painted-over exterior hardware:
- Plastic scrapers (like old gift cards): Gentle but tough on paint.
- Fine steel wool or a soft toothbrush: Good for buffing without scratching.
- Small screwdrivers: For removing handles, plates, or battery covers.
- Painter’s tape: Protects areas you don’t want to scratch or strip.
- Cotton swabs and isopropyl alcohol (at least 70%): Useful for cleaning tight edges and sensors.
- Warm, soapy water: Safe for most surfaces—just dry thoroughly after.
- Microfiber cloths: For wiping away residue without leaving lint.
If you’re working with electronic locks, be sure to remove the batteries first to prevent any short circuits. Pairing issues or battery resets are common complaints with painted-over hardware, and you don’t want to accidentally fry your components while you work.
Here’s the thing: patience matters more than strength. Take your time, use gentle pressure, and remember that it’s easier to remove a little more paint later than to repair a scratched, broken, or unpaired remote lock.
Step-by-Step Process: Removing Paint from Door Hardware
Ready to tackle the problem head-on? Here’s a beginner-friendly method that works for almost any kind of painted-over exterior door hardware, including Yale, Schlage, Kwikset, or even a universal smart lock. This troubleshooting process keeps you from damaging sensitive parts or making your code or remote pairing issues worse.
- Remove the hardware if possible: Unscrew the handles, locks, or plates from the door. It’s much easier to clean paint off when the parts are flat on a table. If you can’t remove them, just take your time and work with the hardware in place.
- Scrape gently: Use your plastic scraper or an old plastic card to lift paint from the surface. Focus on edges and seams where paint usually builds up. Avoid metal tools—they scratch easily.
- Soak and clean: For stubborn spots, dip a cloth in warm, soapy water and press it against the paint. Let it soak for 10–15 minutes. Then use a toothbrush, gently scrubbing in small circles to loosen the paint.
- Detail the crevices: Use cotton swabs dipped in isopropyl alcohol to get into tight corners, keyholes, and between buttons. Let things dry completely before testing any electronics.
- Reinstall and test: Once all the paint is gone, reinstall the hardware. Check the battery, try the remote lock, sync any smart features, and see if everything feels smooth again.
If you’re dealing with a keypad or smart lock, be extra gentle—paint can get under the rubber buttons or mess with sensors. Sometimes, you’ll need to reset or re-sync the code after cleaning (just check the manufacturer’s instructions). Don’t be surprised if you need to replace a worn gasket or reapply a touch of lubricant to the moving parts.
Troubleshooting Smart Locks and Remotes After Paint Cleanup
Let’s talk about something a lot of guides miss: what if your smart lock, keypad, or remote just won’t work after you’ve cleaned off the paint? Maybe the code doesn’t work, the battery seems dead, or you can’t pair your device with your phone anymore. Don’t panic—these problems are usually easy to fix.
First, try a reset on your device. Most smart locks from brands like Schlage or Yale have a hidden button inside the battery compartment or a reset sequence listed in the manual. Pop out the batteries for a few minutes, then reinsert them and follow the manufacturer’s pairing steps. Nine times out of ten, this syncs up your remote or keypad after a cleaning or battery change.
Next, check for any paint residue on the sensors or electrical contacts. Even a thin layer can prevent a solid signal for your code or stop a button from registering. Use a cotton swab with a touch of isopropyl alcohol to clean these spots. Be gentle, and don’t use too much liquid.
You might also need to re-pair your remote or re-enter your access code if the device got fully unpowered or reset during cleaning. Double-check the battery orientation—sometimes, a simple mistake keeps things from powering back on. If you’re still stuck, search for your model and “troubleshooting” online, or check the brand’s support site for specific sync instructions.
If you cleaned and reset and things are still stuck, try fresh batteries. Sometimes paint removal knocks wires or contacts loose, and a battery swap solves it faster than hours of poking around.
When to Repair, Replace, or Upgrade Painted Door Hardware
Honestly, not every painted-over lock is worth saving. Some older hardware—especially those with deep paint damage, corrosion, or snapped-off plastic—just won’t bounce back. Here’s how to know when it’s time to troubleshoot further, replace parts, or upgrade:
- Minor trouble: If it’s just sticky or slow, a good cleaning fixes it most of the time.
- Severe paint damage: If the paint has filled in the keyhole or blocked buttons, even after cleaning, you might need to replace the cylinder, keypad, or handles.
- Corrosion or internal damage: If you see rust, warped parts, or broken springs, it’s safer and more reliable to upgrade. Modern Schlage, Yale, or universal locks often fit standard holes and offer easier code syncing and remote pairing.
- Smart lock problems: If your electronics were damaged by water or chemicals during paint removal, replacement is often the only fix. Just make sure to follow the manufacturer’s installation and sync instructions so you don’t repeat the same issues.
Here’s the upside: upgrading gives you the chance to pick features you want, like easier code resets, longer battery life, or even app-based locking. If you’re already troubleshooting a finicky old lock, sometimes a new device is less work than another afternoon scraping and cleaning.
Preventing Paint Problems in the Future
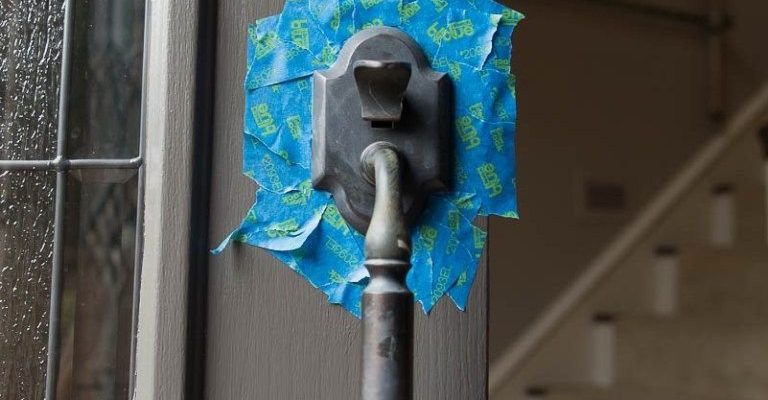
Nobody wants to troubleshoot the same issue twice. The best way to avoid this hassle? Protect your hardware the next time you paint. It sounds simple, but you’d be surprised how often even pros forget this step.
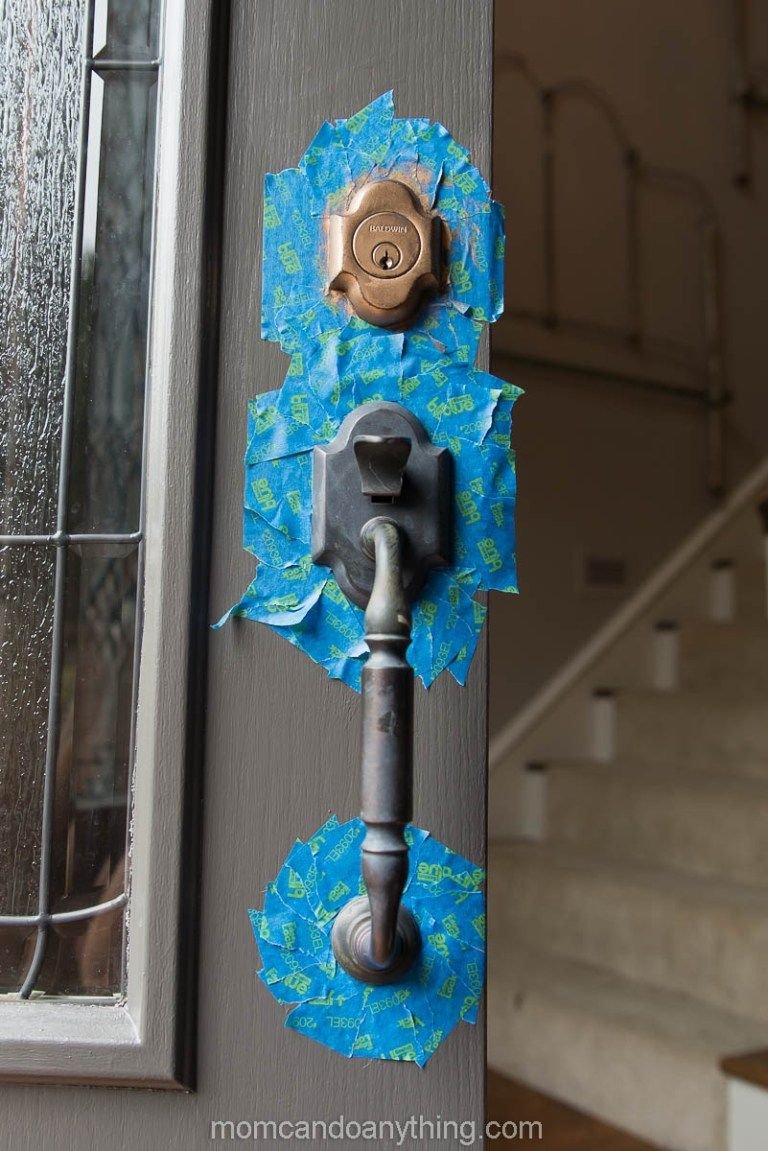
Before you start painting, remove handles, locks, and plates if you can. If that’s not possible, cover all exposed hardware with painter’s tape and plastic wrap. Press the tape down firmly along the edges where paint could seep in. For hinges, wrap them fully and cut away any loose tape to keep the door swinging freely.
If you’re painting around keypads or electronic locks, take a few extra minutes to seal them up. Even the smallest paint splatter can ruin sensors or make buttons sticky. Think of it like taping over your phone’s screen before heading to the beach—you’ll thank yourself later.
When the paint is dry, carefully remove the tape and check for any leaks. Spot clean as needed before reattaching any removed hardware. This small step can save you hours of troubleshooting and keep your locks, remotes, and codes working smoothly for years.
Alternatives and Quick Fixes if You’re Stuck
You might not have the time or tools for a full hardware removal and cleaning. Don’t stress—there are a few workarounds you can try until you’re ready to tackle the job. For example, if your exterior door lock is just sticky from surface paint, a quick spray of WD-40 in the keyhole can loosen things enough for everyday use. Just keep in mind, this is a temporary fix—oil can attract grime, so you’ll still want to clean things up later.
If your keypad or smart lock is glitchy and a reset doesn’t help, check the manufacturer’s app for troubleshooting options. Many brands now offer guided resets, code re-pairing, and battery health checks through their phone app. This can help you stay secure without taking everything apart.
Sometimes, calling a locksmith or door hardware pro is worth it, especially if you spot broken springs or stuck parts you can’t reach. They have tools for safe, non-damaging paint removal and can check if anything needs repair or replacement. While it’s usually a last resort, it can save you from breaking an expensive lock or being locked out.
Wrapping Up: Getting Your Exterior Door Hardware Back to Normal
Wrestling with painted-over exterior door hardware is never fun, but the right troubleshooting steps can save you a lot of frustration—and money. Whether you’re cleaning a classic Kwikset or rehabbing a high-tech Schlage smart lock, gentle, patient work pays off. Stick with safe cleaning methods, avoid harsh chemicals, and always prioritize the sensitive parts like keypads or battery contacts.
Remember: most problems are fixable with a little time, a few common tools, and a careful touch. If you do end up needing a replacement, you’ve got a perfect excuse to upgrade to something smarter or more stylish. Either way, your door will work better, feel smoother, and keep your home secure—no matter how many layers of paint it’s seen over the years.