Honestly, it might seem like a minor gap, but even a tiny space at the threshold is an open invitation for insects—and sometimes bigger problems like drafts, dust, or water, too. Whether you’re dealing with a classic wood door from Home Depot, a modern fiberglass Therma-Tru, or even a steel Stanley model, the basics of keeping the bugs out are pretty much the same. Let’s break down what causes those annoying gaps, what you can do about them, and how to get your door to seal as tightly as it should.
Why Do Exterior Doors Get Gaps That Let In Insects?
Let me explain—doors seem pretty sturdy, but they have a lot going on around the edges. Over time, even a well-installed door can start to show tiny spaces where the seal should be. Think of your door like a puzzle piece that’s supposed to fit just right, but after years of use, those edges can shift or warp.
Usually, you’ll see gaps develop because the weatherstripping has gotten worn out, the threshold is misaligned, or the door itself has shifted from house settling or humidity changes. For example, let’s say you have a standard 36-inch entry door, and suddenly you notice a cool draft or see daylight at the corners. That’s a sign your insect barrier isn’t doing its job.
Here’s the thing: even a narrow opening (the kind where you can just barely see light) is more than enough space for ants, spiders, or even mice to squeeze through. That’s why paying attention to the tightness of the seal around your exterior door is so important, especially in bug-prone seasons.
Common Causes of a Door Not Sealing Against Insects
You might be wondering, what’s actually behind those gaps? Most of the time, it comes down to one or more of these issues:
- Worn or Missing Weatherstripping: This is the flexible material (foam, rubber, felt, or vinyl) that runs around the door frame. After years of opening and closing, it can crack, flatten, or even fall off.
- Misaligned Threshold: The strip at the bottom of the door may have gotten knocked loose or warped, making it impossible for the bottom of your door to connect tightly.
- Door Warping or Settling: Especially with wood doors, moisture and temperature swings can make the door bend and pull away from the frame.
- Poor Installation or Hardware Problems: Sometimes hinges come loose, or screws back out, which slightly drops or tilts the door.
A friend of mine spent weeks chasing bugs in his kitchen, only to realize the old rubber seal under his steel entry door had gone flat and hard like a pencil eraser. Once he replaced it, the bug traffic dropped to zero. That’s how much these little details matter.
How to Inspect Your Exterior Door for Insect Leaks
Here’s a simple way to check if your door is letting bugs in:
- Look for Daylight: Stand inside at night and have someone shine a flashlight along the door edges. If you see light streaming through, insects can get in there, too.
- Check the Weatherstripping: Run your hand slowly around the frame, feeling for gaps or soft spots. If the strip peels off easily, or is brittle, it’s time to replace it.
- Test the Threshold: Open the door and look at the strip at the bottom. Is it cracked, missing, or compressed flat? In some designs, you can adjust the threshold up or down with screws to get a better seal.
- Open and Close the Door: Does it latch easily, or do you have to tug or force it? A hard-to-close door might be warped, making a tight seal impossible.
Ideally, your door should close easily, sit evenly in the frame, and not show any light at the edges. If any part fails the test, that’s your starting point for fixing it.
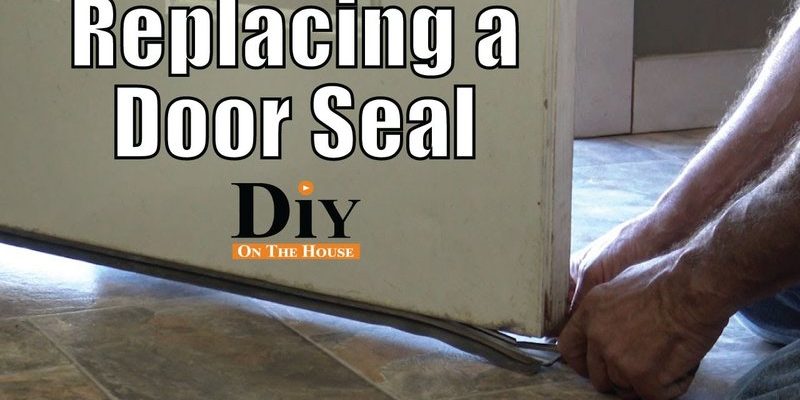
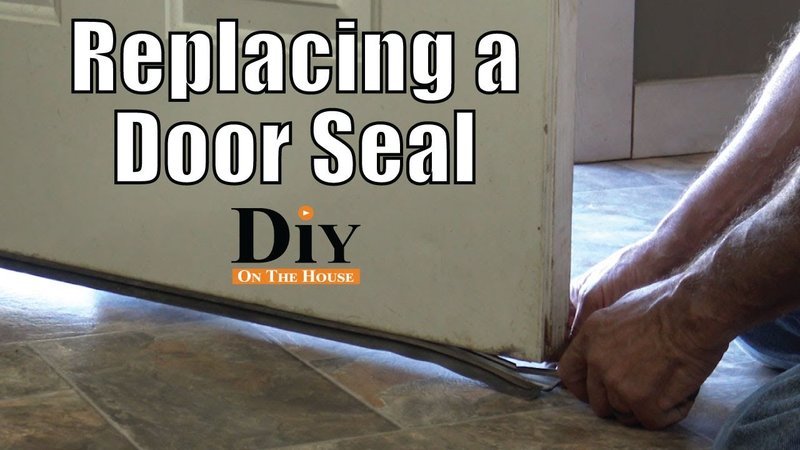
Replacing Weatherstripping to Block Insects
Weatherstripping is one of those things you don’t think about until it stops working. Here’s how to swap it out and make your door bug-proof again:
First, pick up replacement weatherstripping that matches your door (foam tape, rubber bulb, or vinyl stripping work for most brands like Stanley or Therma-Tru). Most home improvement stores carry universal styles that you can cut to length.
Next, carefully peel off the old weatherstripping. Use a putty knife to scrape away any stuck-on bits or old adhesive—don’t worry if it looks messy for a minute. Clean the surface with rubbing alcohol or soapy water before applying the new strip.
Then, measure the new weatherstripping and cut it to fit each side and the top of the frame. Remove the backing (if it’s self-adhesive) or nail it in place, pressing firmly to make sure it sticks in every corner.
Take your time here—if you rush, you’ll end up with gaps, and the bugs will still sneak in.
When you close the door, you should feel a gentle resistance and see the weatherstripping compress slightly but not buckle. If you see obvious gaps or feel a draft, go back and adjust as needed.
Adjusting or Replacing the Threshold
The threshold is the unsung hero of bug defense—it’s the strip at the bottom of the door, sometimes with an attached rubber sweep or adjustable plate. Here’s the thing: if your door has a visible gap under it, insects are going to walk right in.
To adjust a threshold, look for small screws along its top surface. Turning these clockwise usually raises the threshold, closing the gap. Only go a half-turn at a time, testing the door each time until it sweeps the threshold but doesn’t drag hard.
If that doesn’t solve it—or if the threshold is cracked, rotted, or missing its seal—you’ll need a replacement. Most home centers have universal thresholds you can cut to fit. Removing the old one usually means taking up a few screws and prying it loose. When you install the new one, make sure it sits flat, seals tightly, and doesn’t block the door from closing smoothly.
It might sound intimidating, but with a screwdriver, caulk gun, and a bit of patience, even a beginner can handle this.
Installing a Door Sweep for Extra Bug Protection
Sometimes all you really need at the bottom of your door is a good door sweep—a flexible strip that brushes the threshold every time you close the door. They’re cheap, simple, and can make a huge difference for instant insect control.
Here’s how to install one:
- Buy a sweep that matches your door width (most are 32″–36″). Look for styles that screw into the door, not just peel-and-stick—they hold up better.
- Measure and mark where the sweep should go. You want it to just touch the threshold, but not bunch up or get caught as the door closes.
- Hold the sweep in place and screw it in, checking for a smooth fit. Trim any excess length with tin snips or a hacksaw.
If you have a fancy fiberglass or “low-profile” modern door, check with the manufacturer so you don’t void warranties with aftermarket parts.
In my first apartment, I used a brush-style sweep to stop roaches from invading at night—absolutely worth it for peace of mind.
Fixing Door Alignment and Hardware Issues
If you’ve replaced the seals and still see gaps, your door may be out of alignment. This usually happens when hinges get loose, screws back out, or the frame settles over time.
To check door alignment:
- Open the door and grab it at the handle. Lift gently to see if there’s any “play” or sagging.
- Check each hinge. Tighten any loose screws with a screwdriver. If the screw holes are stripped, use longer screws or wood filler and re-drill for a tight fit.
- If the door sags heavily or the latch doesn’t engage smoothly, you might need to adjust the strike plate (the metal catch on the frame) or even shim a hinge.
On some modern composite or code-compliant doors, the manufacturer may specify exact screw types or hinge adjustments. When in doubt, check the documentation or look up your door’s model online—there’s usually a troubleshooting guide.
Don’t be afraid to call in backup if the frame is really out of whack; sometimes structural settling needs a pro.
When to Try Door Seal Kits or Professional Help
If you’re still getting pest visitors after all this, you might want to try a full door seal kit. These kits usually come with everything—threshold, weatherstripping, sweep, and detailed instructions. They fit most standard doors and are especially helpful if you have an older home, unusual gaps, or want a code-compliant solution for a rental property.
Sometimes, though, nothing seems to work. If you notice your door frame is badly warped, rotting, or doesn’t close no matter what, it might be time for professional help. A skilled carpenter or door specialist can identify hidden issues and get your door sealing tight again—saving you endless DIY headaches.
There’s no shame in handing it off—doors are surprisingly technical, and a pro job can last for decades.
Simple Habits to Keep Bugs Out Year-Round
Sealing up your door is step one, but don’t forget the little things that help keep insects away for good:
- Regularly Inspect and Maintain Seals: Once or twice a year, walk around and look for gaps or weatherstripping wear.
- Keep Door Areas Clean: Sweep away leaves, webs, or spilled food that can attract bugs to your threshold.
- Use Caulk or Foam for Gaps: If you spot cracks in the trim or siding around your door, fill them with exterior caulk. Bugs are experts at finding even the smallest gaps.
- Check for Other Entry Points: Sometimes it’s not just the door—look at nearby windows, vents, and foundation edges if you keep seeing pests inside.
You’d be surprised how much peace of mind comes from knowing you’ve closed off “code red” entry points around your home. It turns bug season from a battle into a total non-event.
Wrapping Up: Enjoy a Bug-Free Home
Honestly, taking control of a door that doesn’t seal against insects is one of the most satisfying home fixes out there. With a little troubleshooting—checking weatherstripping, adjusting the threshold, adding a sweep, or tightening up the hinges—you can say goodbye to most of your unwanted bug visitors. And if your best efforts still don’t do the trick, there’s always a professional ready to step in.
The real reward is coming home to a space that truly feels sealed and comfortable, no longer worrying about what’s crawling in. Take it one step at a time, use the right materials for your door type and brand, and soon enough, you’ll have security—and quiet—right where you want it.