You might not give much thought to thresholds until yours is suddenly a problem, especially if it’s a brand like M-D Building Products, Pemko, or even something custom. Fixing an uneven or unlevel threshold isn’t glamorous, but it’s key to comfort, safety, and even how your doors work. So let’s get into how to troubleshoot threshold issues, why they matter, and—honestly—how to make your floors feel right again.
Why an Uneven Threshold Is a Big Deal
Here’s the thing—thresholds do more than look nice. They help seal gaps, block drafts, and create a smooth transition between rooms. But when one is uneven, small annoyances can start to pile up. Maybe you notice a cold breeze sneaking in at the front door. Maybe you’re tired of stubbing your toe or the door scraping at the bottom.
An unlevel threshold can even cause bigger headaches. If water seeps underneath, you could be looking at long-term floor damage. With brands like M-D Building Products, the design might be adjustable—but if it’s set wrong, you get more trouble than help. It’s sort of like having a remote that won’t sync—frustrating and fixable if you know what to look for.
Honestly, ignoring a crooked threshold is tempting. But as it keeps settling or shifting, it might get worse. Suddenly, you’re not just dealing with a small trip hazard, but bigger repair bills or even trouble opening and closing your door.
What Causes a Threshold to Become Uneven?
Before you jump into adjustments, it’s smart to figure out why thresholds get uneven in the first place. You might be wondering, “Did I install it wrong?” Sometimes that’s part of the story, but there are a few usual suspects to check out.
- Improper installation: If the original threshold wasn’t level or secure, it will usually shift over time. Maybe the installer forgot to shim it, or the screws weren’t set properly. Even brands claiming “universal fit” thresholds need care during installation.
- Foundation movement: Houses settle. Floors move. It’s normal, especially in older homes or places where seasons swing from wet to dry. When the floor or subfloor shifts, the threshold might tilt or lift.
- Wear and tear: Lots of foot traffic, pets, or even heavy doors can knock a threshold loose. Over time, the screws might back out or the wood underneath could rot or swell, especially in places exposed to water.
- Moisture issues: Water is trouble. If a threshold sits by a door, leaks or condensation can seep underneath. That makes the wood swell, warp, or sometimes even rot away—leaving the threshold at a wonky angle.
Strong brands like Pemko or M-D Building Products often provide adjustable features for height, but even then, environmental and installation factors come into play.
How to Spot If Your Threshold Is Uneven or Unlevel
Sometimes it’s obvious—your threshold might look crooked or feel wobbly under your feet. But not every uneven threshold screams for attention; some only cause little annoyances.
- Visual inspection: Get down at eye level. Is one end higher? Does it sit flush against the floor on both sides? You’d be surprised how much a small tilt can throw things off—like a remote that’s just slightly out of battery.
- Test with a level tool: Lay a carpenter’s level along the length (and across the width) of the threshold. If the bubble isn’t centered, something’s out of whack.
- Feel for movement: Press down on both ends and the middle. If it moves, rocks, or squeaks, it’s a sign of loose screws or shifting subfloor—even if you can’t see the problem right away.
- Watch the door: Does the door scrape or stick when swinging shut? That’s a classic symptom.
If you spot any of these signals, it’s time for some basic troubleshooting—before you end up with bigger issues.
Tools and Materials You’ll Need
Let me explain—fixing a threshold doesn’t require a full workshop, but there are a few essentials you’ll want to have on hand. Think of it like grabbing a fresh set of batteries before trying to sync up a stubborn remote.
- Carpenter’s level: For checking how flat and even your threshold sits. A two-foot or longer level works best.
- Screwdriver or drill: Most thresholds are held by screws—either Phillips or flathead. Some may use hex, so check yours first.
- Shims: Thin wooden or composite wedges. You’ll use them to support or adjust low spots.
- Utility knife: For trimming carpet, vinyl, or excess shim material.
- New screws or anchors: Especially for older installations, since old hardware can strip out or corrode.
- Caulk or wood filler (optional): For gaps, sealing, or cosmetic fixes.
If you have a branded threshold, check the manufacturer guide (like Pemko or M-D) for any specialty fasteners, codes, or parts.
Step-By-Step: How to Fix an Uneven Threshold
Here’s where you roll up your sleeves. Don’t worry, you don’t need a contractor’s license—just a bit of patience. If you’re nervous, picture this like resetting a remote: one step at a time, and you can always put things back if needed.
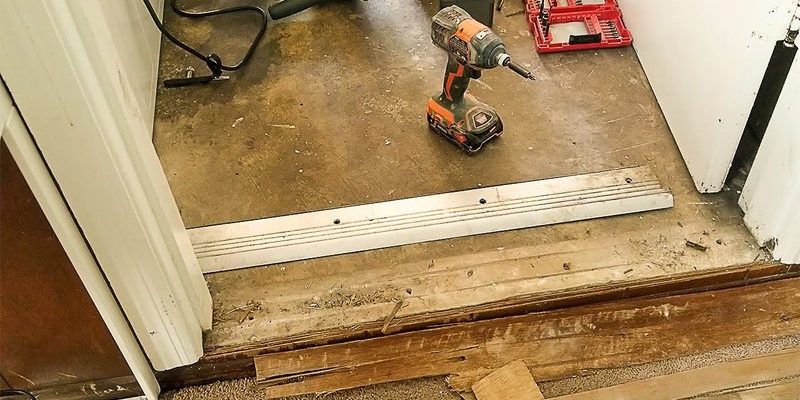
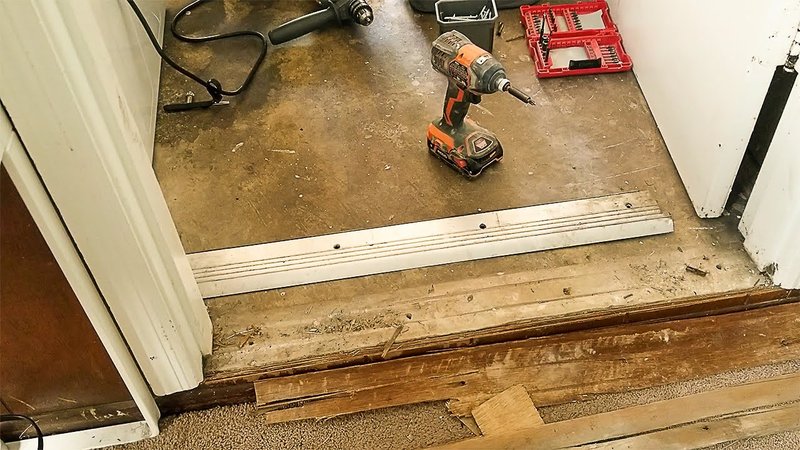
Step 1: Remove the Threshold (if needed)
If the threshold is badly tilted or you can’t see the screws, you’ll need to lift it. Use your screwdriver or drill to remove the fasteners. (Set them aside—if they’re rusted, plan to replace them.)
Step 2: Inspect the Subfloor
With the threshold out, look underneath. Is the wood solid? Dry? If you see any rot, crumbling, or water stains, you’ll need to address that before reinstalling. (Sometimes, quick wood filler can patch a small spot. For bigger issues, replacement is best.)
Step 3: Add Shims to Level the Base
Place your carpenter’s level where the threshold will go. Slip shims under the low side or anywhere there’s a gap. Keep checking the level until you’re dead-on straight. Trim any excess shim flush with a utility knife.
Step 4: Reinstall and Secure
Set the threshold back in place, and drive new screws through the original holes (or drill new pilot holes if needed). Tighten the screws snugly, but don’t over-torque—especially with plastic or composite thresholds.
Step 5: Test and Fine-Tune
Open and close the door. Make sure it swings clear and no longer drags or rubs. If you see any gaps, use a bit of caulk to seal drafts, especially with exterior thresholds.
Even if you don’t get it perfect the first try, thresholds are forgiving—unlike a fussy remote code, you can always adjust and try again.
When to Replace Instead of Repair
Not every uneven or unlevel threshold can—or should—be fixed. Sometimes, you’ve got to know when it’s time to cut your losses and install something new.
If your threshold looks warped, cracked, or water-damaged past the point of no return, repairing it won’t do much. Honestly, it’s like trying to reset a remote that’s missing half its buttons. You’re better off with a fresh start.
Modern thresholds (especially from brands like Pemko or M-D Building Products) often have adjustable height features, built-in weather seals, or universal fit designs. If you’re upgrading, measure your door frame carefully, and check compatibility—just like you would when buying a new remote.
A few clear signs it’s time to replace:
- Wood is soft, crumbling, or moldy.
- Metal is bent or the finish is flaking away.
- Screws no longer grip—holes are stripped or enlarged.
- You’ve tried shimming, but it still rocks or feels unstable.
Swapping out for a new threshold is usually a weekend project—just follow the installation guide, and don’t skip the level checks.
Dealing With Adjustable and Universal Thresholds
You might be dealing with an adjustable or universal threshold, especially in newer homes or weather-sealed entries. These types are meant to make your life easier, but sometimes the features can be confusing—like trying to pair a new universal remote without the manual.
Adjustable thresholds often have a screw system that raises or lowers the strip in small increments. Universal ones might have break-off edges or flexible bases so they can fit a range of door widths and floor heights.
If your adjustable threshold sits unevenly:
- Check that all adjustment screws are set to the same height. If one is higher, the whole piece tilts.
- Watch for debris or gunk under the strip—it can stop the piece from sitting flush.
- If the threshold feels wobbly after adjusting, try resetting all screws to the lowest setting, then raise them evenly one turn at a time, checking the level each time.
- For universal thresholds, make sure you’ve trimmed the ends square, and use shims or caulk to fill any voids.
The trick with adjustable or universal types: Don’t rush. They’re designed for flexibility, but small adjustments can make a big difference in getting things perfectly level.
Prevention: Keeping Your Threshold Level for Years to Come
Once you’ve got your threshold level and sturdy, a few habits can keep it that way. Like keeping spare batteries for your remote, a little maintenance now beats major repairs down the road.
- Check screws every few months. Tighten any that have loosened—especially after a season change or a spate of bad weather.
- Keep thresholds dry and clean. Wipe away water, dirt, or debris, since moisture and grit are the biggest enemies of wood and hardware.
- Seal any gaps. If you spot daylight underneath or feel a draft, reapply caulk or add weatherstripping. Sealing out moisture is key.
- Monitor the door’s swing. If the door suddenly starts dragging or sticking, check the threshold first. Sometimes, catching a small problem early saves hours of work later.
It’s also worth glancing at your home’s foundation once in a while. If you start to notice multiple thresholds or floors going out of level, it could be a sign of settling or bigger structural movement.
Closing Thoughts: Making Peace With Your Threshold
Fixing a threshold that’s uneven or unlevel isn’t the most exciting DIY, but getting it right means no more stubbed toes or freezing drafts—just smooth steps and doors that work the way they should. Whether you’re working with a classic wooden strip, an M-D Building Products adjustable model, or a heavy-duty Pemko, the principles are the same: identify the cause, make careful adjustments, and don’t be afraid to start fresh if the old threshold is beyond saving.
Take your time, grab the right tools, and remember—it’s a lot like troubleshooting a stubborn remote. Patience and small steps go a long way, and once you’ve solved it, the whole house just feels better.