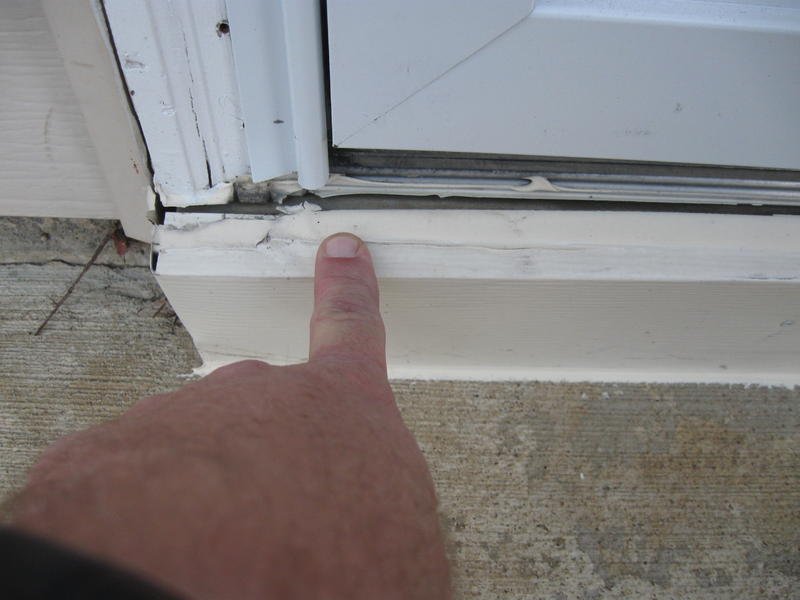
Honestly, a kick plate that won’t sit flush isn’t just a small visual flaw. It can catch on shoes, let in dirt, or even damage the door over time. Most folks think it’s a quick “grab screwdriver, install, done” situation, but there are a handful of sneaky issues that can throw things off—crooked screw holes, warped plates, or even an uneven door surface. Let me break down how you can troubleshoot a kick plate that’s not sitting flush, what to look out for, and how to fix it so it looks like it was always meant to be there.
Why Won’t My Kick Plate Sit Flush?
Sometimes, the problem with a kick plate not sitting flush on the door is hiding in plain sight. The most common culprit is that the door itself isn’t perfectly flat. Wood doors can warp over time from moisture, and even a metal door might have tiny dents or bends you never noticed before. When you try to mount the kick plate, it naturally follows those weird curves, leading to visible gaps.
Here’s the thing: not all kick plates are created equal. Some brands use thicker or stiffer metal, while budget options can be paper-thin and bend just by looking at them wrong. If the plate is warped out of the box, or it got twisted during shipping, you’re fighting an uphill battle from the start.
Another sneaky factor is the fasteners themselves. If the screws are too long, too short, or installed at the wrong angle, they can actually push the plate away from the door instead of pulling it tight. Double-sided adhesive tapes—used on some “no drill” kick plates—also play a role. If the surface isn’t spotless or the adhesive is weak, you’ll see peeling or bubbling over time.
How to Diagnose the Real Problem
Before you reach for your toolbox, let’s take a breath and work through a quick little troubleshooting “code.” Think of it like syncing a remote—start simple, then move to the complicated stuff.
- Step back and look straight on: Is the gap on just one side, or all around? A gap just at the center hints at a warped plate. Gaps at the ends suggest the door itself is the issue.
- Run your hand along the door: Feel for any dips, bumps, or waves. Lightly press the plate against the door—does it flex to match the shape, or does it resist?
- Check the screws or tape: Are they snug against the plate? If you see the plate lift around each screw, you might’ve overtightened and “bowed” the metal.
- Inspect the door’s surface: Paint buildup or even a stray old screw head can create tiny raised spots that keep the plate from resting flat.
You might be wondering: “Do I need special tools?” Most of the time, just your eyes, hands, and a basic screwdriver or drill are enough to get the diagnosis right.
Common Installation Mistakes (and How to Avoid Them)
Let me explain why the installation itself can sometimes sabotage your otherwise perfect kick plate. It’s easy to get excited and start driving screws without checking alignment, but small mistakes here can lead to big headaches later.
One classic misstep is not marking the screw holes before drilling. If you “eyeball” it, the plate can wind up crooked, with tiny gaps that are impossible to hide. Using a template or marking the holes with a pencil first takes a little extra time, but it pretty much guarantees a cleaner result.
Another issue pops up if you use the wrong length of screw. Too long, and you risk poking through the other side of a thin door. Too short, and the screws don’t actually pull the plate tight. Stick with the hardware that came with your kick plate, or grab screws that match the original depth if you need replacements.
Don’t forget about surface prep. If the spot where the plate mounts is dusty, greasy, or still tacky from painting, even the best adhesive or hardware won’t make a flush fit. I always give the area a quick wipe-down with isopropyl alcohol and a rag.
How to Fix a Kick Plate That’s Not Flush
Okay, so your kick plate is already installed and it’s bugging you. Here’s your step-by-step reset to get things sitting pretty:
- Remove the kick plate: Carefully unscrew or peel it off. If it’s stuck, use a thin putty knife to help.
- Check for warping: Lay the kick plate on a flat table. If it rocks or you see a twist, you’ve found your culprit. You can try gently bending it back, but don’t push too hard or you’ll create a kink.
- Smooth the door surface: Sand down any bumps, or use filler to level out low spots. For metal doors, knock down high spots with a hammer and block of wood (gently!).
- Realign and reattach: Hold the plate in place, mark your pilot holes, and drive the screws in evenly, working from the center outwards. If you’re using adhesive, press firmly and hold it steady for a few minutes to help it bond.
Afterward, step back and check your work—sometimes you need to *reset* and try again if you see any stubborn gaps.
When the Kick Plate Still Won’t Sit Flat
Here’s where even patient DIYers can get frustrated: sometimes, after all that troubleshooting, there’s still a tiny space or uneven edge. Don’t worry, you’re not alone. Some doors are just quirky, with edges that aren’t 100% straight—especially older wood doors that have swollen or shrunk over time.
If you keep running into the same issue, consider swapping the kick plate for a thicker, higher-quality model from a trusted brand. Heavier-gauge plates have a better chance of “resetting” the look by bridging small imperfections in the door.
Alternatively, a flexible plastic or vinyl kick plate can contour to a wavy door better than stiff metal. Think of it like using a universal remote when the original stops working—it’s not perfect, but it solves the immediate problem.
Sometimes, no matter how much troubleshooting you do, the best fix is a new approach. If a flush fit is critical (say, for weather protection), don’t be shy about replacing the plate or even the door if it’s in rough shape.
Comparing Screw-On vs. Adhesive Kick Plates
You might be weighing your options: should you go with a traditional screw-on kick plate, or try one that uses heavy-duty double-sided adhesive?
- Screw-on plates offer a more permanent hold and are easier to reset if you need to remove or adjust them. They’re great for thick, solid doors and high-traffic spots.
- Adhesive plates are ideal if you want a drill-free install, or you’re working with a metal door you don’t want to put holes in. However, they rely on perfect surface prep. Any grime, dust, or even slightly uneven paint can mess up the bond and make flush mounting difficult.
Honestly, if you want a truly flush fit and don’t mind a few extra holes, screw-on is easier to troubleshoot and reset. Adhesives work, but only if you have the patience to clean and prep the surface really well.
Tips for a Clean, Professional-Looking Kick Plate
A flush kick plate isn’t just about avoiding gaps—it’s about making the whole door look cared-for. Here’s my quick “checklist” for getting pro-level results:
- Use a level to keep the plate perfectly straight. Even a tiny bit off can look wonky once you stand back.
- Paint or finish touch-ups before installing. If the door has chips or raw wood showing, a bit of primer or paint helps the plate sit better and prevents future rust.
- Don’t overtighten screws. Snug is good; cranking them down can bow the plate or damage the door.
- Countersink the holes just a tad (if your plate and hardware allow) to help the screw heads sit below the surface, giving a flush look.
You’d be surprised what a little extra attention to detail can do. I’ve seen tired old doors instantly upgraded just by installing a new, properly-fitted kick plate.
Troubleshooting Odd Situations: What If Nothing Works?
Every now and then, you run into a door that just refuses to play by the rules. Maybe it’s super old, or the bottom edge is chewed up by years of use. If you’re still stuck after all this troubleshooting, you’ve got a few advanced options:
- Fill low spots with a wood filler or epoxy, then sand smooth before remounting the plate. This is especially helpful on old wooden doors.
- Custom-bend the plate using clamps and padded pliers. If you’re feeling handy, you can actually shape the plate to follow the door’s unique curves.
- Install weatherstripping or foam tape behind the plate to mask gaps—just keep it thin, or the plate will stick out even further.
- Replace the bottom of the door or have a pro sand it flat. For doors in really rough shape, sometimes a “reset” is the only way forward.
Most folks will never need to go this far, but if you’re stubborn (like me) and want everything looking perfect, these little tricks can save your sanity.
Bringing It All Together: Kick Plate Troubleshooting Made Simple
To wrap it up, getting a kick plate to sit flush on your door is part art, part troubleshooting code. Whether you’re dealing with a budget model from the hardware store or a premium Schlage or Kwikset plate, it’s all about patience and attention to detail. Start by checking the door and plate for warping, prep your surfaces well, and don’t rush the install. If you run into trouble, removing and resetting—just like re-pairing a stubborn remote—usually does the trick.
Most issues can be solved with basic tools and a calm approach. But if things still aren’t perfect, remember, a small gap probably matters more to you than anyone else. At the end of the day, it’s about protecting your door and keeping things looking sharp—a flush kick plate is just the cherry on top.
