Here’s the thing: fixing a kick plate isn’t usually rocket science, but understanding *why* it’s coming loose only on one side helps you pick the right troubleshooting steps. Let me explain exactly what’s going on, why it happens, and how you can restore your door to smooth, snag-free perfection—without calling in a pro.
What Causes a Kick Plate to Loosen on Just One Side?
When you notice a kick plate is peeling off just at one end, your first thought might be, “Did I step on it wrong?” But the real answer tends to be a mix of everyday wear, installation quirks, and sometimes even the hidden mood swings of your home’s hardware. Think of a kick plate as a little shield, constantly taking light bumps from shoes, vacuum cleaners, or even rolling suitcases. Over time, this pressure can loosen the screws or adhesive holding it on—especially if the mounting wasn’t perfect from the start.
A common culprit is uneven installation. Maybe one side was screwed in just a bit tighter, or the door surface wasn’t prepped properly under that side, causing it to shift gradually. Humidity and temperature changes can also play a role. If one side of your door faces more moisture (say, near a drafty edge or porch), it can swell or contract unevenly, nudging the kick plate free. Honestly, it’s rarely just “bad luck”—there’s usually a clear reason behind the lopsided loosening.
Besides installation and the elements, sometimes the issue traces back to the type of fasteners or adhesives used. Cheaper screws might strip out of soft wood, or stick-on plates might lose their grip once dirt and dust sneak underneath the plate on one end. The point is, that single loose side is a clue. Figuring out what’s going on helps you choose a fix that actually lasts.
Inspecting the Kick Plate: Getting a Clear Look at the Problem
Before you grab a screwdriver or new adhesive, it’s smart to take a close look at what’s really happening with your kick plate. You might be tempted to just jam it back in place, but honestly, a little detective work up front can save you from repeat repairs down the line. Start by slowly running your hand along the plate. Is it loose at the top, bottom, or maybe along an edge? Does the movement feel wobbly or do you hear a faint creak when you push?
Here’s an easy method: Gently push on each corner and along the entire length of the plate. If only one side moves, take note. Sometimes, the screw or adhesive on that end will be completely disengaged, while the rest look fine. In other cases, you might spot subtle signs like a small gap, a missing screw, or even slight warping in the door surface itself.
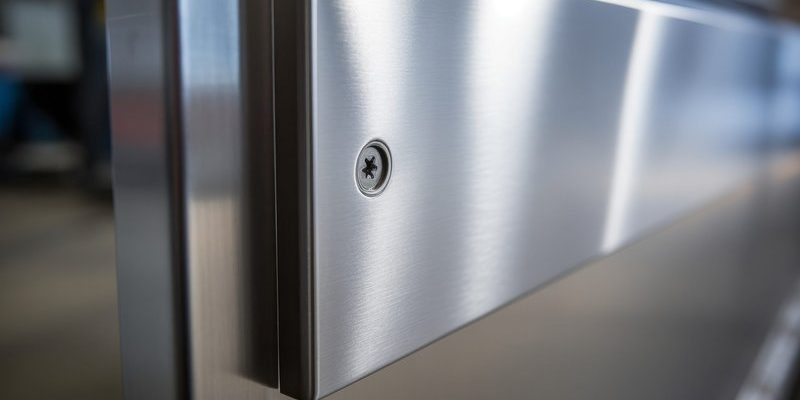
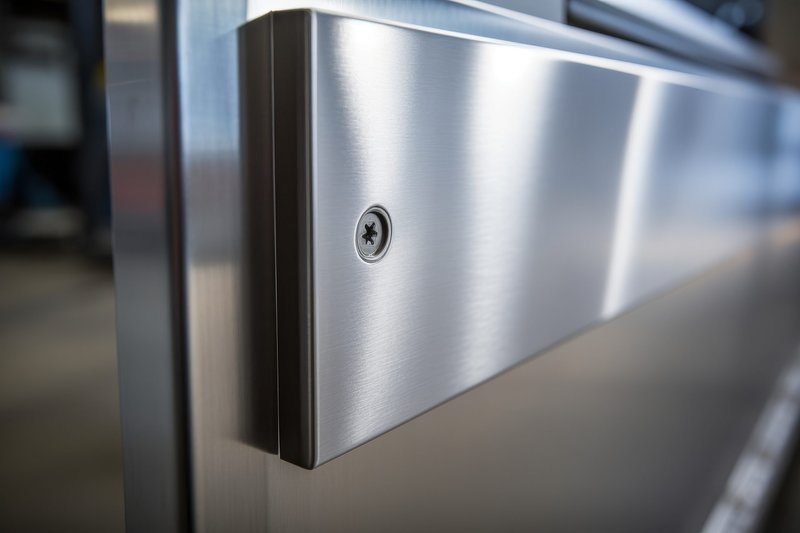
It helps to inspect the fastener type—are you dealing with Phillips screws, slotted screws, or a stick-on plate? If you spot stripped screw heads, rust, or bent hardware, those are big clues. For adhesive plates, look for traces of residue, dust, or peeling paint low on the door. Extra points if you spot tiny scratch marks where the plate’s been shifting back and forth. These details give you insight into whether the problem’s mechanical, environmental, or maybe a bit of both.
Common Reasons for One-Sided Loosening (And What They Mean)
You might be wondering, “Why only one side?” Let’s break down a few of the most common scenarios:
- Screw Pull-Out: If you notice the screw on one side is loose or missing, chances are the hole in the door has stripped out. This happens often with wood doors, especially after years of use or if the original screws were overtightened.
- Adhesive Failure: For stick-on or glued plates, moisture, dirt, or poor surface prep can let one end peel away. Sometimes, only the corner exposed to sunlight or weather will fail, while the rest of the adhesive hangs on.
- Warped Door or Plate: This is a sneaky one. If the door or kick plate is slightly bent or warped, you’ll notice one side pulling away, as if it wants to “spring back” to its original shape. You’ll often see this on older wood doors or cheaper aluminum kick plates.
- Physical Impact: Ever kicked the plate extra hard with a boot, or banged a vacuum into one end? That repeated pressure pushes the weakest side out over time.
Understanding *why* your kick plate is loose in a specific spot helps you pick the right fix. If it’s just a stripped screw, replacing it with a larger option might do the trick. If it’s adhesive or warping, a full reset and re-mount may be in order.
How to Tighten or Repair a One-Sided Loose Kick Plate
Ready to get your hands a little dirty? Here’s a practical, beginner-friendly way to repair that one-sided looseness—no special tools required. First thing: grab a Phillips screwdriver, a few fresh screws (slightly thicker or longer than the old ones help), wood glue or construction adhesive (for extra hold), and a clean rag.
Step-by-step:
- Carefully unscrew or pry loose the entire kick plate, not just the wobbly end. This lets you check for hidden problems like stripped holes or warped backing.
- Clean both the plate and the door surface. Remove old adhesive, dust, or rust using a damp cloth. Let everything dry completely.
- For stripped screw holes, pack in a little wood filler or a piece of wooden toothpick with glue, then let dry. This gives the new screw something to grip.
- If using adhesive, apply a thin, even coat to the plate. For screws, align the plate flush, and drive in fresh screws. Make sure you start with the problem side—this helps lock it down tight.
- Tighten all screws gently so you don’t warp the plate. Wipe away any glue that squeezes out the edges.
Let it set (follow the glue instructions if you used adhesive). Give the plate a test nudge. If everything feels snug, you’re good! Honestly, this approach solves 90% of one-sided kick plate issues, even on stubborn or well-used doors.
Alternatives: Upgrading Hardware or Using Better Adhesive
Sometimes, the original fasteners just aren’t up to the task, especially in older homes or high-traffic doorways. If you find yourself fixing the same side over and over, consider swapping out for stronger hardware. For example, trade short screws for longer, rust-resistant ones, or use anchors for hollow-core doors. It’s a small change but makes a big difference over time.
If your kick plate uses adhesive, look for a weatherproof, construction-grade adhesive next time—brands like Liquid Nails or Gorilla Glue tend to hold up better than the stuff that comes pre-applied on cheap plates. For metal plates, a few small dabs at the corners (not just a strip along the edge) help prevent future peeling.
If you really want a set-it-and-forget-it solution, you can switch to a model that uses both mechanical fasteners and adhesive. That way, even if one system fails, you’ve got a backup. And if your kick plate is warped or bent beyond saving, replacing it with a heavier-duty stainless steel or solid brass plate can make all the difference.
When to Replace the Kick Plate Entirely
Here’s the truth—not every kick plate is worth saving. If yours is dented, rusted, or badly warped, honestly, it’s simpler (and sometimes cheaper long-term) to just replace the whole piece. Most hardware stores carry a range of sizes and finishes, so you can find one that matches your door exactly.
Replacing a kick plate is a lot like a reset. It lets you fix underlying issues, like stripped holes or old adhesive, and start fresh. Before reinstalling, clean and prep the door thoroughly. If you’re installing on a wood surface, add a dab of caulk or sealant behind the plate edges to keep moisture out and prevent future loosening.
And if you’re worried about matching the exact screw holes, don’t be. As long as you fill the old holes with wood filler and drill fresh pilot holes for your new screws, no one will be the wiser. It’s the kind of job you can knock out in an afternoon, but it makes a door look brand-new.
Switching Between Different Kick Plate Mounting Styles
Did your old kick plate use sticky tape, but you want to upgrade to screw-on? Or maybe you’re switching brands (say, from a generic no-name to something like Kwikset)? No problem—just follow a few extra steps to get a secure fit. First, fully remove all traces of old adhesive or tape. If there’s stubborn residue, rubbing alcohol on a rag works wonders.
Measure the exact position for the new plate so it covers any old marks or holes. For screw-on plates, use a level to line things up, then mark your holes lightly with a pencil. Drill tiny pilot holes if you’re attaching to wood, or use anchors for hollow-core metal doors. If you prefer adhesive, make sure the surface is *very* clean and dry before applying a new high-strength glue.
And don’t worry—mixing and matching fastener types is fine, as long as the plate sits flush against the door. Sometimes a little creativity goes a long way when troubleshooting a tricky, one-side-loose kick plate.
Preventing Future Kick Plate Problems
Now that you’ve got everything tightened up, let’s keep it that way. The best way to avoid a kick plate loosening again—especially on just one side—is a little routine attention. Every couple of months, check the plate for wobble or movement when you open and close the door. If you spot any hints of movement, tighten the screws before they work free.
If your entryway gets a lot of rain or humidity, check the seal along the bottom of the door. Moisture is the silent enemy of adhesives and wood alike. For metal kick plates, wipe them down with a dry cloth to prevent rust, and apply a touch of lubricant to screws if they start to squeak or corrode.
Here’s an insider tip: If you’re handy with tools, upgrade to tamper-resistant screws or double up with both screws and adhesive. This gives your kick plate a “belt and suspenders” hold—especially useful for busy households or rental properties.
Wrapping Up: A Sound Fix for That One-Sided Looseness
Dealing with a kick plate that’s loosening only on one side can be strangely satisfying to fix, once you know what to look for. By figuring out the exact cause—whether it’s a sneaky stripped screw, tired adhesive, or a warped plate—you get to choose the right solution and make your door look sharp again. And honestly, it’s one of those repairs that can save you from future frustration or bigger door issues down the line.
With a handful of basic tools and a little attention to detail, anyone can get that stubborn kick plate back in line. Take your time, use the right materials, and don’t be afraid to upgrade if needed. Your door (and your toes) will thank you.