
Handlesets can loosen up for a bunch of reasons: screws wiggle out, parts wear down, or the mechanism gums up with grime. The good news? Most of these fixes are way less complicated than you’d guess. You don’t need to be a locksmith, and honestly, with a screwdriver and a bit of patience, you can probably have it feeling sturdy in less than an hour. Ready to tighten things up? Let’s break down what’s happening, why it matters, and how to troubleshoot your loose handleset step by step—no fancy tools required.
Why Handlesets Get Loose Over Time
Let me explain what’s really going on behind that wobbly handle. Handlesets—whether standard, electronic, or even the high-end ones from brands like Emtek—are made to handle a lot of action. Every time you open, push, or pull on your door, tiny forces nudge the screws, spindle, and latch mechanism. Over months and years, that adds up. Even if you’ve never abused your hardware, vibration from slamming or just everyday use will slowly work those screws loose.
Here’s the thing: not all looseness is the same. Sometimes, only the outside handle jiggles, or maybe the inside knob feels detached. That usually means either the mounting screws have backed out or the spindle that connects both sides has some play. On older models, especially, years of weather changes can cause door materials to swell or shrink, adding another layer of strain. The result? Even a premium Schlage handleset can end up feeling like it’s barely attached.
If you ignore it, this small problem can snowball fast. A loose handleset puts extra stress on the moving parts. Over time, the latch might stop lining up, the lock may jam, or you could end up with stripped threads that make a simple fix much harder. So, it’s smart not to put this off—even if it’s just a tiny shake for now.
Tools You’ll Need for Troubleshooting
Honestly, you don’t need a crazy toolkit to fix most handleset issues, but a few basics will make the job way easier. Before you start, grab these:
- Phillips and flat-head screwdrivers
- Allen wrenches (sometimes called hex keys—some handlesets use these for hidden screws)
- Small flashlight (if you’re working in a dim entryway or you need to spot tiny parts)
- Soft cloth or towel (to protect your door and catch little screws)
- Thread locker (optional, like the blue Loctite, to keep screws from loosening up again)
You might be wondering, “Do I need my specific brand’s repair kit?” Most of the time, no. Schlage, Kwikset, and Baldwin handlesets are all built on the same basic concept: two plates, connected by screws running through the door, and a latch mechanism in between. Universal tools work for nearly all brands. Unless you spot a missing or broken part, you should be set.
Step-By-Step: How to Tighten a Loose Handleset
Let’s walk through the process. You don’t have to take the whole door apart—just follow these steps, and you’ll be back to a solid handleset in no time.
- Locate the screws. Most handlesets have mounting screws on the interior side, sometimes hidden under a faceplate or decorative cap. Use your flat-head screwdriver or a gentle prying motion to pop off the cover, if needed.
- Tighten both screws evenly. Use the Phillips screwdriver to snug up each screw. Don’t overtighten—you want them firm, but not so hard you strip the threads. Alternate between screws for an even fit.
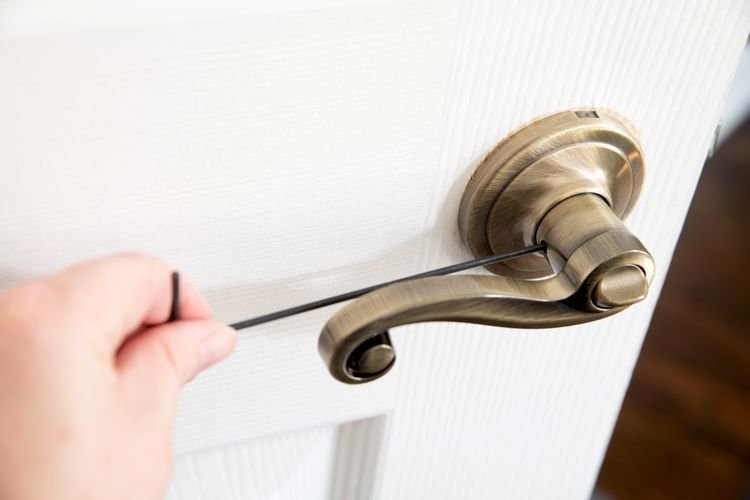
- Check for hidden set screws. Some levers or knobs have a tiny set screw at the base (often a hex/Allen screw). If your handle still wobbles, shine your flashlight around the base and tighten any you spot.
- Test the operation. Open and close the door a few times, working the latch and lock. If it’s still loose, you might have a stripped hole or worn part, which we’ll get into later.
- Consider thread locker. If your screws came loose before, dab a tiny bit of thread locker on them before tightening. This helps keep things snug, even with heavy use.
Working slowly and patiently is key. I’ve seen more than one person get frustrated and end up cross-threading a screw or scratching up the hardware. Take your time, check everything visually, and don’t force anything if it doesn’t want to budge.
When the Problem Is More Than Loose Screws
Sometimes, you tighten everything and the handleset still feels loose—or it loosens up again after a week. That’s your clue the issue runs a little deeper. Maybe the spindle (the metal rod connecting both sides) has worn down, or the screw holes are stripped from years of tightening.
If you’re seeing this, here’s what to look for:
- Worn spindle: The handles have too much “slop.” You twist, but there’s a lag before the latch moves. A replacement spindle can fix this, but you may need to remove the handles to swap it out.
- Stripped screw holes: Screws spin but won’t tighten. Wooden doors can develop this after years. Try using longer screws or “toothpick and glue” tricks to bulk up the hole, or even a metal repair anchor.
- Internal parts failure: If the lock or latch mechanism itself feels mushy or sticks, the inner workings might be worn. At that point, replacing the whole handleset (or the lock core) could be smartest.
If you have an electronic handleset—like a Schlage Sense or Kwikset SmartCode—you might also need to re-sync or reset the lock if the handle mechanism isn’t lined up with the electronic latch. Sometimes, a battery change can help if you’re noticing more resistance or strange noises.
Troubleshooting Electronic vs. Traditional Handlesets
Now, you might be thinking: “Is there a difference between regular and electronic handlesets when it comes to being loose?” The answer is yes—and no. All handlesets, no matter how smart, rely on those same old screws and spindles. But electronic models add a few quirks.
For standard mechanical handlesets, all the troubleshooting is mechanical. It’s about screws, spindles, and the latch. With electronic handlesets, you have extra layers: the keypad or remote, a battery, and sometimes even a code sync routine with your smart home.
Here’s what’s unique with electronic models:
- Alignment matters even more. If the physical handle loosens, electronic locks can lose their “home” position and may fail to latch or unlock automatically.
- Battery changes can sometimes temporarily “reset” motor alignment, but if things are loose, the mechanical fix comes first.
- Don’t forget to re-sync or reset the lock in the app or system after making a mechanical fix. If you skip this, you might get error codes or connection problems.
For both types, the process starts the same: tighten the mounting hardware, test movement, then check the electronic pairing/code steps if needed. If you’re still seeing trouble, check your brand’s instructions or support site—sometimes a software update is involved!
Preventing Future Handleset Loosening
Honestly, the best fix is the one you don’t have to do twice. Once you’ve got your handleset snug again, it pays to do a little preventative TLC.
Here’s what I recommend for keeping your hardware tight and trouble-free:
- Check the screws every few months. A quick turn or two with the screwdriver will spot problems before they get bad.
- Don’t ignore the little wobbles. Catching looseness early keeps screws from stripping and parts from wearing down.
- Wipe down the hardware with a gentle cleaner. Dirt and moisture can corrode parts, especially around the spindle and screw holes.
- Keep a tube of thread locker handy for stubborn screws.
- If you upgrade to a smart handleset, check both the mechanical connections and sync the lock regularly. A solid install means fewer pairing or battery issues.
Think of it like a car: regular, small checkups save you from big, expensive repairs down the line. Plus, there’s something satisfying about a door handle that feels rock-solid whenever you walk through it.
When to Repair, Replace, or Call a Pro
Sometimes, even the best DIY effort can only take you so far. How do you know if you should keep fixing your handleset, upgrade to a new one, or hand things off to a locksmith?
Here’s a quick rundown of what makes sense:
- Repair: If the screws just need tightening, or the fix is as simple as replacing a spindle or cleaning out grime, you’re good to go. Most homeowners can handle this with basic tools.
- Replace: If internal parts are cracked, the lock won’t stay paired, or the mounting holes are badly stripped, a new handleset might be faster (and safer) than wrestling with worn-out hardware.
- Call a pro: If security is on the line (like a multi-point or high-security lock), or you see weird electrical problems with a smart handleset—especially if it’s under warranty—it might be worth getting a locksmith. They have specialty tools and can diagnose trickier sync and code issues.
There’s no shame in calling for backup. Sometimes, trying to “make do” with a dangerously loose handleset is actually riskier—and ultimately more expensive—than just swapping it out.
How Door Material Affects Handleset Loosening
You might be surprised, but the type of door you have can make a big difference in how often your handleset comes loose. Solid wood, hollow core, metal, or even fiberglass doors each react a bit differently to years of use and climate changes.
- Wood doors: These swell and shrink with weather, which means mounting holes can loosen up over time. If your door faces direct sun or fluctuating humidity, check those screws more often and consider using longer or slightly thicker ones for a snug fit.
- Metal doors: Usually steadier, but if the internal threads strip, repairs might need a metal anchor or even a specialized repair kit. Don’t force screws in metal—cross-threading can be a pain to fix.
- Fiberglass doors: These are tough and weather-resistant, but over-tightening can crack the material. Just get things snug, not ultra-tight.
If you’ve tried everything and still can’t get your handleset tight, it might be more about the door than the hardware. In that case, patching or reinforcing the mounting area is sometimes your best bet.
Wrapping Up: Enjoy That Solid, Reliable Handleset
Living with a loose handleset isn’t just a hassle—it’s a reminder that even the sturdiest parts of our homes need care now and then. Whether yours is a classic Schlage, a modern Kwikset SmartCode, or any brand in between, a little troubleshooting can bring back that smooth, solid feel when you walk through your door.
Remember: go slow, use the right tools, and don’t be afraid to tighten things up whenever you notice a wiggle. If you run into deeper trouble—like stripped holes or sync problems on a smart lock—there are always options, from DIY repairs to calling in a pro.
In the end, nothing beats the quiet confidence of a door handle that just works, year after year. Here’s to more secure, frustration-free entries (and exits)!