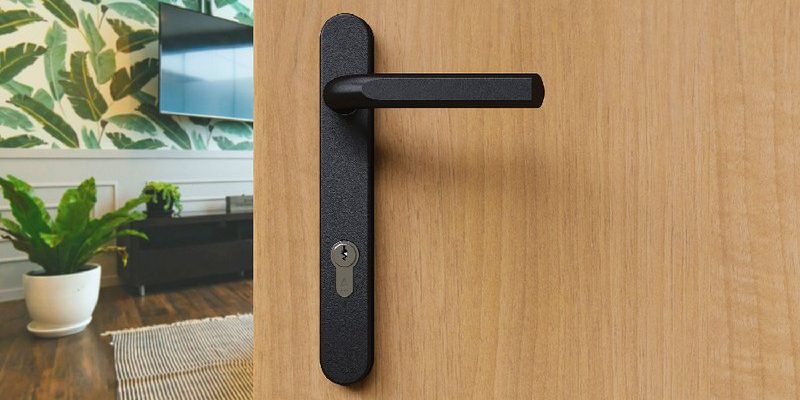
Let me explain: the cam is a small but mighty piece inside most standard entry door hardware, whether it’s a Schlage, Baldwin, Kwikset, or Yale setup. It’s responsible for connecting your handle to the latch and lock mechanism, so when it wears down, everything feels loose and out of sync. Think about it like a stripped gear in a bicycle—it just can’t grab properly anymore. Fixing a loose handleset with a worn cam isn’t as intimidating as it sounds. With a couple of tools, a dash of patience, and a bit of troubleshooting, you can get your door back to that satisfying, snug “click.”
How a Handleset Cam Works (and Why It Wears Out)
You might be wondering what a cam even looks like or why it matters. Here’s the thing: the cam is a tiny, often metal or composite disc inside your handleset that rotates when you twist the handle or key. It acts as a connector—translating the turning motion of your handle into movement that pulls back the latch or bolt.
Over time, the cam can wear down for a few reasons:
- Normal use: Every twist or pull puts pressure on the cam, eventually wearing away the edges.
- Poor alignment: If your door has settled or your lock wasn’t installed perfectly straight, the extra friction grinds down the cam faster.
- Material quality: Some entry-level handlesets use softer metals or plastic cams, which just don’t last as long as solid brass or steel parts.
What does a worn cam feel like? Usually, the handle will move up and down with little resistance, or you’ll notice the latch doesn’t retract smoothly. Sometimes, the lock cylinder spins without catching on anything—making you suspect the whole thing is out of code. As annoying as this is, it’s also one of the more fixable door hardware issues.
The cam is the unsung hero of your door hardware. It’s easy to overlook, but when it fails, everything gets out of sync—kind of like trying to use a remote that’s lost its battery.
Telltale Signs of a Loose Handleset Due to a Worn Cam
If your handleset is loose, you might think it’s just a loose screw or maybe a stripped thread. But here’s how you can tell when a worn cam is to blame for your handleset woes.
- Spongey or sloppy handle movement. You turn the handle, and it feels mushy or doesn’t spring back.
- The latch stays stuck. The handle moves, but nothing happens with the latch—it just sits there, out of sync.
- Lock cylinder isn’t engaging. When you turn your key or thumbturn, it spins more than usual or feels like it’s not connecting inside.
- Screws stay tight but the handle wobbles. If you’ve already tightened all the visible fasteners but the problem returns, the cam could be the issue.
Honestly, a worn cam can feel like a ghost in the works. Think of it as the difference between a TV remote where the “power” button is totally dead versus one that just needs a battery reset. In this case, the internal part (the cam) is failing—not just an easy fix on the outside.
Essential Tools and Parts for Handleset Troubleshooting
Before you dive into fixing a loose handleset, it’s smart to gather everything you might need. The last thing you want is to have your door half-apart while realizing you’re missing a tiny screwdriver.
Most handleset troubleshooting jobs require:
- Phillips and flathead screwdrivers
- Replacement cam (matched to your brand—Kwikset, Schlage, Baldwin, etc.)
- Allen wrench or hex driver (for hidden set screws)
- Small tray or cup for holding screws
- Lubricant (like graphite or silicone—not WD-40, which can gum things up)
- New batteries if you’re working with an electronic or smart handleset remote
If you’ve got a universal handleset or you’re not sure what cam fits your lock, bring the old part to your local hardware store for reference. Many stores have sample boards or can help you sync up the right part numbers by brand and style. For electronic locks, double-check that your code or battery isn’t the real issue before replacing the cam—sometimes low power can mimic a bad cam.
Preparation is half the battle—having the right part on hand means less frustration and fewer “oops” moments while your door is in pieces.
Step-by-Step: Diagnosing a Worn Cam in Your Handleset
Let’s break down the process of figuring out whether the cam is actually your problem. Handleset troubleshooting is a bit like detective work—eliminate the easy stuff first, then target the tricky bits.
1. Remove the Handleset:
- Open the door to access both sides of the handleset.
- Look for screws on the inside portion (sometimes hidden beneath a cover plate).
- Use the correct screwdriver to remove all mounting screws. Keep them in your tray.
2. Inspect the Internal Mechanism:
- Gently pull apart the handleset so you can see the internal cam and spindle.
- Look for obvious wear, flattening, or grooves on the cam. If it looks chewed up or lopsided, that’s your problem.
- Check that the spindle (the rod that connects the handles) isn’t stripped or bent.
3. Test the Cam:
- Lightly turn the handle with the set disassembled. The cam should grasp and turn the latch mechanism firmly. If it slips or feels too loose, it’s worn.
If you can see shiny, uneven metal where the cam meets the latch, or if things don’t line up, you’ve found your culprit. On smart or electronic handlesets, disconnect the remote or battery before starting, then check if the cam is physically worn rather than just out of sync due to a battery or code issue.
How to Replace a Worn Handleset Cam
Once you’ve confirmed the cam is the problem, replacing it isn’t rocket science. Here’s how I’d tackle it, step by step.
1. Match the Replacement Cam:
- Take the worn cam to your hardware or locksmith shop, or search for your brand (Kwikset, Schlage, etc.) online. Make sure you match the size and shape.
2. Install the New Cam:
- Line up the new cam with the spindle and latch mechanism, following the same orientation as the old one.
- Slide everything back together and make sure the parts fit snugly. Some handlesets have a little detent or tab that helps the cam lock into place—don’t force it, but make sure it’s secure.
3. Reassemble the Handleset:
- Reattach the inside and outside handles, threading the screws back through the holes.
- Tighten everything evenly so the handle sits flush on both sides of the door.
4. Test the Repaired Handleset:
- Try the handle several times with the door open before closing it. Make sure the latch retracts and springs back with normal pressure.
- If you have a remote or key code entry, sync everything up and check that the electronic lock works as expected. Replace the battery if needed.
If anything feels off—maybe it’s still a bit loose or not resetting properly—double-check that you’ve used the right cam and that all screws are secure. Don’t be afraid to take it apart again. It’s better to get it right now than to end up back at square one.
When to Call a Pro: Beyond DIY Handleset Repairs
Let’s be real—sometimes a loose handleset isn’t something you want to mess with on your own. If you’ve followed all the troubleshooting steps and your handleset is still loose, or if your lock simply won’t sync up (especially on electronic models), it might be time to call in the cavalry.
Here’s when you might want a locksmith or handyman:
- Your handleset is an expensive or antique brand (like Baldwin Estate or a custom Yale).
- The door itself is damaged, out of alignment, or weathered beyond a basic repair.
- You’ve broken or stripped a screw, or the mounting plate is damaged.
- Your lock code, remote, or battery system is acting up AND the cam is worn—sometimes these issues overlap and need a pro’s touch.
A good professional can usually replace a cam, sync up electronic locks, or reset your entire system in less than an hour. Yes, it might cost a bit more, but sometimes the peace of mind is worth every penny—especially when security is on the line.
Comparing Handleset Types: Universal vs. Brand-Specific Solutions
You might be tempted to just grab any “universal” cam or handleset repair kit from the hardware store. But here’s the deal—fit really matters. Handlesets from different brands (Kwikset, Schlage, Baldwin, etc.) each have their own cam shapes, spindle sizes, and screw placements.
- Universal replacement cams may work for some older or very basic hardware, but often don’t fit newer, higher-security models.
- Brand-specific cams are designed to match the lock’s code, latch movement, and reset mechanism perfectly. They’re usually worth searching out for a lasting fix.
- If your handleset has a remote or programmable keypad, always look up the manufacturer’s troubleshooting guide before swapping parts. Some systems need to be put in a “pair” or “reset” mode after a hardware change, especially if the battery was removed.
Think of it like trying to put the wrong batteries into a remote. Sure, something might fit in the slot, but unless it’s the right size and power, things just won’t sync up. When in doubt, go with the exact match for your brand and model—even if it takes a few extra days to order.
Preventing Future Handleset Cam Wear
Nobody wants to fix the same problem twice. Luckily, there are some easy, practical ways to keep your handleset in top shape and stretch out the life of that humble cam.
- Keep everything snug: Every few months, check and tighten the screws on both sides of the handleset. Loose screws mean more movement—which wears down the cam faster.
- Lubricate smartly: Use a dry graphite or silicone spray on the cam and latch assembly twice a year. Don’t flood it—just a little spritz helps everything move in sync and reduces friction.
- Handle with care: Don’t “slam” or yank on your handleset. Gentle, steady pressure is all you need to avoid over-stressing the cam.
- Monitor electronic models: For smart locks or keypad-entry sets, replace the battery regularly and keep the lock code updated. Any lag, reset, or sync problem can put extra stress on the internal cam if left unchecked.
A little prevention goes a long way. Honestly, if you get in the habit of checking your door hardware when you do things like swap out a smoke detector battery, you’ll keep everything running smoothly—and avoid that “oh no” moment when your handle suddenly goes limp.
Handleset cams might be hidden out of sight, but a little routine care and troubleshooting keeps your front door working like new, every time you come home.
Wrapping Up: Getting Your Handleset Firm and Reliable Again
A loose door handle can put a serious damper on that “I’m home!” feeling. But most of the time, the issue comes down to a worn cam—a small part with a huge job. Whether you’re dealing with a classic Kwikset or a fancy remote-controlled smart lock, the process of troubleshooting, diagnosing, and replacing a worn cam is pretty manageable once you know where to look.
Remember to take your time, match your parts, and double-check that everything’s back in sync (especially with electronic or battery-powered handlesets). Don’t be afraid to ask for help if you need it—sometimes a second set of eyes is what it takes to get those last stubborn bits working right.
Fixing this problem isn’t just about tightening up your hardware—it’s about restoring a little bit of peace of mind and making sure your home feels solid and secure every day. Now that you’ve got the know-how, your handleset will be back to its firm, reliable self in no time.