Imagine you’re at home, ready to step out, but the door handle suddenly breaks. It’s like a scene straight out of a movie—you’re stuck, and the tension builds. Maybe you have a brand like Kwikset or Schlage in your home. Whatever it is, knowing how to troubleshoot that snapped component can save you time, money, and a lot of hassle. So, let’s break down the steps you need to take to get that door back in shape.
Identifying the Broken Component
First things first: you need to pinpoint exactly what part has snapped. Is it the door handle, the lock mechanism, or perhaps a hinge? A clear understanding of the problem is crucial.
– Door Handles: If the handle feels loose or won’t turn, check if the spindle (the metal part connecting the two handles) has broken.
– Lock Mechanism: If you’re having trouble turning the key or the lock isn’t engaging, the internal mechanism may be compromised.
– Hinges: If the door hangs unevenly or creaks when you open it, inspect the hinges for damage.
To visually inspect, you may want to remove the handle or lock cover. Just keep a small toolkit handy—you might need a screwdriver.
Gathering Replacement Parts
Once you’ve identified the broken piece, it’s time to gather your replacement parts. Here’s how to proceed:
1. Check Manufacturer: If you’re dealing with a specific brand like Kwikset, visit their website. They often have replacement parts available directly for purchase.
2. Visit Local Hardware Store: If you’re in a rush, a trip to your local hardware store can be quick. Bring the broken piece along to match sizes and types.
3. Consider Universal Parts: In some cases, you might prefer universal parts. These can be versatile and work with various brands, which is handy if you’re ever in a pinch.
Before you buy, double-check that what you’re picking up matches the size and type of your original part.
Tools You’ll Need
Before diving into the repair, make sure you have the right tools. Here’s a quick list:
- Screwdriver (usually a flathead or Phillips)
- Replacement part(s)
- Measuring tape (if you need to ensure the right fit)
- Utility knife (for removing old hardware if necessary)
You might already have some of these tools lying around, but if not, it’s worth investing in a set. Honestly, having a few basic tools can help with many other home repairs down the line.
Step-by-Step Repair Process
Now, let’s go through the repair process. Keeping it simple is key. Here’s how to proceed:
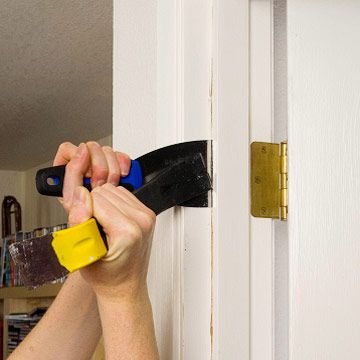
Removing the Broken Component
– Start by unscrewing any visible screws holding the broken part in place. Don’t rush—patience is your best tool here.
– Carefully pull off the broken piece. If it’s stuck, gently wiggle it until it comes free.
Installing the Replacement
– Align the replacement part with the existing holes. This step is crucial; if it’s off, the door may not open or close correctly.
– Insert screws and tighten them securely. You don’t want anything loose when you’re done.
Testing the Repair
– After installation, give the door a few test runs. Open and close it a couple of times to make sure everything is functioning smoothly.
Don’t hesitate to revisit any steps if something doesn’t feel right. It’s better to ensure everything is perfect than to rush and have to redo it later.
Additional Troubleshooting Tips
If the door hardware still isn’t functioning correctly, here are a few troubleshooting tips:
– Check Alignment: Sometimes, the problem isn’t just the component itself. Ensure everything is properly aligned. A misaligned door can cause wear and tear on components.
– Lubricate: If the door feels stiff even after the repair, apply some lubricant to hinges and locks. A little can go a long way in ensuring smooth operation.
– Revisit the Manual: If you have it, refer back to the installation manual for specific troubleshooting steps related to your brand.
Taking these additional steps can save you from future problems and prolong the life of your door hardware.
Prevention Tips for the Future
Now that you’ve successfully repaired your snapped component, let’s talk about how to prevent this from happening again:
- Regular Maintenance: Check door hardware every few months. Tighten screws and look for signs of wear.
- Choose Quality Components: Investing in good-quality locks and handles can prevent future issues.
- Be Gentle: Avoid slamming doors or pulling on handles too hard. A gentle touch goes a long way.
By staying proactive, you can catch potential issues before they become a headache down the road.
When to Call a Professional
There are instances when DIY just isn’t enough. If you’re facing ongoing issues with your door hardware or if the repair feels beyond your skill level, don’t hesitate to reach out to a professional.
Here’s when you might want to call in the experts:
– Multiple Components: If several parts are damaged, it may indicate a larger issue.
– Complex Mechanisms: Some lock systems are intricate. If your lock requires special tools or knowledge, it’s worth getting a pro.
– Time-Sensitive Situations: If you’re pressed for time (maybe you’re moving or hosting guests), a professional can ensure everything is secured quickly.
Remember, there’s no shame in asking for help, especially when it comes to the security of your home.
In conclusion, dealing with a snapped door hardware component can feel daunting, but with a clear process, you can tackle it like a pro. By identifying the broken part, gathering the right tools, and following a straightforward repair process, you can get your door back on track. Don’t let a little hiccup keep you from enjoying your home—get in there and fix it!