Imagine you’re in your living room, ready to hang a door. You’ve planned it all out, but as soon as you start, you realize that the holes for the hardware are mismatched. It’s like preparing a delicious meal only to realize you’ve left out a key ingredient. But instead of tossing everything out, you can troubleshoot the situation and make it right. Let’s walk through how to tackle this issue step-by-step and ensure your door can operate smoothly again.
Identifying the Problem with Your Door Frame
First things first: Before you can fix an incorrectly drilled door frame, you need to identify what exactly went wrong. Was the hole drilled too deep? Too shallow? Maybe it’s not even in line with the hardware. Each scenario requires a different approach.
Look closely at the drill holes. If they’re not aligned with the hardware you’re using, it might be time to reassess your options. You should also check if the screws can still hold the hardware. If they’re loose or feel wobbly, that’s a sign the holes were not drilled correctly.
Think about the door frame as the foundation of a house. If the foundation isn’t solid, everything built on it can be unstable. So, understanding the nature of the problem is crucial before diving into fixes.
Tools You’ll Need for Troubleshooting
Now that you know what went wrong, let’s gather the tools you’ll need to address the issue. Here’s a handy list to make your life easier:
- Drill
- Wood filler or epoxy
- New screws or hardware
- Measuring tape
- Wood clamps
- Screwdriver
Each of these tools plays a vital role in fixing your door frame. The drill will help you make any necessary adjustments, while wood filler can smooth out any mistakes. New screws might be needed if the current ones won’t hold, and the measuring tape is key for ensuring everything is lined up correctly.
Before you start, take a moment to gather everything. Having your tools on hand will make the process smoother, kind of like having all the ingredients ready before starting to cook.
Repairing Oversized or Misaligned Holes
If you discover that the holes are too large or misaligned, don’t panic! There are ways to fix this. One popular method is to use wood filler or epoxy. Here’s how:
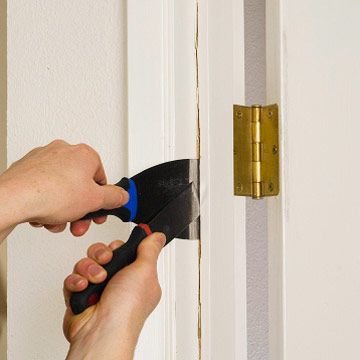
1. Clean the Area: Remove any debris or loose wood from the drilled hole to ensure the filler adheres properly.
2. Apply the Filler: Use a putty knife to fill the holes completely. Make sure to overfill slightly, as it can shrink when it dries.
3. Smooth It Out: Once the filler has dried, sand it down until it’s flush with the door frame.
4. Re-drill: Finally, once the filler is hardened, you can measure and drill new holes in the correct positions.
This process is similar to patching a hole in the wall—simple yet effective. Just take your time and make sure everything is lined up right before going in for the new holes.
Using Anchors for Extra Support
Sometimes, even after fixing the holes, you might worry they won’t hold up under pressure. In this case, using wall anchors can be a smart solution. Anchors give added support to screws, ensuring they grip the material securely.
To use wall anchors:
1. Choose the Right Size: Make sure the anchors match the size of your screws.
2. Drill a New Hole: Slightly larger than the anchor itself, the new holes should be placed in a stable area of the frame.
3. Insert the Anchors: Gently tap the anchors into the holes until they’re flush with the surface.
4. Attach the Hardware: Finally, screw in your hardware through the anchors.
This added layer of support can make your door feel solid and reliable, like a sturdy bridge holding up traffic.
Replacing Damaged Hardware
If your hardware is damaged or too old, it’s wise to consider replacing it. Sometimes, trying to salvage old parts can do more harm than good. Here’s how to go about it:
1. Remove the Current Hardware: Unscrew everything carefully.
2. Select New Hardware: Choose a door handle or hinge that fits your style but also matches the new drill holes.
3. Install the New Hardware: Follow the manufacturer’s instructions for installation. This often involves aligning the hardware with the new holes and securing it with the screws.
When replacing hardware, think about it like updating your wardrobe. Sometimes, an old piece just doesn’t fit anymore, and replacing it with something new can make all the difference.
Final Adjustments and Testing
Once you’ve repaired the door frame and installed the hardware, it’s time for a test run. Open and close the door gently to check for any sticking or wobbling. If it doesn’t open smoothly, don’t worry; minor adjustments can often solve the problem.
Look at the hinges. Are they aligned correctly? Sometimes, a simple turn of a screw can make a big difference. You might also need to adjust the strike plate on the frame, which helps the latch catch properly.
This part is similar to tuning a musical instrument. You might need to make several small adjustments to get the perfect sound—or in this case, the perfect swing.
Preventing Future Issues
To avoid facing a similar situation down the line, consider some preventive measures.
– Double-Check Measurements: Always measure twice before drilling. It’s a classic tip that saves frustration.
– Use a Template: Many hardware kits come with installation guides. Use them to mark where to drill accurately.
– Consider Professional Help: If DIY projects feel overwhelming, hiring a professional might save you time and stress.
Taking these precautions can make all the difference. It’s like brushing your teeth daily—prevention can save a lot of trouble in the long run.
In conclusion, troubleshooting a door frame that was drilled incorrectly doesn’t have to be a headache. With the right tools and techniques, you can make it work again. Just remember, it’s all about patience and precision. Before long, you’ll have a door that swings smoothly, keeping your home secure and stylish.