Let’s be honest—installing a deadbolt in wood is usually straightforward. But swap in a steel door, and you need more patience, better tools, and a little troubleshooting know-how. Different brands, like Schlage, Kwikset, or Yale, tend to follow the same basic steps, but the tough outer shell of a steel door doesn’t play by the same rules as wood. If your deadbolt is getting stuck, not lining up, or just won’t go in at all, you’re not alone—and you’re definitely not the first person to wonder if your door is secretly made of spaceship-grade metal.
Here’s the thing: with a bit of prep and the right techniques, you can absolutely get that deadbolt mounted securely, even on the most stubborn steel. Let’s walk through the most common headaches—and the simple fixes—for deadbolts that refuse to cooperate with steel doors.
Why Deadbolt Installation Is Harder on Steel Doors
So, why does a steel door make this so much more complicated? Well, it isn’t just about brute strength. Steel doors are built with a thin layer of metal wrapped around a core—sometimes foam, sometimes wood. That means you’re not just dealing with hard metal, but also a mix of surfaces that react differently to drilling and screwing.
For one, steel is far less forgiving than wood. If your drill bit slips or your hole isn’t perfectly centered, it’s not just “oops, try again.” The metal can get bent, warped, or chipped. Also, steel naturally resists drilling, so your basic toolbox bits might dull fast or refuse to make a dent. Another issue? The inner core can be damaged by too much pressure, leaving you with a wobbly lock or a compromised door.
And let’s not forget heat. Metal heats up as you drill, which can melt certain cores or gunk up your bits. If you feel your tools getting hot, it’s not your imagination—and it’s a sign to slow down. All this adds up to a job where patience and precision matter way more than muscle. If you’ve struggled to “sync” the deadbolt parts with the tight space in a steel door, trust me, you’re not alone.
Getting the Right Tools for Steel Door Deadbolt Installations
Here’s the truth: using the wrong tools is the number one reason people struggle to install a deadbolt on a steel door. You might be tempted to grab your regular wood drill bits and hope for the best, but that’s a recipe for frustration—and ruined hardware.
What you really need is a set of high-speed steel (HSS) or cobalt drill bits. These are designed to cut through metal cleanly and won’t dull as quickly. Even better? An adjustable hole saw with teeth rated for metal, not just wood. This will help you “pair” the deadbolt to the door with a perfectly round opening.
You’ll also want:
- Safety glasses (metal shavings fly—don’t risk your eyes)
- Tape measure and marker (accuracy is everything with steel)
- Masking tape (to help prevent scratches and wandering bits)
- Vacuum or magnet (for picking up pesky metal shards)
Honestly, investing in the right gear will save you hours and prevent nasty mistakes. If you don’t have these tools at home, most hardware stores rent them out. Remember, prepping your work area matters just as much as the tools—clean the door, clear your workspace, and make sure your batteries are charged if you’re using a cordless drill.
Common Deadbolt Installation Problems on Steel Doors
You might be wondering what can go wrong—besides, well, everything. Here’s what most people run into:
1. The hole is too small or misaligned. Steel doesn’t “give” like wood, so if your pilot hole is off by even a couple millimeters, the bolt won’t fit right or the remote parts of the lock won’t line up. This can make the deadbolt impossible to turn or “code” correctly with your key.
2. Deadbolt won’t sit flush. Sometimes, the faceplate doesn’t rest against the door, or the lock mechanism rocks from side to side. This usually means the hole isn’t deep enough or the edges are too rough—common with steel.
3. Trouble with screws or parts stripping. Steel is so hard that regular screws can strip, snap, or refuse to thread in. You might end up with a lock that never tightens or won’t stay attached.
4. Latch won’t align with strike plate on frame. Even a small error can throw off the strike alignment. With steel, it’s much harder to “reset” or nudge the parts into place without fancy tools.
5. Wires or insulation damaged in smart deadbolts. More advanced deadbolts have battery packs or wires. Accidentally slicing through these when you drill can “sync” your lock out of order.
Each of these problems can be frustrating, especially if you’ve never tackled a metal door before. Thankfully, there are fixes for each one.
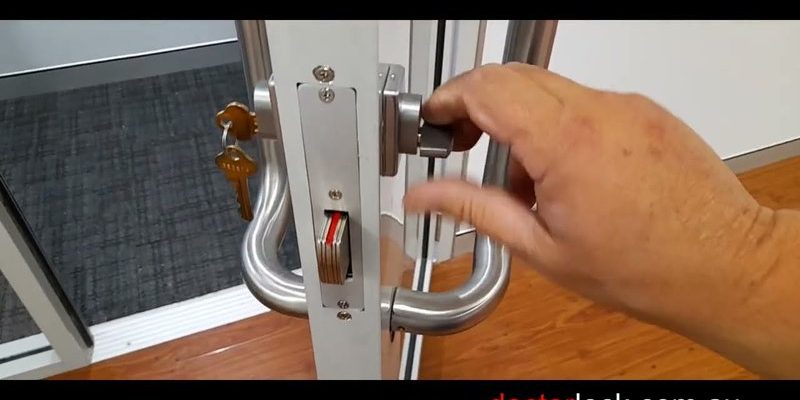
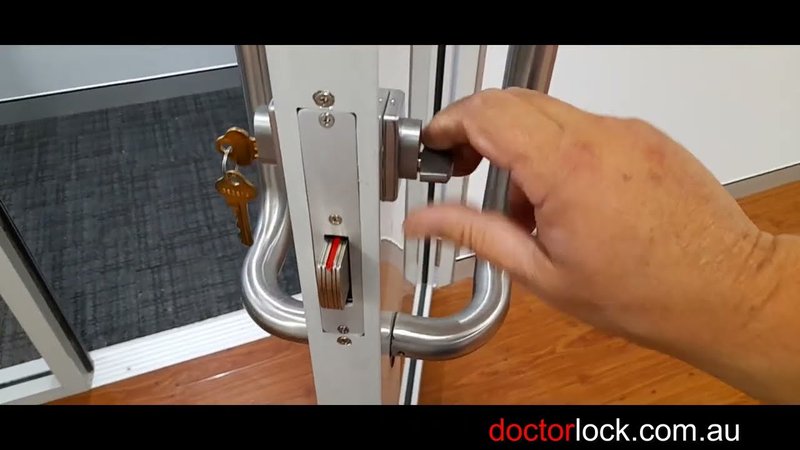
Step-by-Step: How To Install (and Troubleshoot) a Deadbolt on a Steel Door
You might be dreading this, but don’t worry—I’ve got your back. Here’s how to handle it, step by step:
1. Mark your spot. Use the template that came with your deadbolt (popular brands like Schlage or Kwikset include one). Line it up at the standard height—usually 6 to 8 inches above your door handle. Use a pencil or marker so it’s clear and bold.
2. Drill a pilot hole. Stick masking tape over where you’ll drill to stop the bit from skating. Start with a small pilot hole—about 1/8 inch—right through the steel layer. Go slow, and don’t push too hard.
3. Cut the main hole. Switch to your hole saw for metal and cut out the main deadbolt cylinder hole. Again, go slowly, and let the tool do the work. If your drill or bits heat up, back off and let them cool.
4. Drill the latch hole. Using an HSS or cobalt bit, drill the latch hole in the door’s edge. This usually lines up with your main cylinder hole, but double-check before drilling all the way through.
5. File down rough edges. Metal holes will almost always have sharp burrs or rough patches. Grab a metal file and smooth down the inside and outside. This prevents the lock from jamming or snagging.
6. Test-fit the deadbolt. Insert the deadbolt body and see if it sits flush. If it doesn’t, check for obstructions or burrs. Make sure the holes “pair” up so the cylinder and latch work together.
7. Secure with proper screws. Most deadbolts include specialized screws. If yours seem to strip, switch to self-tapping metal screws. They’ll bite into the steel better and hold the lock tight. Don’t over-tighten—steel doesn’t compress like wood.
8. Install the strike plate. The frame around a steel door can be just as tough. Use the same pilot-hole and metal-drilling techniques—don’t try to force wood screws here.
9. Check function and alignment. Try your key or, for a smart lock, test the battery-powered functions. Make sure the lock “codes” properly and the latch slides smoothly into the strike plate. If it sticks, you might need to reset the alignment by re-drilling the frame holes just a touch wider.
It sounds like a lot, but each step is basically about slowing down, double-checking, and using the right tool for the job.
What To Do If the Deadbolt Still Won’t Work
You’ve followed all the steps—and the deadbolt still won’t budge, lock, or align. Here’s what to check next:
First, double-check your holes. It’s easy to think you’ve drilled wide enough when in reality, the steel lip is still crowding the lock. Sometimes, just a few extra turns of the metal file can make the difference.
Second, if the deadbolt “sticks” when you turn the key or remote, try lubricating the mechanism. Use a graphite-based powder or a tiny drop of standard lock lubricant—never use oil, which can gum up.
For smart or motorized deadbolts with batteries, make sure the wiring hasn’t been pinched or cut during installation. If your lock won’t “sync” with its app or remote, try resetting the system according to the brand instructions. Sometimes it’s as simple as popping out the battery and putting it back in.
If the screws won’t grip, upgrade to longer or thicker self-tapping screws made for metal. Hardware stores offer plenty of options, and just a switch in screw type can instantly fix a loose or wobbly lock.
Finally, if all else fails, don’t force anything. Disassemble the lock and start again with fresh holes—trying to ram a deadbolt into a misaligned or too-tight opening will only wreck the hardware or damage your steel door. Trust me, it’s worth the extra effort to get it right.
Helpful Tips for Avoiding Common Installation Mistakes
Here’s where a little experience goes a long way. Here are some tips I wish I knew my first time dealing with a steel door:
- Always measure twice. Mark your holes and then double-check against both sides of the door before drilling. Steel doors can be expensive to replace if you mess up the placement.
- Clamp a wood block behind your hole saw. This helps keep the drill from “blowing out” the back side and protects the inside surface of your door.
- Use tape to catch metal shavings. Masking tape not only prevents scratches but also helps collect steel dust, saving your floors and your eyes.
- Take breaks to cool your bits. Drilling through steel heats up quickly. If your bit starts to smoke or discolor, pause and let it cool—it’ll last much longer.
- If in doubt, call for backup. Sometimes it’s worth having a friend hold a flashlight or even tag in a local locksmith for tricky cases. There’s no shame in getting help with a stubborn steel door.
Even if you don’t get it perfect the first time, each lesson makes the next attempt easier.
Alternatives to Drilling a Deadbolt Into Steel Doors
Honestly, not every door needs a drilled-in deadbolt. You might have a situation where you want extra security, but you’re worried about damaging the steel or voiding a warranty. Here are a few other options to consider:
- Surface-mount deadbolts. These mount directly to the door surface using screws, so you don’t have to cut a cylinder hole. They’re less sleek but can offer a quick “code” upgrade, especially for rentals or older doors.
- Keypad or smart locks with adhesive mounts. Great for renters or anyone wanting to avoid permanent changes. Just be sure they’re rated for outdoor use and tough enough for steel.
- Professional locksmith installation. If you’re nervous or have a custom door, a locksmith can drill and fit the lock with specialized tools, often faster and with less risk of error.
No shame in exploring easier paths if the steel is giving you a headache. Sometimes it really is better to let the pros handle the hardest jobs—or to pick a lock that requires less intense prep.
When To Call In a Locksmith
Let me be blunt: there’s a point when “DIY” stops being fun and starts risking your door—or your sanity. If you’ve tried the above steps, used the right bits, and the deadbolt still won’t install or function, there’s no harm in calling a pro.
A locksmith has heavy-duty drills, perfect-pair hole saws, and the know-how to “reset” any mistakes. If your deadbolt brand has special requirements (like certain Schlage smart locks needing wired connections), they’ll know how to keep the warranty intact. It might cost a little more, but it’ll give you peace of mind—and a secure, properly installed lock.
Even the toughest steel door isn’t a match for the right mix of patience, tools, and troubleshooting. There’s no shame in asking for help if you’re stuck.
Final Thoughts on Troubleshooting Deadbolts in Steel Doors
Installing a deadbolt on a steel door can feel intimidating, especially if it’s your first time wrestling with metal, precision measurements, and fussy lock brands. But with solid planning, the right bits, and a bit of troubleshooting know-how, you’ll end up with a lock that syncs perfectly and keeps your home secure.
Don’t rush the process. Slow down, double-check each step, and don’t hesitate to back up if something feels off. Whether you’re working with a Schlage remote smart lock or a classic manual deadbolt, the secret is respecting the steel—and knowing when to call for help.
At the end of the day, a properly installed deadbolt is more than just a project—it’s peace of mind, every time you turn the key or tap the remote. Take your time, and you’ll get there.