Here’s the thing: a deadbolt isn’t just a metal stick holding your door shut. It’s a precise set of parts moving together. When moisture sneaks in—thanks to rain, humidity, or just time—it reacts with the metal inside your deadbolt. That leads to corrosion, which can jam up the lock, make it hard to turn, or even keep you locked out of your own house. If you’re staring at a corroded deadbolt and wondering how to fix it, or if you’ll need an expensive locksmith, you’re not alone. Let’s break down what’s really going on inside that lock and how you can get it working again.
What Does Corrosion Do to a Deadbolt?
Corrosion inside your deadbolt isn’t just unsightly—it’s a mechanical nightmare. Metal parts depend on smooth movement, but when they start to break down, you’ll quickly notice. Over time, corroded areas can actually fuse or grind against each other, making it harder and harder to turn the key or thumbturn. You might notice a gritty feeling, a squeak, or even a complete lockup.
Honestly, it’s easy to ignore the first signs. Maybe you just use a bit more force to turn the key and hope it’ll fix itself. But because corrosion eats away at the metal, your lock’s internal code (the precise fit of pins and springs) can get thrown off. That causes more trouble than just a sticky key; it can make the lock fail altogether.
The worse the corrosion, the trickier the troubleshooting. If you spot green, white, or red crust on the inside, you’re dealing with a chemical reaction—either copper oxidation or plain old rust. Sometimes, you’ll also see a powdery buildup that looks a bit like baking soda. Leaving it untreated means risking a jammed or broken lock, which nobody wants.
Why Are Deadbolts Prone to Corrosion?
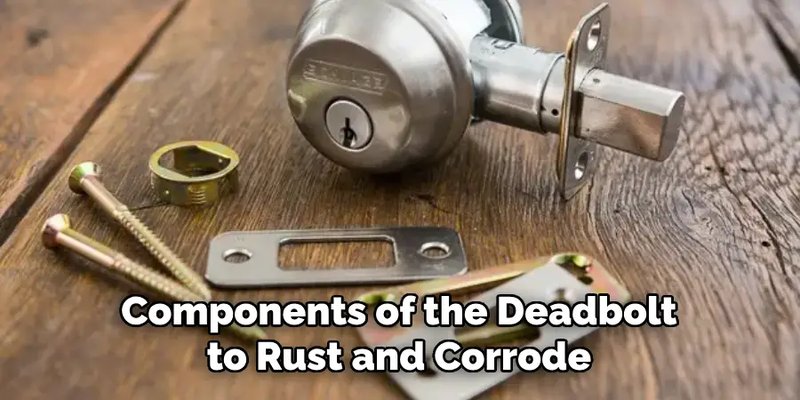
You might be wondering: why did this even happen? Deadbolts are supposed to handle the outdoors, right? The reality is, even the best brands like Schlage or Kwikset aren’t immune to *moisture*—their biggest enemy. If you live somewhere with wet or humid weather, moisture can seep in around your door frame or right into the lock’s tiny gaps. Over time, this causes trouble.
Door hardware is usually made from metals like brass or steel, which can resist rust for a while but aren’t invincible. If your door lacks good weatherstripping, or if you’ve got condensation building up inside, it gets worse. Sometimes older doors just settle, leaving the lock a little loose and letting more air (and water) in.
Even if you’re super careful, humidity and temperature swings can pull moisture right into the lock’s core. That’s especially true for remote-entry deadbolts with batteries, which sometimes leak if they get damp. Batteries plus corrosion? That’s double trouble, and it can cause both mechanical and electronic failure.
How to Visually Inspect a Corroded Deadbolt
First things first: don’t panic if you notice corrosion. Start with a proper inspection. Remove the deadbolt’s inside plate (usually with a couple of Phillips screws) so you can see what’s really going on. Shine a flashlight into the mechanism—look for any reddish, brown, or greenish areas on the moving parts.
Check these spots:
- The bolt itself (the part that moves in and out)
- Spring-loaded parts and pins
- The area where the key fits in
- Battery compartment, if it’s a smart or remote deadbolt
While you’re in inspection mode, gently wiggle or try to operate the lock. Watch for parts that look frozen or rough. If you see flakes or powder falling out, that’s a sign things have started to break down inside.
If you’re dealing with a smart deadbolt from Yale, August, or similar brands, take extra care around wiring and the battery pack. Corrosion can eat away at the battery terminals, making the remote code or sync functions unreliable. If those don’t work, you’ve got both a mechanical and electronic troubleshooting job ahead.
Basic Steps to Fix a Corroded Deadbolt
Once you’ve sized up the mess inside your deadbolt, it’s time to get hands-on. Here’s the step-by-step to bring things back to life:
1. Remove the Deadbolt
- Take off both the inside and outside plates with a screwdriver
- Slide out the deadbolt mechanism gently
- If you have a remote lock, unclip the battery pack first
2. Clean Off the Corrosion
- Use a dry toothbrush or a small wire brush to scrub away loose rust and buildup
- For stubborn spots, dip the brush in white vinegar (but go easy—too much liquid can make things worse)
- Wipe all parts dry with a paper towel or microfiber cloth
3. Apply Lubricant
- Spray a small amount of non-greasy lock lubricant (like graphite powder or a Teflon spray) into the lock body
- Work the mechanism back and forth to spread the lubricant
- *Avoid using WD-40 or oil-based sprays inside the lock—they attract dust and can gum things up later*
4. Reassemble and Test
- Put all parts back together carefully
- Test the lock with the key or remote—make sure it moves smoothly
- If you took out a battery pack, replace the batteries with new, fresh ones
Most of the time, this process brings even stubborn deadbolts back to life. If things still feel rough or jammed, there’s probably deeper damage inside—and you might need a new lock.
When to Replace vs. Repair Your Deadbolt
Let me explain. While a good cleaning can work wonders on a mildly corroded deadbolt, sometimes the damage goes too deep. If your lock still resists after cleaning, or if you notice broken or pitted metal, it’s safer and simpler to replace the whole lock. Here’s how to tell:
If the key won’t turn at all, the core won’t reset or pair, or if your remote deadbolt keeps losing battery connection even after cleaning, it’s probably time for a new lock.
Trying to keep an old, corroded lock going can leave you stranded, especially if it’s your main entry. Modern deadbolts aren’t that expensive, and switching to a new one (universal or brand-specific like Kwikset, Schlage, or Yale) is usually a straightforward DIY job. If you’re replacing a smart or remote lock, make sure to sync or pair the new deadbolt with your existing system, and reset any codes before use.
Honestly, peace of mind is worth a lot. If you’re always fiddling with the lock and worried it’ll jam, don’t take chances—upgrade it.
Preventing Corrosion in Your New or Repaired Deadbolt
You probably don’t want to go through this hassle again. So how do you keep your deadbolt from corroding in the future? It really comes down to minimizing moisture.
- Make sure your door fits tightly and weatherstripping is in good shape. Gaps let in rain and humid air.
- Routinely give the lock a wipe-down with a dry cloth, especially after wet weather.
- If you have a smart lock, check the battery compartment every few months for leaks or corrosion, and replace batteries at the first sign of trouble.
- About twice a year, spray the inside with a little dry lubricant—this keeps parts moving smoothly and helps repel water.
If you live near the ocean or in a super humid area, you might want to look for deadbolts made from stainless steel or with a protective coating. Some high-end models are built to resist corrosion right out of the box. If you’re installing a new smart deadbolt, make sure its battery and wiring caps are sealed tightly after any sync or reset steps.
Comparing Brand-Specific vs. Universal Deadbolts for Troubleshooting
You might be thinking: does it matter if I use the original brand deadbolt or a universal replacement? For most doors, a universal deadbolt will work just fine—these are designed to fit standard holes and thicknesses. However, if you have a remote or smart deadbolt from a brand like Yale, Schlage, or Kwikset, there’s more to consider.
- Brand-Specific Deadbolts: Easier to install, better fit and finish, and they sync with your existing remote or smart home system. Codes and pairing instructions are usually straightforward.
- Universal Deadbolts: More flexibility and often cheaper, but you may need to adjust the fit or swap out batteries. If you have a smart system, make sure the new lock supports your remote’s pairing process and can be reset correctly.
For troubleshooting, sticking with the same brand as your original deadbolt often makes life easier, especially if you need to match up code or battery features. If your remote system is acting up after replacing a corroded lock, double-check the pairing and sync instructions before calling support.
When to Call a Locksmith (And When You Don’t Have To)
Here’s where a lot of people get stuck: is it time to call in a pro, or can you handle it yourself? Most routine corrosion fixes, like cleaning and basic resets, are totally DIY-friendly with a screwdriver and some patience. But there are times when calling a locksmith just makes sense:
- If the lock is completely seized or the key breaks off inside
- If you’re dealing with a high-security remote lock and can’t reset or pair it after troubleshooting
- If your door or lock seems out of alignment—sometimes, the problem isn’t just the deadbolt
Locksmiths can often repair or re-key a corroded deadbolt without replacing everything, especially if it’s a good-quality brand. They can also check for bigger issues, like water getting into the door itself or problems with your home’s entry wiring (for smart locks).
But honestly, if you’ve followed the cleaning steps above, swapped out the battery, and the deadbolt still won’t cooperate, it’s usually faster (and sometimes cheaper) to just install a new lock.
Bringing Your Deadbolt Back to Life—And Keeping It That Way
Corrosion in a deadbolt can be a real pain, but it’s not a death sentence for your front door. With the right tools and a little know-how, you can handle most troubleshooting tasks yourself—whether you’re just scrubbing off rust, syncing a remote, or deciding to make a clean swap for a new model. Remember, moisture is the main culprit, so focus on prevention once you’ve got things working again. And if you ever feel stuck, there’s no shame in calling a professional—sometimes, the peace of mind is worth it. In the end, a solid, non-corroded deadbolt means you can trust your door to do its job, rain or shine.