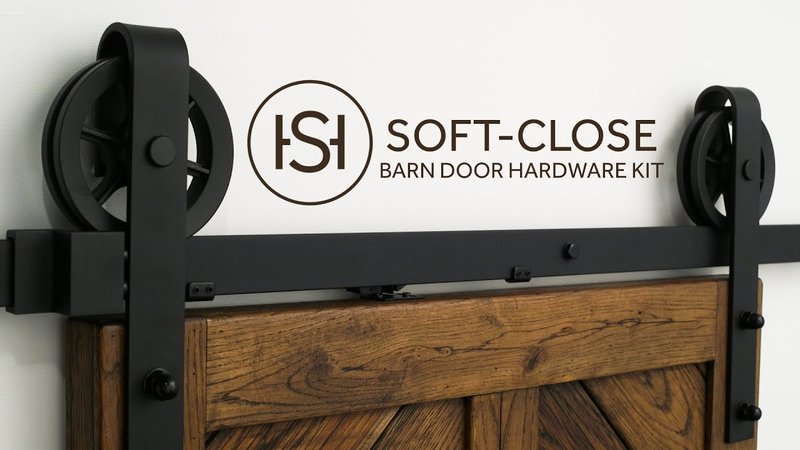
Installing soft-close hardware is a bit like teaching an old dog new tricks. It might seem challenging at first, but once you understand the process, it becomes much simpler. This guide will walk you through everything you need to know about retrofitting your old barn door. We’ll cover the tools, steps, and even a few tips for troubleshooting along the way. By the end of this article, you’ll confidently turn your barn door into a smooth-closing marvel.
Why Choose Soft-Close Hardware?
You might be wondering, “What’s the deal with soft-close hardware?” Well, imagine the serenity of your home being interrupted by a slamming door. Not ideal, right? Soft-close hardware uses a hydraulic system to gently close the door, reducing the noise and preventing damage to both the door and the frame. It’s like having a quiet friend who always knows when to ease off.
Soft-close hardware isn’t just about noise reduction. It also provides a safety feature, especially for little ones or pets who could get their fingers or tails caught in a closing door. With this setup, your old barn door becomes more user-friendly and safe. Plus, you can keep that rustic aesthetic while adding modern convenience.
Gathering Tools and Materials
Before diving into the installation process, it’s essential to gather your tools and materials. Having everything on hand can make the installation smoother and less frustrating. Here’s a quick list of what you’ll need:
- Soft-close hardware kit (make sure it’s compatible with barn doors)
- Drill and drill bits
- Level
- Measuring tape
- Screws and anchors (if not included in the kit)
- Safety goggles
- Stud finder (if mounting on drywall)
Having these items ready will help you avoid those annoying trips back to the hardware store mid-project. Trust me, nothing kills momentum quite like realizing you forgot something.
Measuring Your Barn Door
Now that you have your tools, let’s move on to measuring your barn door. Accurate measurements are crucial for ensuring that your soft-close hardware works effectively. Start by measuring the width and height of the door. It’s best to measure at several points because sometimes doors can warp a bit over time.
Use your measuring tape and jot down the numbers. You’ll also want to decide where the soft-close mechanism will attach. Generally, it should be placed about a third of the way down from the top of the door. This placement helps balance the door’s weight, making for smoother operation. Plus, it keeps the mechanism out of sight for that clean, polished look.
Installing the Soft-Close Hardware
Here’s the part you’ve been waiting for—the actual installation! Start by following the manufacturer’s instructions that come with your soft-close kit. Each kit can be slightly different, but the basic steps usually include:
1. Marking the Drill Points: Place the hardware on the inside of the door where you plan to attach it. Use a pencil to mark the spots for drilling.
2. Drilling: Put on your safety goggles and drill holes at the marked spots. Be careful to drill straight and true—this is crucial for a proper fit.
3. Attaching the Hardware: Using the provided screws, attach the hardware. Ensure it’s snug but don’t over-tighten, as this could cause damage.
4. Testing: After everything is installed, open and close the door several times to test the soft-close mechanism. If it’s not functioning smoothly, you might need to adjust the position slightly.
Remember, patience is key here. If something doesn’t seem right, take a moment to double-check your work.
Troubleshooting Common Issues
Even with the best preparations, things can occasionally go awry. If your soft-close hardware isn’t working as expected, here are a few common troubleshooting tips:
– Check the Alignment: If the door doesn’t close smoothly, it might not be aligned correctly. Use a level to check and adjust as needed.
– Revisit the Installation: Sometimes, simply tightening screws or repositioning the hardware can fix the problem.
– Lubrication: If your door seems stiff, spray a little lubricant on the hinges and the soft-close mechanism. Over time, dust can build up and cause sticking points.
With a little patience and the right adjustments, you can usually get everything working as it should.
Maintaining Your Soft-Close Mechanism
Once you’ve got your soft-close hardware installed, you’ll want to keep it in good shape for years to come. Regular maintenance is quite simple. Here are some tips:
– Keep It Clean: Wipe down the hardware every few months to remove dust and debris that can accumulate. A soft, dry cloth is all you need.
– Inspect Regularly: Check for any loose screws or signs of wear. Catching issues early can save you a lot of hassle down the road.
– Lubrication: As mentioned earlier, a little lubrication on hinges can go a long way. Just be careful not to overdo it—too much can attract dirt.
By regularly maintaining your soft-close hardware, you’ll ensure it continues to work smoothly and efficiently.
Retrofitting an old barn door with soft-close hardware is a straightforward project that provides several benefits. Not only does it enhance the functionality of your door, but it also adds to your home’s comfort and safety. With the right tools and a bit of patience, anyone can tackle this DIY project.
So, if you’re looking to transform that beloved barn door into something even more user-friendly, why not give it a shot? You might find that a little upgrade can make a big difference in your everyday life. Happy DIY-ing!
