In this guide, I’ll walk you through the entire process of replacing rollers on a pocket door step-by-step. Whether you have a standard pocket door or a specific brand like Johnson Hardware or Stanley, this guide is designed for beginners. You might be surprised at how simple the process is! Get ready to transform your door from a stickler to a smooth operator.
Understanding Pocket Door Rollers
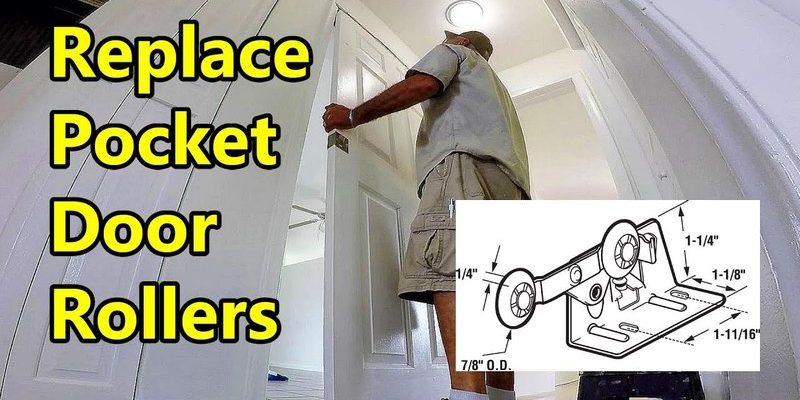
Let’s start with the basics. Pocket door rollers are small, essential components that allow the door to slide in and out of the wall cavity smoothly. Picture them as the wheels of a shopping cart. If those wheels aren’t functioning well, your cart is a pain to push. Similarly, if the rollers on your pocket door are worn or damaged, your door will stick or wobble, making it a hassle to use.
There are various types of pocket door rollers, from nylon wheels to steel ones. Nylon is quieter and less prone to rust, while steel tends to be sturdier. Depending on your door’s weight and design, you’ll want to decide which type is right for your replacement. The key is to match the new rollers with the style and weight of your door to ensure optimal function.
Now that you have a basic understanding, let’s get into the nitty-gritty of how to replace those rollers.
Gather Your Tools and Materials
Before diving into the replacement process, you’ll need to gather a few tools and materials. Here’s a handy list to get you started:
- New pocket door rollers (make sure they match your existing ones)
- Screwdriver (typically a Phillips and flathead)
- Measuring tape
- Step ladder
- Level (for proper alignment)
- Wood glue or adhesive (optional, for added stability)
Having everything on hand will make the process smoother and more efficient. Imagine trying to cook a meal without all the ingredients; it just doesn’t work well! The same goes for this project.
Safety First: Prepare the Area
Before you start, make sure the area around your pocket door is clear. Remove any furniture, rugs, or obstacles that might get in the way. You don’t want to trip over anything while you’re working! Also, it’s a good idea to lay down a drop cloth or some newspapers to catch any dust or debris.
Next, turn off any power to nearby fixtures, especially if your door includes electrical components like a light switch. Just think of it as giving your workspace some breathing room. Your safety is paramount, and taking these small precautions can prevent accidents down the line.
Remove the Pocket Door
Now we’re getting into the action! To replace the rollers, you’ll first need to remove the pocket door from its track. Here’s how to do it:
1. Open the Door: Slide the door fully into the pocket until it’s completely open.
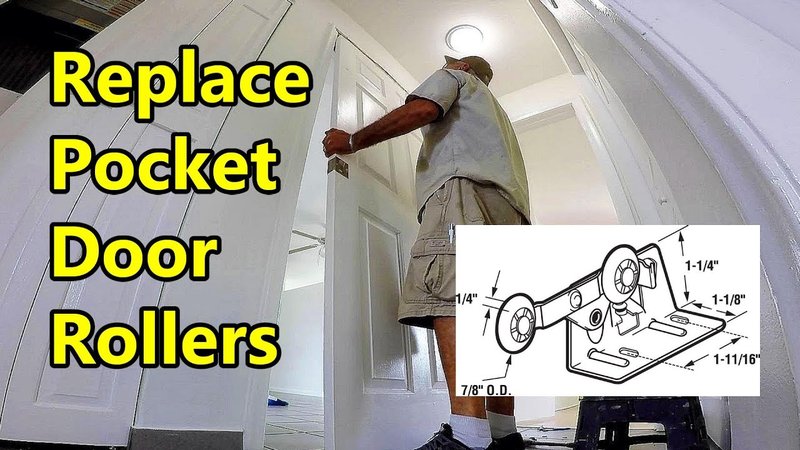
2. Locate the Roller System: Look at the top edge of the door. You should see the rollers attached.
3. Unscrew the Rollers: Use your screwdriver to carefully remove the screws holding the rollers in place. Remember to keep these screws safe because you’ll need them for the new rollers.
4. Lift the Door Out: With the rollers detached, gently lift the door up and out of the track. This might take a little wiggling. Just be patient!
Once the door is clear, you’ve officially set the stage for a smooth roller replacement!
Install the New Rollers
With the door off, it’s time to install your new rollers. Follow these steps:
1. Check Compatibility: Before you attach the new rollers, ensure they fit snugly into the same slots as the old ones.
2. Attach the Rollers: Line up each new roller with the pre-drilled holes on the top edge of the door. Use your screwdriver to secure them back in place, tightening them enough so they’re secure but not overly tight.
3. Adjust Height: Many pocket door rollers allow you to adjust the height. You might want to use a level here to ensure the door sits evenly. This is crucial for smooth sliding.
Taking a moment to double-check your work at this stage will save you headaches later on. It’s like proofreading your email before hitting send—always a good move!
Reinstall the Pocket Door
Now comes the exciting part: putting the door back in place. Here’s how to reinstall your pocket door:
1. Lift the Door: Angle the door slightly so it fits back into the track.
2. Slide the Door In: Gently push the door towards the pocket, making sure the rollers align with the track. It should glide smoothly.
3. Check Functionality: Once the door is in, give it a few test slides. Does it move easily? If it sticks, you may need to make minor adjustments either to the roller height or the alignment.
Once you’re satisfied with how it operates, you’ve officially completed the installation!
Final Adjustments and Maintenance
After your door is back on track, it’s wise to make a few final adjustments and keep maintenance in mind:
– Lubricate the Rollers: A little lubricant on the rollers can enhance their performance. Think of it like giving your door a refreshing spa day!
– Regular Checks: Make it a habit to check the rollers every few months to ensure they’re still functioning well.
– Watch for Wear: Keep an eye out for signs of wear and tear. If the door starts to stick again, it might be time for another roller replacement.
Regular maintenance can extend the life of your pocket door and prevent future issues, saving you time and frustration in the long run.
Replacing rollers on a pocket door is a manageable DIY task that can greatly improve your door’s functionality. By following these steps carefully, you’ll gain confidence in your ability to handle home repairs. Remember, it’s all about taking your time and ensuring everything is aligned and secure. With a little effort, your pocket door will glide smoothly like new, making your home feel even more welcoming.
So next time you’re faced with a sticky door, you’ll know exactly what to do. Happy DIY-ing!