Here’s the thing: you don’t have to buy an entirely new handleset or call a locksmith just because of a tired spring. Replacing a worn-out spring inside a door knob’s mechanism is actually a doable weekend project, even if you’ve never taken apart a lock before. It’s a little like changing the battery in a remote—once you know where everything goes, it’s just a matter of swapping things out and putting it back together.
Most modern handlesets, especially from popular brands, use similar internal setups. But the exact shape and style of spring might vary, so it’s helpful to know what you’re looking at before diving in. Whether you’ve got a classic twist knob or a more modern lever handle, the concept is the same. Let’s walk through how these springs work, why they fail, and what you’ll need to get your door handle feeling brand new again.
Why Does the Spring in a Door Knob Wear Out?
Door knobs and handles get more action than just about anything else in your house—think about it, how many times do you open and shut that front door every day? All those twists and turns slowly wear on the *return spring*, a thin piece of coiled metal that makes your knob or handle snap back to its neutral position. Over time, with enough cycles, that spring can either lose its tension, break, or even slip out of place.
Honestly, it’s a bit like the battery in your TV remote: it works perfectly until it suddenly doesn’t. You might notice the handle doesn’t spring back, or it hangs down instead of sitting straight. Sometimes you’ll even hear a faint “clunk” or “click” instead of a smooth movement. If you’ve got a Schlage or Kwikset handle, they often use the same U-shaped return spring. Levers, especially, can be more prone to this because gravity’s always pulling them down.
It’s not a sign your house is falling apart—it’s just physics and everyday wear. The good news is that a new spring costs almost nothing, and you can often find a universal replacement if you can’t get the exact brand’s part. The trick is getting inside the mechanism safely and putting the new spring in the right spot, so you don’t end up with a handful of tiny metal bits and no working door.
Signs Your Door Knob’s Return Spring Needs Replacement
So how do you know it’s actually the spring, and not the latch, lock, or something else causing trouble? There are a few classic symptoms that almost always point to a worn-out door knob spring.
- Droopy or Sagging Handle: The number one sign. If the lever or knob doesn’t return to center, or hangs down, the spring is either broken or has lost its tension.
- Loose or Wobbly Movement: You might notice the knob spins more freely than usual, or it doesn’t “snap” back after turning.
- Door Latch Not Retracting Properly: If the latch gets stuck or doesn’t pop in and out when you turn the knob, a bad spring might be to blame, especially if the handle feels limp.
- Clicking or Scraping Noises: Sometimes a broken spring will make odd noises as the metal rubs inside the mechanism.
You might be wondering, “Couldn’t it just be a battery or something that needs to be reset?” Not in this case. The spring is all mechanical—no electronics involved. If you’re having trouble *locking* the door, that could be a different issue, but a floppy or slow-returning handle almost always traces back to the spring.
Another tip: if the handle is stiff (instead of loose), the problem might be dirt or old grease, not the spring. Give it a quick wipe and some lubricant before diving deeper. But if that doesn’t help, it’s time to open things up.
Tools and Parts Needed for Spring Replacement
Let’s talk about what you’ll need before you take your door knob apart (so you don’t end up locked out or stuck halfway through the job). Most door knob mechanisms, especially from big brands, are held together with a handful of screws. You won’t need any special code to “reset” or “sync” things—just a steady hand and a couple of common tools.
- Phillips and flathead screwdrivers: These cover most screw types found in handlesets.
- Needle-nose pliers: Helpful for grabbing springs and small parts.
- Replacement spring: You can order OEM parts for Schlage, Kwikset, etc., but many hardware stores carry universal door knob springs that fit most models.
- Optional: Tweezers (for tiny springs), lubricant (like silicone spray), and a towel or tray (to keep track of screws).
Let me be clear: don’t start taking things apart until you have the new spring in hand. Once you open the housing, it can be tricky to put everything back without the right part. Some handlesets have hidden screws under faceplates or “reset” pins you push to release the knob, so check for those before you start prying.
If you’re unsure about the right spring, take your old one to the hardware store or match it online by brand and model. Universal springs fit most, but some (especially decorative or electronic handles) might need the exact replacement.
Step-by-Step: How to Replace a Worn-Out Spring in a Door Knob
Here’s where things get hands-on. Replacing a spring in a door knob’s mechanism might sound intimidating, but if you go slow, it’s less stressful than changing a bike tire. Patience and a little curiosity go a long way. Let me explain the basic steps:
1. Remove the Door Knob or Handle
Most handlesets have screws on the inside plate. Use your screwdriver to take out these screws. If you can’t see any, check for a small hole or slot—sometimes you’ll need to press a hidden “release” with a paperclip. Carefully pull the knob or lever off the spindle.
2. Take Off the Faceplate and Latch
Once the handle is off, unscrew and remove the faceplate (the round or square piece that covers the internal mechanism). Next, slide the latch mechanism out from the edge of the door. It should come out with a bit of wiggling.
3. Locate and Inspect the Return Spring
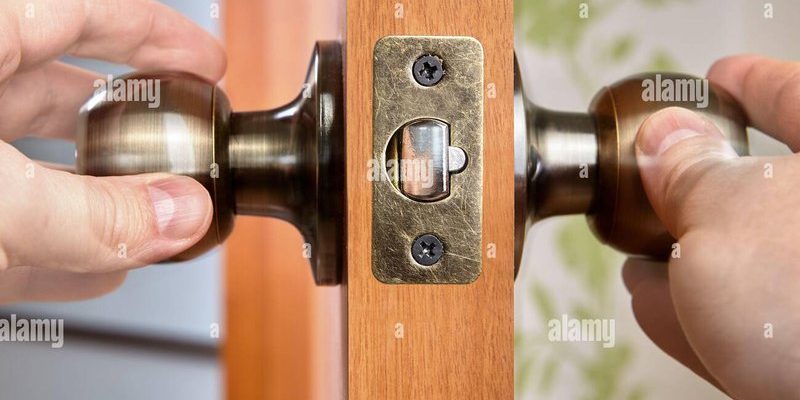
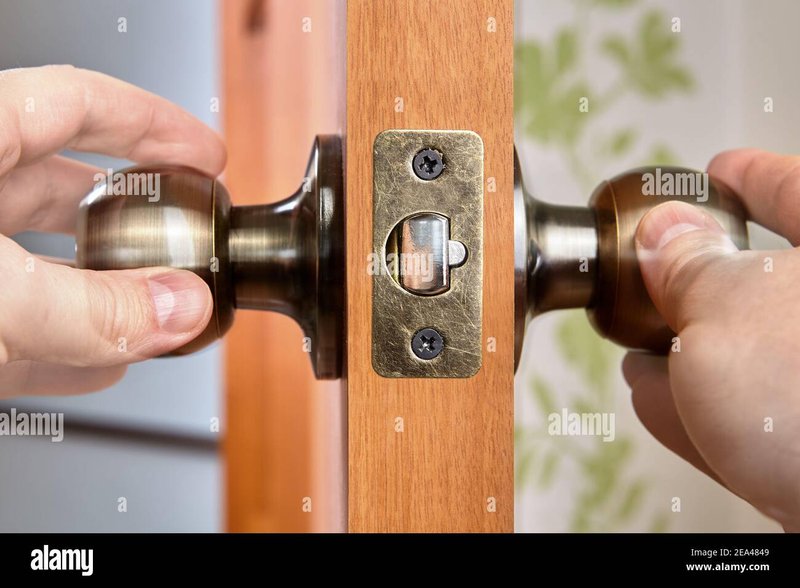
Look inside the removed mechanism for the spring. It’s usually a small, coiled or U-shaped piece of metal hooked around a post or slot. If it’s broken, bent, or missing tension, that’s your culprit. Use needle-nose pliers to carefully remove the old spring.
4. Install the New Spring
Compare the new and old springs. If they match up, press the new spring into position where the old one was, hooking it onto the same posts or notches. This part can be fiddly! Make sure it’s seated firmly, or the handle won’t work right.
5. Reassemble and Test
Slide the latch and faceplate back into the door, then reattach the handle or lever. Screw everything back together, double-checking that all parts are snug. Test the handle a few times before closing the door, making sure it snaps back and the latch works smoothly.
Pro tip: Work over a towel or tray so you don’t lose any tiny screws or springs. If you get stuck, many manufacturers have exploded view diagrams on their websites—just look up your lock by code or model.
Common Problems After Spring Replacement
You might be feeling pretty proud once the handle’s back together, but sometimes things don’t work perfectly on the first try. Here’s what to watch for and how to troubleshoot:
- Handle Feels Stiff or Jammed: Double-check that the spring is seated correctly. If it’s pinched or off-kilter, the handle won’t move smoothly. Take it apart and try again.
- Latch Doesn’t Retract: Make sure the spring is actually hooked around the right post—not just floating inside the housing. Sometimes the latch itself might be sticky; clean or lubricate if needed.
- Parts Left Over: (Hey, it happens!) If you end up with extra screws or a mystery piece, go back through the steps and compare your setup to an online diagram for your brand (Schlage, Kwikset, etc.).
- Handle Still Sags: If you used a universal spring, it might not have quite enough tension. Consider sourcing the OEM part for a perfect fit.
Here’s the thing: every door knob is a little different. If you run into a step that feels weird, pause for a minute and look up your specific model. Don’t force anything—that’s how parts get bent or broken. Take photos as you go, so you know what “right” looks like during reassembly.
Universal vs. Brand-Specific Springs: What’s Better?
You might be tempted to grab the first “universal door knob spring” you spot at the hardware store, especially if you’re in a hurry. In most cases, these springs work fine, especially for basic knobs and levers by leading brands like Schlage and Kwikset. Universal options are affordable, easy to find, and cover 90% of standard residential handles.
But there are a few exceptions. If you’ve got a decorative or unusual handle, or you’re dealing with an electronic or smart lock (yes, those still have mechanical springs inside), it’s worth hunting down the exact replacement spring by brand and model. The wrong spring can cause weak return, extra wear, or even prevent the lock from syncing properly if it has a battery-powered mechanism.
Bottom line: Universal springs are great for most quick fixes, but brand-specific parts will always give you the best fit and feel.
And here’s a little story—my neighbor once used a spring from an old pen as a DIY fix for her lever handle. It worked for a week, then snapped and jammed the whole lock. Sometimes “close enough” just isn’t close enough.
When to Replace the Whole Mechanism Instead
Sometimes a new spring isn’t enough. If your door knob is really old, corroded, or has internal parts that are bent or worn, you might be fighting a losing battle. Here’s when it makes more sense to swap out the entire handleset:
- Visible rust or heavy corrosion inside the housing—even the best spring won’t save a rusted-out mechanism.
- Multiple broken or missing parts, not just the spring.
- Latch or lock cylinder won’t move smoothly even after cleaning and reassembly.
- Handle won’t stay secured or keeps coming loose after tightening.
If you do replace the whole mechanism, syncing your new lock with the existing door is usually straightforward. Just be sure the latch and strike plate line up, and check if any electronic parts (like a keypad or remote battery) need to be paired or reset. Most standard handlesets can be swapped in under an hour with a screwdriver.
Final Thoughts: Bringing Life Back to Your Door Knob
Replacing a worn-out spring in a door knob’s mechanism is one of those small household fixes that packs a real punch. Instead of putting up with a droopy handle or shelling out for a whole new lock, you can get things snapping back into place with just a little patience and a few basic tools.
Whether you’re working with a familiar Schlage lever, a classic Kwikset knob, or just a generic handleset, the process is pretty much the same. Pop it open, swap out that tired spring, and enjoy the satisfying “click” of a handle that feels brand new. If you ever run into issues along the way, don’t hesitate to search for a model-specific diagram—or reach out to the manufacturer for troubleshooting tips. And remember, sometimes the best fix is just taking things one careful step at a time.
Now, next time that door knob starts to sag, you’ll know exactly what’s going on inside and how to bring it back to life. Happy fixing!