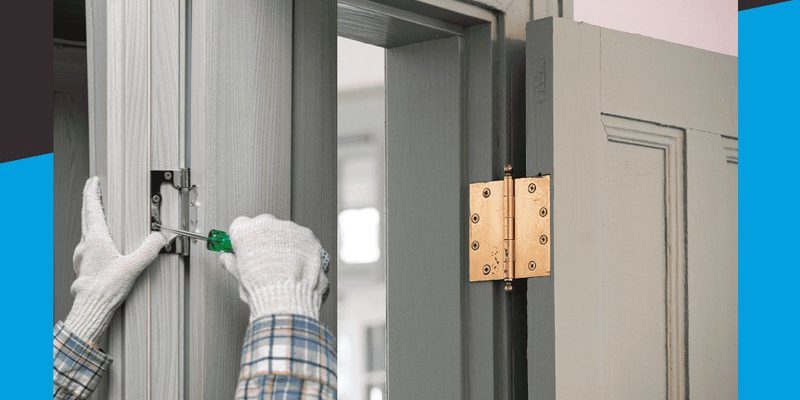
Replacing a door hinge isn’t as complicated as it sounds. With a bit of guidance, you can tackle this task yourself—no need to call in a professional. In this guide, I’ll walk you step-by-step through the process of replacing your worn-out interior door hinge, so you can get back to enjoying the quiet (and functional) bliss of your home.
Understanding Door Hinges
Before diving into the replacement process, let’s chat about what exactly door hinges do. Think of a door hinge as the pivotal point of a door, allowing it to swing open and closed smoothly. Typically, interior door hinges come in pairs or threes, depending on the size and weight of the door. They’re essential not just for movement but also for supporting the door’s weight.
Hinges are often made from metal, but their longevity can vary based on usage and quality. Signs of wear include rust, squeaking, or difficulty in movement. If you’ve noticed these signals, it’s time for a replacement. The good news? This project is a great beginner’s DIY task that requires just a few tools and some patience.
Gathering Your Tools and Materials
Before you start on this project, you’ll want to gather all the necessary tools and materials. Here’s a checklist to get you started:
- Replacement hinges: Choose the right size and style to match your door.
- Screwdriver: A Phillips or flat-head screwdriver, depending on your existing screws.
- Drill: If you need to replace screws or if the hinge holes are stripped.
- Screws: You may need new screws, especially if the old ones are stripped or rusty.
- Wood filler: For filling in any holes if you need to change the hinge location.
- Level: To ensure your door hangs straight after the job.
Honestly, having everything on hand makes the process smoother. You don’t want to be halfway through and realize you’re missing something crucial. And remember, while you’re at the hardware store, don’t hesitate to ask for assistance. They can help you find the correct hinges for your door.
Removing the Old Hinge
Now that you’re equipped with your tools, it’s time to remove the old hinges. Here’s how to do it step-by-step:
1. Start by propping the door: If possible, use a wedge or have someone hold the door to prevent it from swinging while you work.
2. Unscrew the existing hinges: Use your screwdriver to remove the screws from the door frame first, then from the door itself. If the screws are stiff, a little WD-40 can help loosen them up.
3. Take off the hinge: Gently pull the hinge away from the door and frame. If it’s stuck, a little wiggling might be necessary.
You might be wondering why it’s crucial to remove both pieces of the hinge. If you only take out the one on the door, you could end up with a balancing act that’s tough to manage when installing the new hinge.
Installing the New Hinge
With the old hinge out of the way, it’s time for the exciting part—installing the new hinge. Follow these steps:
1. Align the new hinge: Place the new hinge in the same spot as the old one, making sure it fits snugly against the door and frame.
2. Screw it in place: Start by tightening the screws on the frame first before moving on to the door side. This helps secure the hinge properly.
3. Check for level: Before you fully tighten everything down, use your level to make sure the door hangs straight.
It’s important to not get too eager and tighten everything down right away. This is your chance to adjust it if the door isn’t hanging correctly. You want it to swing freely and close easily without any gaps.
Testing the Door Functionality
Once the new hinge is in place, it’s time to see if everything works smoothly. Here’s how to do a quick check:
1. Open and close the door: Give it a few swings to see if it operates smoothly. Listen for any squeaks or irregularities.
2. Check alignment: Make sure the door sits evenly in the frame when closed. If you notice gaps at the top or bottom, you may need to adjust your hinge placement slightly.
3. Tighten screws as needed: If everything looks good, go ahead and tighten the screws fully.
Here’s the thing: a well-functioning door hinge not only makes your door easier to use, but it can also help with energy efficiency by creating a better seal when closed.
Finishing Touches and Maintenance
With your new hinges installed and the door tested, you might think you’re done. But there are a few finishing touches to consider:
1. Apply lubricant: If your door is still a bit squeaky, a little lubricant on the hinge can work wonders. Just a few drops can keep everything running smoothly.
2. Inspect your work: Double-check all your screws to ensure they’re tight and that the hinge plates are secure against the wood.
3. Regular maintenance: It’s a good idea to inspect your hinges periodically. Lubricate them every few months to keep them from wearing out prematurely.
You might be surprised how much a fresh hinge can transform the feel of a doorway. It’s like putting a new set of wheels on a car—the difference in operation can be striking!
Replacing a worn-out interior door hinge might sound daunting, but it’s a straightforward task that can greatly improve your door’s functionality. With just a few tools and some careful steps, you can do it yourself. Think of it as a mini home improvement project that can give your space a fresh feel.
So grab your tools and get started! Not only will your door swing freely again, but you’ll also have the satisfaction of completing a DIY task successfully. Plus, you’ll save a bit of money by not calling in a handyman. And that’s something to feel good about!
