Here’s the thing: handlesets are one of those touches that make your entryway look polished. But once the plate gets bent, rusty, or loose, your lock’s security and weather resistance can take a hit, too. People sometimes think you have to change the whole lock, but often, you just need to replace the plate. With a little patience, some basic tools, and this step-by-step walk-through, you’ll have your door looking sharp and working smoothly again.
What Is a Rosette or Escutcheon Plate—and Why Does It Matter?
You might be wondering, “What’s the difference between a rosette and an escutcheon plate?” Honestly, the words get tossed around a lot, sometimes even by the pros. In simple terms, the rosette is the smaller round or oval trim piece behind a doorknob or lever. The escutcheon plate is usually a bigger, rectangular or decorative cover plate—especially common on entry handlesets. Some brands like Schlage or Kwikset use both; others just call everything an escutcheon.
Why care about this humble plate? Because besides looking nice, it covers and protects the hole bored into your door. It keeps weather out and hides screws or hardware that could attract tampering or curious little fingers. Plus, handles and locks tend to flex a bit over years of use, so a strong plate helps keep things tight. If the plate starts to crack or loosen, your handleset might wobble, get out of alignment, or just look like it’s been through decades of door-slamming. Replacing the plate fixes the whole vibe—and helps the lock work right.
Signs Your Handleset’s Plate Needs Replacing
Not sure if you really need to swap out the escutcheon plate or rosette? Here’s what to look for:
- Visible cracks or chips: Metal or plastic plates can break over time, especially in harsh weather or if the door gets slammed.
- Loose or wobbly handles: If the handle or knob moves around too much, it’s often the plate underneath that’s worn out or the screws have stripped.
- Rust or corrosion: On exterior doors, rust can eat away at the finish and weaken the plate, especially if you live near the ocean.
- Paint damage or peeling finish: Sometimes, old escutcheons look fine functionally, but the finish is gone, or they’re just ugly.
- Drafts or leaks: A bent or damaged plate can let cold air or moisture sneak in around the lock.
If any of those sound familiar, replacing the plate isn’t just a style upgrade—it can mean fewer drafts, smoother locking, and a safer door overall.
Choosing the Right Replacement Plate for Your Handleset
Not all rosette or escutcheon plates are universal—especially when you factor in different handle designs, lock brands, and door hole sizes. Some companies, like Kwikset or Schlage, offer replacement plates that fit their most popular models. Others require special ordering or, in a pinch, an adjustable “universal” plate that fits several brands.
Here’s what matters when shopping for a replacement:
- Brand and model: Whenever possible, match the plate to your lock’s brand and series (check the lock side or manual if you’re unsure).
- Shape and size: Measure the old plate’s width, height, and the distance between screw holes. Not all plates are the same!
- Finish: Choose a finish (satin nickel, brass, bronze, etc.) that matches your existing handle—or go bold and mix it up if you like.
- Screw location: Some plates screw into the face; others attach from inside the house. Double-check how yours mounts before ordering.
If you can’t find the exact match, there are “universal” escutcheon plates out there, but they might need a bit of tweaking or creative mounting. Honestly, sticking with the original brand will save you a headache if you can swing it.
Tools and Supplies You’ll Need
Before diving into the replacement process, it’s smart to gather everything you’ll need. Here’s the basic toolkit for most handlesets (especially for brands like Kwikset, Schlage, or Yale):
- Phillips screwdriver (sometimes a flathead, depending on the screws)
- Replacement rosette or escutcheon plate (matched to your brand/model, or a universal one if needed)
- New screws (most plates include fresh screws, but keep the old ones as backup)
- Masking tape (helps prevent scratching your door’s finish while you work)
- Small utility knife (for scraping away old paint or caulking if the plate was painted over)
If your handleset has special “torx” or hex screws (less common, but some high-end brands use them), grab the right bit. Having a towel under the door also helps prevent lost screws bouncing away. Trust me, chasing tiny hardware across the porch isn’t fun.
Step-by-Step: How to Replace a Rosette or Escutcheon Plate
Let me explain the process in small, clear steps. Even if you’re a total beginner, you can swap a damaged plate in about 30–45 minutes—sometimes less, if the lock isn’t stubborn.
1. Remove the Handleset or Knob
Almost every job starts here. Look for small screws on the interior side of the door (the side facing indoors). Remove these carefully, keeping one hand on the handle so it doesn’t drop. Slip the handle, knob, or lever off the spindle and set it aside.
If your handleset uses hidden screws or a release button, you might need to poke a thin screwdriver into a small hole below the knob to pop it off. Check your brand’s manual if you’re stuck.
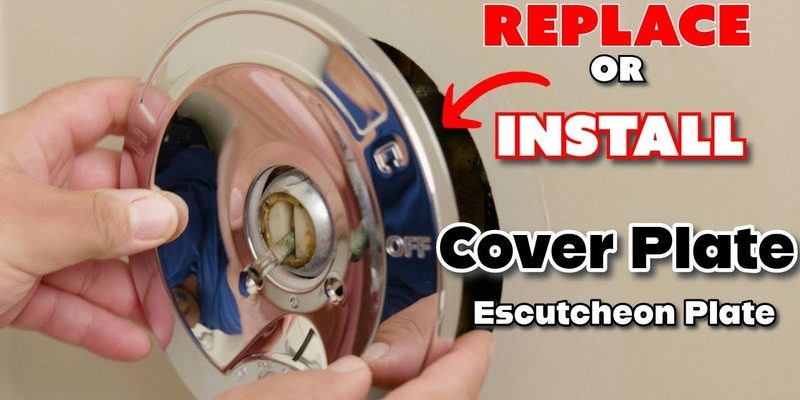
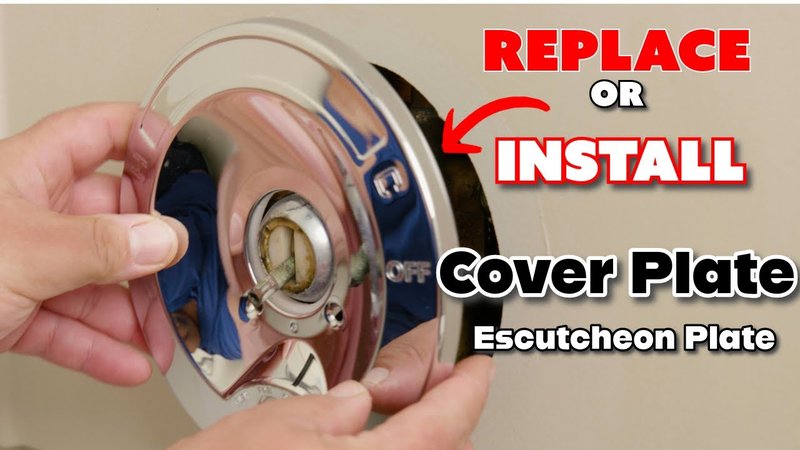
2. Unscrew and Remove the Old Plate
With the handle off, you’ll usually see two or more screws holding the escutcheon plate or rosette in place. Unscrew them, then gently pry the plate away from the door. If it feels glued down, run a utility knife around the edge to break any old paint or caulk. Be gentle, or you might scratch the door.
3. Prep the Area
Honestly, this is a step a lot of people skip—but it makes a world of difference. Wipe away dust, old paint chips, or rust around the hole. If there’s any leftover sealant or adhesive, scrape it off with your knife. This gives the new plate a clean, flush surface for a tight fit.
4. Install the New Plate
Line up the new plate with the existing holes. If it’s a bit snug, tap gently with your palm until it sits flat. Thread in the screws by hand, then tighten with your screwdriver. Don’t overtighten or you risk bending the new plate or stripping the screws.
If you’re using a universal escutcheon plate, you may need to adjust how it sits or use extra washers to fill any gaps.
5. Reattach the Handle or Knob
Slide the handle or knob back onto the spindle. Secure the mounting screws until snug, but not over-tight. Test the handle: it should move smoothly, with no wobble. Double-check that everything’s lined up and the lock engages easily.
What If Your Plate Won’t Budge—or Doesn’t Fit?
Sometimes, things don’t go quite as planned. You might find the old plate is stuck with old caulk or layers of paint. Or maybe your new escutcheon plate’s holes don’t line up.
Here’s what to try if you’re stuck:
- Stuck plate: Use a hair dryer to soften any paint or adhesive, then gently pry with a putty knife.
- Non-matching holes: You might be able to drill new pilot holes—just go slow and use a tiny bit to avoid splitting the door.
- Universal plates: Sometimes, a “universal” plate needs you to use only a couple of the included mounting holes. Just make sure the handle feels secure and stable when finished.
- Brand incompatibility: Honestly, if you keep running into fit issues, it’s smarter to order the exact replacement from the lock brand (Schlage, Kwikset, etc.) rather than hacking it with a universal plate.
If you hit a wall, don’t force anything—breaking a screw or stripping a hole can make things way harder than waiting a day for the right part.
Tips for a Clean, Long-Lasting Handleset Plate Replacement
Replacing your plate is more than just a quick hardware swap—it’s a chance to get your entryway looking sharp and working better than ever.
- Double-check alignment: Make sure the plate sits flat and covers the hole completely. Minor gaps can let moisture in.
- Consider weatherproofing: For exterior doors, run a thin bead of silicone caulk behind the plate to keep out water and drafts—but don’t block any moving parts.
- Tighten with care: Over-tightening can distort thin metal plates. Stop turning screws as soon as the plate is snug and stable.
- Match the finish: If you can’t find an exact match, at least keep the finish in the “family” (e.g., all satin or all aged bronze) for a cohesive look.
- Save instructions: Tuck any extra hardware or the installation guide somewhere safe in case you need to tweak the fit later or replace more hardware down the road.
The little things matter—a smooth, professionally installed escutcheon plate not only makes your door look new again, but also helps keep your handleset, lock, and even your home safe over time.
When to Call a Pro Versus DIY
Most folks can tackle a simple rossette or escutcheon plate swap with nothing more than a screwdriver and a little patience. Still, there are times when calling a locksmith or handyman makes more sense.
For example:
- Specialty or antique hardware: Some old or high-security locks have non-standard plates and hidden screws that can be a pain to remove.
- Severely damaged doors: If the wood around the holes is splintered or stripped, you may need repairs before a new plate will sit right.
- Lost keys, stuck locks, or code issues: If your lock isn’t just loose, but won’t turn or “pair” with your smart remote (as with Schlage’s electronic models), it’s best to call in a pro for a reset or troubleshooting before replacing hardware.
If you’re just swapping a standard handleset plate—especially for brands like Kwikset, Schlage, or Yale—give it a go yourself first. You’ll save money and get the satisfaction of a job well done.
Enjoy Your Fresh, Secure Handleset
Wrapping things up, replacing a damaged rosette or escutcheon plate on a handleset is one of those home maintenance jobs that looks intimidating but turns out to be totally manageable. As long as you match your hardware, take your time with the steps, and double-check the fit, you’ll have your door looking and working like new. Plus, you’ll dodge drafts and keep your entryway tight, whether you’re fixing up a Schlage, Kwikset, or another brand. A fresh escutcheon plate is a small project with a big payoff—so put down the super glue, grab your screwdriver, and tackle that upgrade. Your door (and your peace of mind) will thank you.