Honestly, a damaged fingerprint sensor can be really frustrating. These little sensors are the heart of your smart lock’s security magic, turning your fingertip into a key. When something this small gives up, it can throw off your whole routine. The idea of replacing it might sound like rocket science at first, but with the right steps and expectations, it’s way more doable than you think. Whether your model uses a simple snap-in sensor or something more integrated, I’ll break down the process so it feels less like surgery and more like a weekend project.
Signs Your Fingerprint Sensor Needs Replacing
Before grabbing your screwdriver, let’s talk symptoms. A fingerprint sensor doesn’t usually just quit without warning. You might notice your smart lock suddenly rejecting your prints, taking much longer than usual, or not responding at all. For example, a popular brand like Ultraloq U-Bolt Pro might throw up an error message, or your August smart lock just ignores your finger altogether. Sometimes, the lock’s app will even give you a vague “hardware malfunction” alert.
Sometimes the trouble isn’t that dramatic. Maybe the sensor only works for some users or acts up in cold weather. This could be due to sensor wear and tear, exposure to moisture, or even just a build-up of grime. If you’ve already tried cleaning the sensor, resetting the lock, and re-syncing the device, but things haven’t improved, you’re probably looking at a damaged sensor. And honestly, the longer you wait, the more likely you’ll end up locked out—or forced to rely on a backup code or key every time you come home.
Can You Replace The Sensor Yourself?
Here’s the thing: Not all smart locks are built the same. Some brands, especially the more modular ones like Ultraloq or older Samsung models, make it surprisingly easy to swap out components. Other locks, especially high-end or recent models, may have the sensor soldered right onto the mainboard. So, before you start, grab your smart lock’s manual, check the brand’s website, or browse user forums for info about your exact model.
You might be wondering if you’ll need soldering skills or special tools. Usually, if the sensor is replaceable, it’ll be a “plug and play” module that just snaps or screws into place. If yours is hardwired, you could try contacting the manufacturer for a replacement mainboard, but for most folks, that’s the point where calling in a pro or simply replacing the whole lock makes more sense. Honestly, DIY is best suited to models where the sensor isn’t permanently attached.
What Tools And Parts Will You Need?
Let me explain what’s usually in your toolkit:
- Replacement fingerprint sensor: Make sure you purchase the right sensor for your smart lock model. Universal sensors rarely work without code tweaks or adapter kits.
- Small Phillips-head screwdriver: Most smart locks use these tiny screws; check your lock’s finish or color for the right size.
- Plastic pry tool or guitar pick: For popping open the housing without scratching the surface.
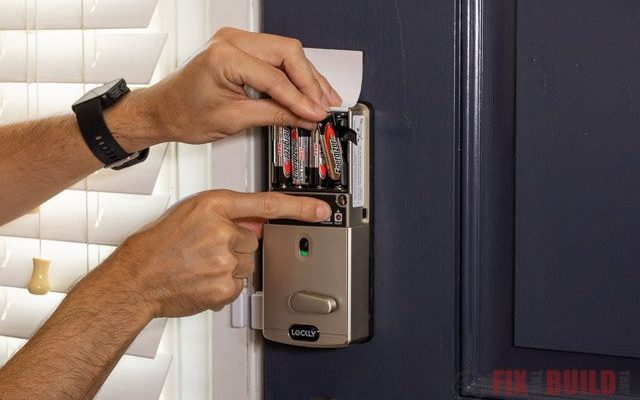
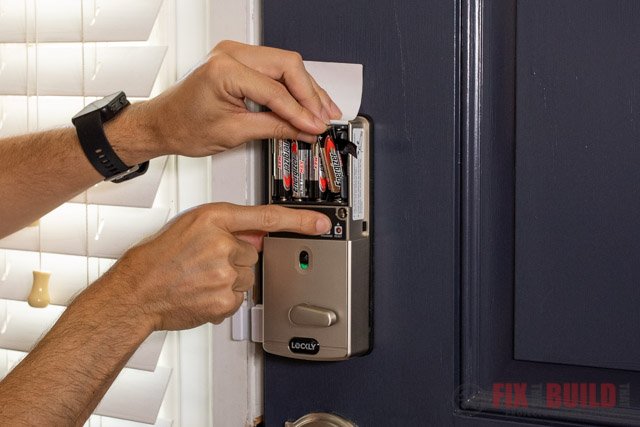
- Fresh batteries: You’ll want new batteries on hand, since the lock may reset during the repair.
- Microfiber cloth: Wipe down the new sensor, and clean off the inside of your lock while you’re in there.
If your lock brand lets you order parts directly, like August or Ultraloq, that’s always easiest. Sometimes, third-party sellers offer sensors for less-popular models, but be careful—an incompatible sensor means more troubleshooting and likely more headaches.
Don’t forget: If you’re not sure about the part, take a clear phone photo of your lock’s model sticker and compare it to the replacement listing before you buy.
How To Remove The Old Fingerprint Sensor
Now for the part most people dread—opening up the lock. Start by removing your smart lock from the door, if necessary. This gives you room to work and avoids dropping tiny screws on your porch. Locate and unscrew the back panel with your Phillips screwdriver. Gently pry the casing open, using your plastic tool if it’s snug.
Once inside, you’ll see a small board or module with a ribbon cable or wires running to the fingerprint sensor. Take a photo, so you remember how everything is connected. Carefully disconnect any cables. Sensors are often held in place with tiny screws or clips; remove these and slide the sensor out.
If the sensor is part of the front cover or mounted under a plastic shield, follow the shape of the module as you pry. Don’t force it—damaging the cable or board can mean a much harder fix. If you spot corroded contacts or visible damage, take a close-up photo for reference, especially if you need to contact support later.
Installing The New Fingerprint Sensor
Ready to put things back together? Here’s where patience pays off. Unpack the new fingerprint sensor and line it up with the mounting area inside your smart lock. If your model uses a ribbon cable, slide it gently into the connector until it clicks or fits snugly. Screw or snap the new sensor into place, using your photos as a guide.
Take a moment to double-check everything. Are all cables seated? Did you put every screw back in? Before sealing up the lock, pop in fresh batteries—this can help clear any leftover charge or glitches from the old sensor. Reattach the lock’s cover, being careful not to pinch cables or misalign the housing.
It’s smart to test the sensor now, before you reinstall the lock on your door. Hold down the power or reset button (if your model has one) to jumpstart the sensor. Use the lock’s app, keypad, or remote to start the setup process.
Syncing And Resetting Your Smart Lock
With the new fingerprint sensor installed, you’ll need to sync or pair your smart lock with your saved fingerprints. Each brand has its quirks, but the general process looks like this:
- Power up the lock.
- Open the lock’s companion app or use its built-in menu (for example, Ultraloq and Samsung models usually have a “fingerprint enroll” mode).
- Follow the steps to add, delete, or reset fingerprints. You’ll re-add your prints one at a time—don’t skip this, since the new sensor won’t recognize prints saved to the old one.
- Test unlocking with your print, code, and remote to double-check everything is synced.
Honestly, this step trips a lot of people up. If the lock won’t recognize your print or keeps throwing an error code, try a full factory reset (instructions are in your manual). If you’re still having trouble, check for a firmware update—sometimes a brand pushes out a patch to fix pairing or battery issues after parts are swapped.
Troubleshooting Common Installation Problems
Let’s say things don’t work perfectly on the first try—don’t panic. Here are some typical snags and how to fix them:
- Sensor isn’t recognized: Double-check the connector alignment and that the cable is fully seated. Power-cycle the lock or yank the batteries out for a “hard reset.”
- Sensor works, but unlocks inconsistently: Make sure you’ve cleaned your finger and sensor surface. If you’re still having trouble, try re-enrolling your fingerprints—sometimes a new sensor is more sensitive than the old one.
- Lock won’t pair with app: Reboot your phone, check for app and lock firmware updates, and reset the lock’s Bluetooth or Wi-Fi connections.
- Code or remote problems after sensor swap: Sometimes, replacing hardware triggers a software mismatch. Check your lock’s settings to re-sync codes and remote fobs.
If nothing gets better after these steps, it might be a deeper electronics issue. At this point, reaching out to the brand’s support (especially if you have the wiring photos you took!) can save hours of frustration.
When To Call A Professional Or Replace The Whole Lock
Some repairs are just too tricky to handle on your own. If your fingerprint sensor is soldered on, or the lock is still under warranty, it pays to call customer support before you risk voiding any coverage. Sometimes, sending the lock in for service is cheaper (and safer) than buying tools or risking water damage.
Also, if the rest of your lock is getting flaky—maybe the code keypad or battery contacts are worn—it’s worth weighing the cost of a new smart lock instead of just a sensor. Today’s models often add extra features, like remote access or stronger anti-tamper protection, so a full upgrade could be a smart move in the long run.
Remember: Even the best smart lock is only as reliable as its weakest part. If you’re always troubleshooting or piecing things together, moving up to a new lock can end up saving money, time, and headaches.
Final Thoughts: Getting Your Smart Lock Back In Action
Replacing a damaged fingerprint sensor on a smart lock might sound like a big project, but it’s surprisingly manageable if your model is designed for repairs. With a little patience, the right part, and a steady hand, you’ll have your lock running smoothly again—maybe even better than new. And honestly, once you’ve tinkered under the hood, you’ll have a deeper appreciation for the tech that keeps your home safe. Whether you’re syncing fingerprints, troubleshooting error codes, or weighing the time to upgrade, the main thing is that your entryway is secure and convenient once again.