Think of a door hinge like a pair of shoes: if one shoe wears out faster than the other, you don’t throw away both. You replace the worn-out one. In this guide, we’ll walk through how to replace a damaged door hinge leaf step by step. We’ll look at the tools you need, how to do the replacement, and some tips for ensuring your door works smoothly again.
Understanding Door Hinge Parts
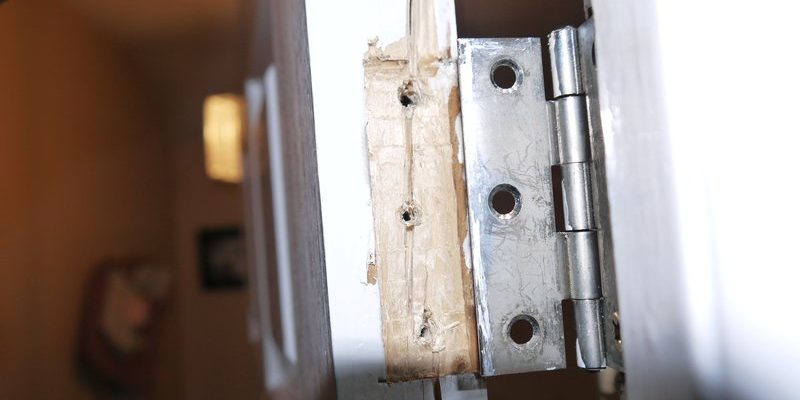
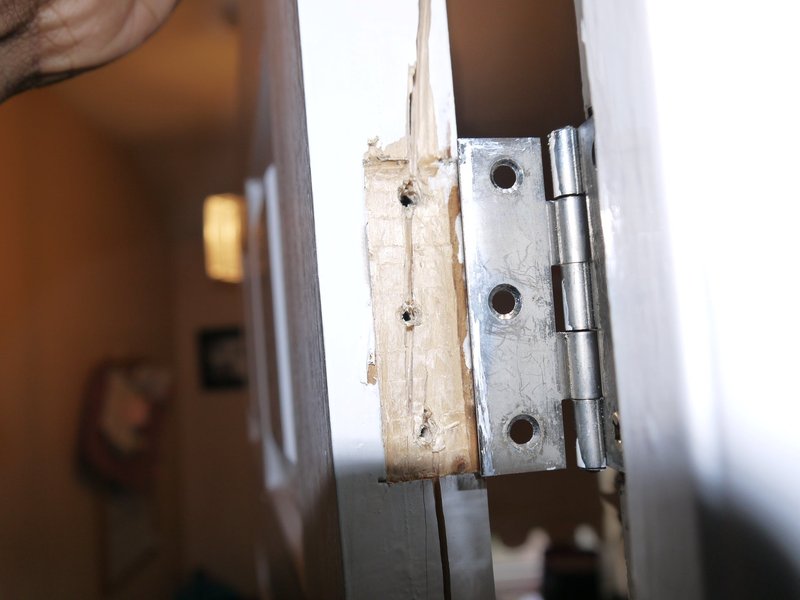
Before diving into the replacement process, it helps to understand the anatomy of a door hinge. A typical hinge consists of two leaves (the flat parts), a pin, and sometimes a removable pin. The leaves are what attach to the door and the frame. When only one leaf is damaged, you don’t need to worry about the other; it can still do its job.
Sometimes the damage is obvious, like a crack or break. Other times, it might just be bent or rusted. You could liken it to a car tire: even if one tire is a bit flat, the others are fine. You can simply replace that one tire and be back on the road in no time.
Gathering Your Tools and Materials
Replacing a hinge leaf isn’t a complicated task, but you’ll want to gather your tools first to make it as smooth as possible. Here’s what you’ll need:
- Replacement hinge leaf (make sure it matches the existing style)
- Screwdriver (usually Phillips or flat-head, depending on your screws)
- Drill (with a bit for pilot holes, if necessary)
- Wood filler or screws (if you’re repairing the frame)
- Level (to ensure your door hangs correctly)
Honestly, having everything ready beforehand saves time and frustration. Think of it as prepping for a recipe; gathering your ingredients makes the cooking process much easier!
Removing the Damaged Hinge Leaf
Now it’s time to get your hands dirty. To remove the damaged hinge leaf, follow these steps:
1. Remove the Door: If possible, it’s easier to work on the hinge if the door is off. Support the door with a level or a friend. Use your screwdriver to take out the screws holding the damaged leaf in place.
2. Take Off the Leaf: Once the screws are out, gently twist the hinge to remove the damaged leaf. Be careful not to damage the other leaf or the door itself.
3. Check the Screw Holes: Inspect the holes where the screws were. If they’re stripped or damaged, you might need to fill them with wood filler to ensure a secure fit for the new leaf.
During this process, you might feel like a detective—carefully examining the hinge and ensuring you’ve accounted for every detail. Take your time and don’t rush it.
Installing the New Hinge Leaf
Once the old hinge leaf is out, it’s time to put in the new one. Here’s how to do it:
1. Position the New Leaf: Align the new hinge leaf with the existing leaf on the door. Make sure it fits snugly and that the holes line up.
2. Secure the Leaf: Start by inserting one screw into the top hole and tightening it. This will hold it in place while you adjust the others.
3. Add Any Additional Screws: Once the top is secure, move to the other holes and insert the screws, tightening each one fully. If you filled in any holes earlier, make sure the screws bite into the fresh wood.
You might feel like a bit of a handyman as you tighten everything up. Getting the new leaf installed correctly is crucial for the longevity of the door.
Re-hanging Your Door
Once the hinge leaf is in place, it’s time to put the door back on its frame. Here’s how:
1. Align the Door: Carefully lift the door back into place, aligning the hinge with the frame. It might help to have someone support the door while you work.
2. Insert the Hinge Pin: If your hinge has a removable pin, reinsert it to secure the door on the hinge. If not, just make sure the hinge is secured tightly against the frame.
3. Test the Door: Finally, give your door a gentle push to see how it swings. It should open and close smoothly without any sticking or creaking.
This process can be a bit like a puzzle: aligning everything just right to get that satisfying ‘click’ when the door goes back into place.
Troubleshooting Common Issues
Sometimes things don’t go as planned, and that’s okay! You might find your door isn’t hanging straight or that it still creaks. Here are a few things to check:
– Misalignment: If the door isn’t hanging straight, check that the hinge leaf is properly aligned. Loosen the screws slightly and adjust as needed.
– Screw Issues: If screws keep coming loose, you may need to fill the holes with wood filler and re-drill pilot holes for a better grip.
– Stickiness: If the door sticks, it could be rubbing against the frame. Check the spacing and adjust the hinge if needed.
Think of troubleshooting like being a detective. You’re piecing together clues to ensure everything works perfectly.
Final Thoughts
Replacing a damaged door hinge leaf, when only one is bad, can be a straightforward and rewarding DIY project. Armed with the right tools and a little patience, you can restore your door to its former glory without the hassle of replacing the entire hinge.
Now that you’ve tackled this repair, you can enjoy a smoothly functioning door once again. Remember, small fixes can make a big difference, much like choosing a fresh coat of paint for an old chair. So next time you hear that annoying creak, you’ll know exactly what to do! Happy fixing!