Here’s the thing: even if you’ve never taken a lock apart before, replacing a deadbolt thumbturn spindle isn’t as scary as it sounds. Maybe you have a Schlage, Kwikset, or even a Yale deadbolt—honestly, most residential lock brands use similar parts and approaches. With the right tools and a little patience, you can restore your door’s security without calling an expensive locksmith or replacing the whole lock. Let me walk you through how it works, what tools you’ll need, and what to watch out for, step by step.
What Is a Deadbolt Thumbturn Spindle, and Why Does It Break?
The deadbolt thumbturn spindle is a small but crucial part of any standard deadbolt lock. Think of it as the translator between your hand’s motion (turning the knob inside) and the internal mechanism that slides the heavy deadbolt into place. Most often, the spindle is a simple metal rod or bar, sometimes slightly squared off or splined, designed to fit snugly into the thumbturn on one end and the lock mechanism on the other.
Over time, especially with heavy use or force, the spindle can get stripped, rounded, or even snap in two. Sometimes, it’s the indoor side (the thumbturn itself) that’s the issue, spinning on a worn-out spindle. Other times, it’s the lock’s internal core being stubborn. Kids slamming the door, a sticky lock, or even just age and corrosion are all common culprits.
You might be wondering, “Why not just buy a new lock?” Sure, that’s an option, but spindles are cheap, readily available, and replacing them is less of a hassle if your lock has sentimental or architectural value. Besides, matching lock codes or pairing new remotes (on smart locks) isn’t always simple. Fixing the spindle usually solves everything, especially for basic manual deadbolts.
Symptoms of a Damaged Thumbturn Spindle
So, how can you tell if the spindle is the real problem? Here’s what most people notice first:
- The thumbturn spins freely but the bolt doesn’t move. Sometimes there’s a “loose” or wobbly feeling.
- The lock works from outside (with the key), but not from inside. Or vice versa.
- You hear rattling, grinding, or metal scraping sounds when you try to use the lock.
- The lock catches or jams halfway, but resets if you jiggle the thumbturn.
If you’re troubleshooting and the symptoms above match, chances are your spindle is stripped, bent, or broken. Of course, always check the basics—maybe a screw has just loosened, or the entire thumbturn set has slipped out of alignment. Many times, the damage is hidden inside until you remove the lock from the door. It’s a bit like popping open the back of a remote: sometimes it’s just a dead battery, other times something inside is clearly busted.
Tools & Parts You’ll Need to Replace a Deadbolt Thumbturn Spindle
Let’s get practical: you might be surprised by how few tools this job really takes. For most brands—whether it’s Kwikset, Schlage, Yale, or even generic or universal deadbolt models—you only need basic hand tools.
- Phillips and flathead screwdrivers (sizes depend on your hardware)
- Replacement spindle (make sure it matches your deadbolt model—bring the old one to the hardware store if unsure)
- Allen wrench set (some brands use set screws or hex bolts on the thumbturn)
- Optional: Lubricant spray (for cleaning or easing reassembly)
Here’s a tip: even if your lock looks “universal,” tiny differences in spindle width, length, and tip shape can matter. Don’t just guess—some brands use a notched design, others are square or half-round. If you’ve lost your spindle or it’s totally mangled, try searching for your lock’s model number online, or ask a hardware store with a sample in hand. If this is a smart deadbolt or a model with electronic code, pairing, or sync features, double-check for extra wiring or battery connections before you dive in.
Removing the Old Spindle: Step-by-Step
Alright, time to get inside the lock. If you’re new to this, don’t rush—take a photo before each step, just in case.
-
Remove the interior thumbturn plate.
Most deadbolts have two screws on the inside plate. Loosen and remove these (sometimes they’re hidden under a decorative cap or stuck if there’s old paint—use a flathead to pry gently if needed). -
Gently pull off the thumbturn and interior plate.
This usually slides right off, exposing the spindle and inner lock mechanism. If there’s an Allen or set screw, use the right wrench to release it. -
Slide out the damaged spindle.
It might fall right out, or you may need to wiggle it. If it’s bent or broken, use needle-nose pliers to pull it free. -
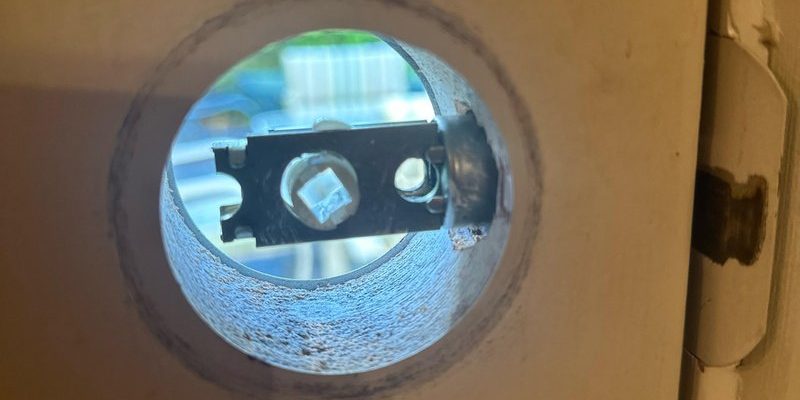
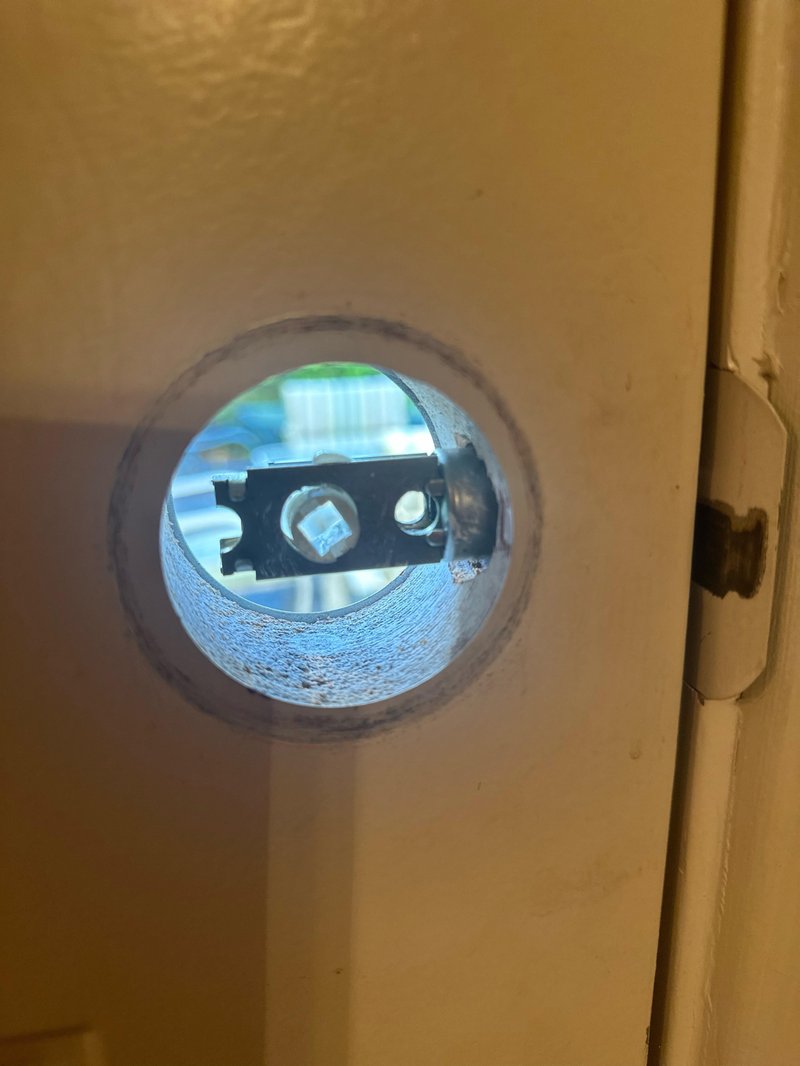
Inspect the spindle and lock body.
Check for metal shavings, rust, or other obvious damage. Honestly, if the spindle looks chewed up, it’s a clear sign it’s the root cause.
If anything seems stuck or you feel resistance, stop and look for hidden screws or retaining clips. Forcing it can damage your lock mechanism or the door itself.
Installing the New Thumbturn Spindle
You’ve made it to the “fun” part: fitting the new spindle. Here’s what this typically looks like, step by step:
-
Insert the new spindle into the lock body.
Make sure it lines up with any grooves or shapes inside, and that it reaches through to the front of the door (where the key cylinder sits). -
Test the fit by turning the spindle gently.
You should feel the bolt sliding smoothly in and out. If it’s catching, the spindle may be the wrong length or not fully seated. -
Replace the thumbturn and interior plate.
Reverse the earlier removal steps—align everything, tighten screws, and make sure the thumbturn is secure on the spindle. If your model uses a set screw, tighten it firmly but don’t overdo it. -
Double-check the lock action.
From inside, turn the thumbturn to make sure the deadbolt operates as expected. Then test with the key from outside.
If the thumbturn feels stiff, add a tiny bit of lubricant (like graphite spray, not oil) to the spindle ends. Wipe up any excess, since oily residue attracts dust and can create problems later.
Common Issues After Replacing a Deadbolt Spindle
Most times, things fit back together perfectly. But here’s a handful of hiccups you might run into:
-
The thumbturn still spins loosely.
This usually means the spindle isn’t fully seated, or the thumbturn itself is stripped and can’t grip. Remove and check alignment, and make sure all set screws are tight. -
The deadbolt jams or won’t extend fully.
Sometimes, the new spindle is too long or short for your lock model. Compare it with the old one—some universal spindles are designed to be broken or cut to size. -
Difficulty syncing smart lock features.
If your deadbolt has electronic code, battery, or remote-pairing features, double-check all connections. You may have to reset or re-pair the lock with your mobile app or remote after reassembly. -
Screws don’t bite or strip out.
Wood doors, in particular, can get chewed up over time. Use slightly larger or longer screws, and never overtighten—especially if you want to avoid splitting the wood.
If the spindle you’ve got just doesn’t fit at all, don’t force it. Deadbolts—even between brands—can have subtle differences. Grabbing a universal spindle might save the day, but sometimes the best bet is a direct replacement from your deadbolt’s manufacturer.
Should You Replace the Entire Deadbolt Instead?
You might be debating if it’s worth all this hassle—would a brand-new deadbolt be easier? Well, here’s my take:
If your lock is old, sticky, or missing parts, a total swap might make sense. Especially if the code, battery, or remote pairing (for smart deadbolts) has been acting up. Sometimes, the cost of a new spindle isn’t much less than a basic new lock from Home Depot or Lowe’s.
On the flip side, if you love your current lock’s look, want to keep existing keys, or the issue is clearly just the spindle, repair is the way to go. Plus, you don’t need to mess with door alignment, strike plates, or upgrading to a new code system.
Here’s how replacing just the spindle compares to a full swap:
| Spindle Replacement | Full Deadbolt Swap |
| Cheaper (usually under $10) | Costs $20–$50 (manual) or $70+ (smart locks) |
| Faster (15–30 minutes) | Can take up to 1 hour, especially if holes don’t line up |
| Retains original keys and codes | May require re-coding keys, syncing remotes, or app reset |
| Less risk of damaging door or finish | New lock could require chiseling, drilling, or filling old holes |
Honestly, for most repairs, a new spindle is the easiest, quickest fix—unless the whole lock is obviously worn out or faulty.
Tips for Preventing Future Deadbolt Spindle Damage
Once you’ve gone through the trouble of fixing this tiny part, it’s worth doing a little extra to keep it working smoothly. Here are a few easy tips:
- Lubricate the lock annually. A quick spray of graphite or lock-specific lubricant keeps everything moving and prevents rust.
- Check screws and alignment. Every few months, just glance at the thumbturn and strike plate. Loose screws are often the first warning of bigger problems.
- Don’t force the thumbturn. If you ever feel resistance or hear scraping, stop and inspect—forcing it can bend or snap the spindle again.
- Upgrade to a higher-quality spindle or thumbturn. Some universal parts are sturdier than the originals and can last much longer, especially in busy households.
Lock maintenance is one of those five-minute tasks that saves you hours of frustration (and money) down the line. Plus, a smooth, solid deadbolt is just plain satisfying every time you come home.
When to Call a Locksmith or Seek Professional Help
Let’s be real: while most spindle replacements are totally DIY-friendly, there are some situations where an expert is the better call. If your lock is part of a complicated smart home system, or if the internal parts are completely jammed or falling apart, don’t risk making things worse.
Also, in rental properties or older homes, it’s smart to check with your landlord or property manager before pulling things apart—sometimes locks are keyed in groups or paired with specific remotes for entry systems. And if you try swapping the spindle and the thumbturn still won’t work, you may have a broken internal lock core, not just a spindle issue.
Locksmiths can often re-key, sync, or code new remotes if you’re totally stuck—especially with newer Yale, Schlage, or Kwikset smart locks that demand pairing with apps or master codes. But for most manual deadbolts, you can do this fix yourself and save time and money.
Wrapping Up: A Simple Fix with Big Security Benefits
Replacing a damaged deadbolt thumbturn spindle is proof that small fixes can make a big difference. With a little patience and the right part in hand, you can restore your door’s security and skip the drama (and expense) of a full lock replacement. Whether you’ve got a classic Schlage, a modern Yale, or any other common deadbolt, the basic approach is the same—remove the old spindle, fit the new one, and test everything before you close up.
Honestly, there’s a real satisfaction in fixing something so important with your own two hands. Plus, next time your thumbturn feels loose or your lock starts acting up, you’ll know exactly what’s happening—and exactly what to do.