Imagine the frustration of trying to effortlessly slide open your door, only for it to get stuck halfway. Or the awkwardness of a door that won’t close properly, leaving your home vulnerable. Luckily, fixing this issue isn’t as daunting as it sounds. Whether you have a standard track or a unique design, the principles of replacement remain the same. Let’s dive into how you can replace that damaged track section and get your bi-fold door back in action.
Understanding Bi-Fold Doors and Their Tracks
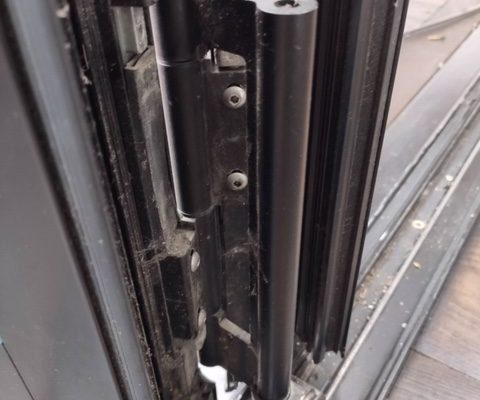
Bi-fold doors are a popular choice for both homes and offices because they save space while providing a wide opening. They consist of multiple panels that fold against each other when opened, making them ideal for closets or patio entrances. The tracks, which guide the movement of these panels, are vital for ensuring smooth operation. If the track is damaged, it can cause jamming or misalignment, making it tough to operate the door.
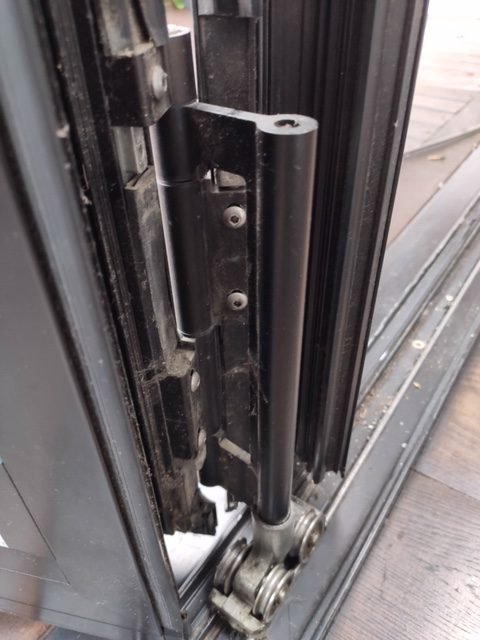
A typical bi-fold door setup includes two main tracks: one at the top and one at the bottom. When you open the door, the wheels attached to the panels glide on these tracks. However, wear and tear, moisture, or even a rogue heavy object can lead to damage. Think of the track as the road for your door—it needs to be smooth for a good ride. Damaged sections can create bumps that disrupt the flow, leading to frustration every time you try to use the door.
Here’s the thing: you don’t need to call a handyman for most track replacements. With a little patience and the right tools, you can do it yourself. This guide will help walk you through each step, so you can confidently tackle this task.
Gathering Your Tools and Materials
Before you dive into replacing that track section, it’s essential to gather everything you’ll need. Having the right tools on hand can make this project go quickly and smoothly. Here’s a checklist to get you started:
- Screwdriver – A flathead or Phillips, depending on your screws.
- Replacement Track – Make sure it matches the dimensions of your existing track.
- Measuring Tape – For accurate measurements.
- Level – To ensure your track is installed straight.
- Safety Gear – Gloves and goggles to protect your hands and eyes.
Having everything ready will save you time running back and forth. Think of it like prepping for a cooking session; when all ingredients are out, you can whip up your dish without a hitch. It might be a small step, but taking time to gather your tools can prevent a lot of headaches later on.
Once you have all your materials, you’ll be ready to tackle the job. You might be wondering how to identify the type of track you need. Most tracks are standard sizes, but if you’re unsure, taking a quick measurement of your current track will help you find the perfect replacement.
Removing the Damaged Track Section
Now that you’re equipped with the right tools, it’s time for the hands-on part: removing the damaged track section. This might seem a bit intimidating, but with a clear plan, you’ll feel like a pro in no time. Here’s a simple step-by-step guide:
1. Remove the Bi-Fold Door Panels: Start by removing the panels from the track. Most panels lift up and off once you release the bottom wheel from the groove.
2. Unscrew the Damaged Track: Use your screwdriver to remove the screws holding the damaged track in place. Keep the screws safe; you’ll need them for the new track.
3. Clean the Area: Once the track is out, take a moment to clean the area. Remove any dirt, debris, or old adhesive. Think of this as cleaning the plate before you serve a delicious meal.
4. Inspect the Surrounding Area: Check for any additional damage to the surrounding framework. If everything looks good, you’re ready to install the new track.
If you encounter any resistance while removing the track, don’t force it. Instead, check for any remaining screws or nails that might be holding it in place. Taking your time here ensures you won’t damage the surrounding structure.
Installing the New Track
Now comes the exciting part—installing the new track section! This is where your bi-fold door will start to feel functional again. Follow these steps for a smooth installation:
1. Position the New Track: Align your new track in the same position as the old one. Make sure it’s level. A level track is crucial for the door to operate correctly.
2. Secure the Track: Using the screws you saved, attach the new track to the wall. Be sure to drive the screws in firmly but avoid over-tightening, which can strip the holes.
3. Check Alignment: Once attached, double-check that everything is aligned correctly. You can use your level here. If it’s off, slightly loosen the screws and adjust until it’s perfect.
4. Reattach the Door Panels: After ensuring the track is secure and level, it’s time to put the door panels back in place. Make sure the wheels fit snugly into the track, and test the door’s movement before closing it up completely.
By following these steps, you can easily install the new track section and restore the functionality of your bi-fold door. Honestly, you might just surprise yourself with how straightforward it is!
Testing Your New Track Section
Once your new track is installed, it’s vital to test it thoroughly. This ensures everything is working as it should before you call it a day. Here’s how to check your work:
– Slide the Door Panels: Open and close the bi-fold door several times. It should glide smoothly along the track without sticking or wobbling.
– Check for Gaps: Look for any gaps between the panels when the door is closed. Ideally, they should meet evenly without any large spaces.
– Inspect the Track: Ensure that the wheels are securely in the track. If they pop out, you might need to adjust the alignment slightly.
If you notice anything amiss, don’t panic. This is a common part of the process. Just take a moment to adjust the track or the panels as needed. Remember, it’s all about getting that perfect fit.
Maintenance Tips for Your Bi-Fold Door
You might be wondering how to keep your new track section in good shape for years to come. Just like any other system, a bit of regular maintenance can go a long way. Here are some tips to keep your bi-fold door operating smoothly:
– Regular Cleaning: Periodically wipe down the tracks to remove dust and debris. A simple damp cloth will do the trick.
– Lubrication: Consider using a silicone-based lubricant on the wheels and tracks. A quick spray now and then can help keep everything gliding effortlessly.
– Inspect for Damage: Check your door and track for signs of wear regularly. If you notice any issues, address them early before they turn into bigger problems.
By keeping up with these simple maintenance tasks, you can ensure that your bi-fold door remains a reliable and stylish part of your home for years to come. It’s like giving your door a little TLC every now and then; it pays off in the long run!
Replacing a damaged bi-fold door track section may seem like a task best left to professionals, but with the right approach, it’s something you can handle yourself. Not only does it save you money, but it also gives you the satisfaction of completing a DIY project. Remember, this whole process is like guiding your door back onto the right path to ensure everything runs smoothly.
From gathering your tools to installing that new track and performing routine maintenance, every step ensures your bi-fold door functions as it should. So, the next time you slide it open, you can enjoy the effortless motion without a hitch. You’ve done the work, and now it’s time to reap the rewards!