
Here’s the thing: a clean, level threshold isn’t just about looks. It helps keep cold air, bugs, and moisture where they belong—outside. If you’re working with a standard brand like Pemko, National Guard, or even a generic one from the hardware store, the steps are usually the same. I’ll walk you through everything you need to know, from tools to troubleshooting mistakes, so you can finish this project feeling proud every time you step through your door.
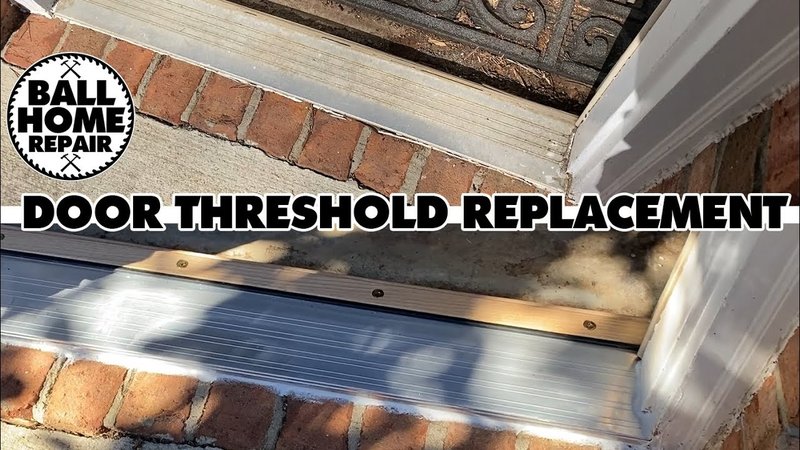
What Does an Aluminum Threshold Cap Actually Do?
Let me explain—an aluminum threshold cap acts like a shield for your door’s entryway. It’s the metal piece you see on the floor, right at the base of your door. Think of it as a protective cover for the sill underneath, designed to take a beating so your home’s structure doesn’t have to. Over time, doors opening and closing, shoes stomping in and out, and temperature swings all take their toll. Without a solid cap, the threshold below can wear out way faster.
Most modern threshold caps are made of aluminum for a reason: it’s light, doesn’t rust, and holds up well in all kinds of weather. Brands like Pemko or M-D Building Products make them in standard widths and finishes, so replacing one rarely turns into a wild goose chase. Some even have a bit of weatherstripping underneath to keep the elements at bay.
Besides protecting your entry, a solid threshold cap helps your door seal tight when it closes. If yours is banged up, you’ll probably notice drafts, squeaks, or a door that doesn’t shut as smoothly. In other words, it’s not just a cosmetic thing. Keeping the cap in good shape matters for comfort and energy savings, too.
When Should You Replace an Aluminum Threshold Cap?
You might be wondering, “Do I really need to bother replacing this thing?” Honestly, not every scratch calls for a new cap. But a few signs mean it’s time to act:
- Bent or raised edges: These can catch shoes, vacuum cords, or even pet claws. Worse, they let water seep underneath.
- Serious corrosion: If white, chalky residue or deep pitting has eaten into the metal, especially near the screws, the cap won’t last much longer.
- Loose or missing fasteners: If screws no longer hold, the cap can wiggle or slide with every step. That’s a tripping hazard, plain and simple.
- Gaps or drafts: If you feel cold air or see daylight peeking under the cap, it’s probably bent out of shape and isn’t sealing right.
Here’s why it matters: Leaving a damaged cap in place lets water get to the wood or concrete beneath. That can mean rot, mildew, or worse. Even if you’re not worried about looks, a broken threshold cap can turn into a real headache if ignored.
Tools and Supplies You’ll Need
Before you start, let’s be honest—gathering the right tools makes this job a lot less frustrating. If you’re working with a brand-name system like PEMKO or National Guard, most threshold caps follow the same installation basics. Even if your existing cap is old or universal, here’s what you’ll want nearby:
- Replacement aluminum threshold cap (make sure it matches length and style—measure twice!)
- Drill or screwdriver (power drill preferred if you have stubborn screws)
- Flat pry bar (for working the old cap loose without chewing up the floor)
- Utility knife (to cut any old caulking or adhesive)
- Measuring tape and pencil (for accurate markings)
- Caulking gun and exterior-grade caulk (to seal the new cap, if needed)
If you’re replacing a threshold cap with weatherstripping or foam underneath, check if your new one comes with replacement inserts—or grab some at the hardware store. It’s the little details that make the seal strong and the job look professional.
Step-by-Step: How to Remove the Old Aluminum Threshold Cap
Swapping out the cap isn’t just a matter of yanking it up and tossing in the new one. Here’s the slow, careful way that keeps you from scuffing up the floor or breaking something important.
- Clear and clean the area. Move rugs, shoes, and anything else out of the way. Give the threshold a good sweep or vacuum so you can see what you’re working with.
- Locate and remove fasteners. Most caps are held down with screws—check for them at the ends and middle. Use your drill or screwdriver to back them out. If screws are stripped or painted over, a utility knife or a little WD-40 can help loosen them up.
- Break the seal. Run the utility knife along the edges to cut any old caulk or paint that might be gluing the cap down. Take it slow—no need to gouge the floor.
- Gently pry up the cap. Slip the flat end of your pry bar under the cap and work it up a bit at a time, moving along the length. If it feels stuck, don’t force it—try cutting along the edge again or spraying a little lubricant underneath.
If a screw won’t budge, don’t get mad—grab a pair of locking pliers or a screw extractor. A little patience (and the right tool) saves a lot of cursing.
Once the old cap is up, check for any leftover debris, old caulking blobs, or loose splinters. Clean everything so the new cap sits smooth and flush.
How to Install the New Threshold Cap
Now for the satisfying part—putting the fresh aluminum threshold cap in place. Here’s a simple breakdown:
- Double-check the fit. Set the new cap over the threshold opening. It should lay flat and not wobble. If it’s a little long, use a hacksaw to trim the ends—go slowly and sand the edges smooth after cutting.
- Mark for screws. Use the cap’s pre-drilled holes as a guide, or mark new ones evenly spaced. Pre-drill small pilot holes if the underlying material is wood or dense composite.
- Optional: Add weatherstripping. If your cap comes with a foam or rubber insert underneath, now’s the time to add it. This helps with both draft control and cushioning.
- Secure the cap. Set the cap in place and drive in the screws. Do the ends first, then fill in the middle. Don’t overtighten—you want it snug, not warped.
- Seal the edges. Run a bead of exterior-grade caulk along the sides where the cap meets the floor. Smooth it with a damp finger or tool to keep things neat and watertight.
Give everything one last check—try opening and closing the door to make sure nothing rubs or sticks. If you hear a squeak, a bit of silicone spray along the edge usually does the trick.
Common Problems and Troubleshooting Tips
Even with careful prep, things don’t always go smooth. Here’s what to do if you hit a snag:
- Cap won’t sit flat: Double-check for debris, old nails, or warped subfloor. You might need to sand down a raised spot or fill a dip with wood filler.
- Screws keep spinning: If screw holes are stripped out, fill them with wood glue and a toothpick, then re-drive the screw after it dries. For concrete floors, use masonry anchors instead.
- Drafts after install: If you still feel air, check that the cap’s weatherstripping is fully compressed when the door closes. Adding a thin self-adhesive foam strip can help “sync” up the seal.
- Cap too long: Measure twice, cut once. Use a fine-tooth hacksaw and clamp the cap to a workbench before cutting for a straight, clean edge.
- Door rubs on cap: Lower or reset the threshold cap, or trim the door bottom if there’s room. It’s better to adjust the cap than to shave too much off your door.
Most of these fixes are quick if you catch them early. It’s tempting to rush, but honestly, a few extra minutes spent troubleshooting now saves a bunch of frustration later.
Comparing Aluminum Threshold Caps to Other Options
You might be thinking, “Couldn’t I just use a different material?” Aluminum’s not the only type, but it does have some advantages. Here’s a quick look at what’s out there:
- Aluminum threshold caps are durable, weather-resistant, and easy to cut to size. They strike a good balance between looks and function. Most big brands, like Pemko or National Guard, offer several finishes and fit universal entryways.
- Brass threshold caps look fancy and are even tougher, but they cost more and tarnish faster if left unpolished.
- Wooden thresholds have a warmer look but need regular finishing to avoid rot or swelling. They’re not a great choice for exposed entries or heavy use.
- Plastic or vinyl caps can work in a pinch (especially on interior doors), but they scratch easily and warp in the sun or extreme temps.
If you want something with a long life and minimal maintenance, aluminum wins for most homes. Just make sure your new cap matches the profile of your old one—universal kits usually do the trick, but check the details to avoid rework.
Tips for Keeping Your Threshold Cap in Good Shape
Once you’ve swapped in a new cap, a little care helps it last. Here are a few habits that protect your handywork:
- Clean it regularly: Sweep away dirt and grit that could scratch the metal. A wipe with a damp cloth and mild cleaner keeps it looking sharp.
- Check for loose screws: Every few months, take a quick peek and tighten anything that’s worked loose. Door vibrations can slowly back them out.
- Keep caulking fresh: Inspect the edges every season. Reapply caulk if you see gaps or peeling, especially before winter or wet months.
- Don’t ignore early signs of wear: A tiny dent or scratch can turn into a snag or leak over time. It’s easier to touch up small flaws than wait until the cap is a mess.
If your door gets heavy use, or if you have kids (or pets) who love slamming things, it’s worth doing a quick check more often. Maintaining a good seal and a safe, smooth threshold saves you from annoying repairs down the road.
Final Thoughts on Replacing a Damaged Aluminum Threshold Cap
Replacing a damaged aluminum threshold cap isn’t just about fixing an eyesore—it’s about protecting your home and making every entry and exit smooth and safe. While the job looks a bit intimidating at first, it’s mostly about being slow, steady, and paying attention to the little things: measuring twice, using the right tools, and making sure your new cap lines up just right.
Honestly, it’s one of those projects that’s equal parts satisfying and practical. You’ll see the results every day, and your friends or family might just wonder how you made it look so seamless. Take your time, follow the steps, and don’t sweat the small stuff—most mistakes are fixable, and a solid cap means fewer headaches for years to come. So roll up your sleeves, tackle that threshold, and enjoy the fresh look (and better seal) on your next step through the door.