Honestly, it’s easy to think that once a thread is stripped, that piece of hardware is toast. But here’s the thing: with a little patience and the right tools—specifically, thread repair inserts—you can bring those mangled threads back to life. Brands like Heli-Coil have made a name for themselves in this world, offering simple kits that let you restore strength and reliability without tossing the whole part. Let me explain exactly how this works, so you can decide if it’s the right fix for your next project.
Why Threads Strip in Metal Hardware
Before we get into fixing things, let’s look at why threads strip in the first place. It’s not always about brute force—sometimes, it’s subtle mistakes that add up over time. Usually, threads strip because a bolt is overtightened, or cross-threaded (where threads don’t line up right as you screw things in). In softer metals like aluminum, you can even ruin threads just by repeated tightening and loosening.
You might be wondering, “Is this always the fault of the person doing the repair?” Not really. Sometimes, manufacturers cut corners on thread quality, or corrosion gets in and weakens the metal. In other cases, the hardware just wasn’t designed to be taken apart that many times. Whatever the cause, stripped threads are more common than most folks like to admit.
Here’s the frustrating part: stripped threads mean you lose the tight connection that hardware was designed for. Bolts can wobble loose with vibration, or worse, pull straight out under pressure. In the world of troubleshooting, a stripped thread feels like a “code error” in your favorite gadget—it’s a small fault that can lead to much bigger problems if ignored.
What Are Thread Repair Inserts?
So, what exactly is a thread repair insert? In simple terms, it’s a tiny, coiled or solid metal sleeve that restores the original size and strength of a damaged threaded hole. You create new threads in the stripped hole to match the outer size of the insert, then screw in the insert itself. The inside of the insert provides a brand-new set of threads that matches your original bolt.
- Heli-Coil is the big name here. Their inserts look like a tightly wound spring.
- Other types include solid steel inserts or even keyed inserts for extra strength.
- The “repair” is permanent if installed right. Your bolt will go in and out like new.
Think of it like lining a worn-out pocket with a fresh piece of fabric. The insert takes the load, not the damaged metal, so your hardware holds tight again. And honestly, the process is satisfying—like hitting “reset” on an old remote that just wouldn’t sync.
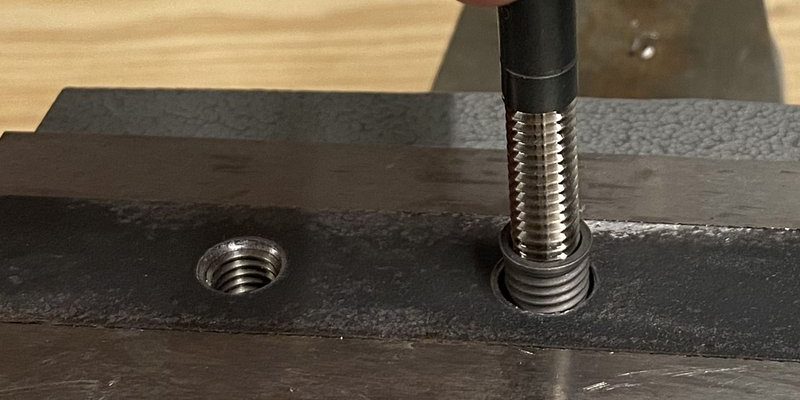
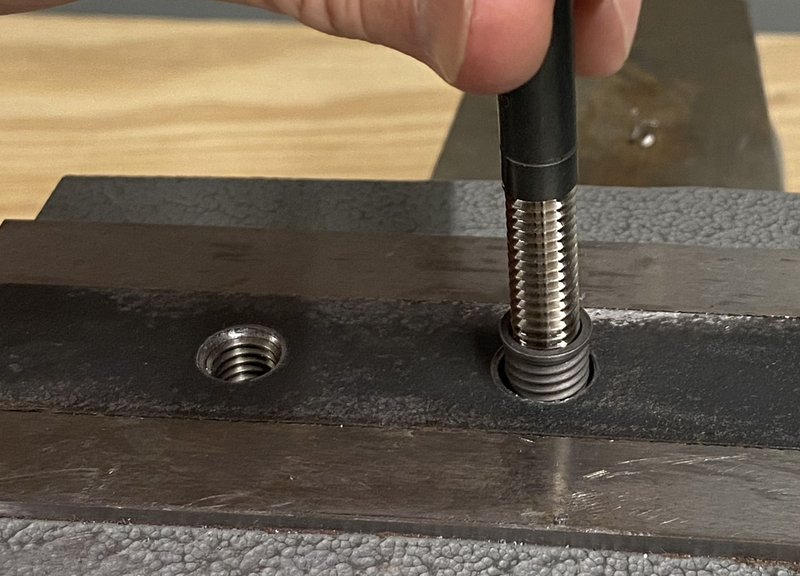
How Thread Repair Inserts Work
Let’s walk through the basic idea. When a thread is stripped, the hole is too big or misshapen for the original bolt to grip. Here’s what a thread repair insert does:
- You drill out the damaged threads, making the hole a little bigger.
- You tap new threads in that oversized hole using a special tool from the insert kit.
- You screw in the insert—it locks into the new threads, and its inner surface matches the original bolt.
- When you use the hardware, your bolt grabs the insert instead of the stripped metal.
The most common inserts (like Heli-Coil) “spring” into place and grip the hole tightly. Once set, they don’t come out unless you force them. There are also solid inserts for heavy-duty fixes, like in engine blocks or industrial machinery, where every bit of strength matters.
Picture this: Your favorite chair has a wobbly leg because a screw keeps falling out. With a thread repair insert, you can fix the hole so the original screw fits tight again—no wood glue or oversized screws needed. It’s a tool that gives new life to things you thought were done for.
Choosing the Right Thread Repair Insert
Not every stripped thread needs the same fix. You might be deciding between Heli-Coil, Time-Sert, or another brand, and honestly, it can be confusing. The right choice depends on the job:
- Heli-Coil inserts (the coiled-wire kind) work for most home or automotive repairs. They’re cheap, easy to install, and available for lots of thread sizes.
- Solid inserts (like Time-Sert) offer more strength and are used in high-stress places, like cylinder heads or transmission cases.
- Keyed inserts have tiny prongs to lock them in place, so they won’t twist out even if you remove bolts a lot.
Here’s the thing: If you’re fixing a remote mounting bracket or a battery compartment in a power tool, a simple coiled insert is perfect. If you’re working on an engine or a part that gets super hot and takes a beating, go with a solid or keyed insert. Always check what bolt size and thread pitch you need—the wrong match can cause more problems than it solves.
Step-by-Step: Installing a Thread Repair Insert
Alright, let’s get practical. Installing a thread repair insert isn’t rocket science, but you need to follow the steps carefully. Here’s a walk-through that even a first-timer can manage:
- Remove any broken bolt or debris from the hole. You want a clean workspace, so grab some compressed air or a brush.
- Drill out the damaged threads using the bit provided in your kit. Go slow and keep the drill straight—this is no time for guesswork.
- Tap new threads with the special tap from the kit. It’ll be bigger than your original bolt. Use cutting oil if possible for a smooth cut.
- Screw in the insert with the tool provided. Some inserts break off a tab at the bottom when you’re done; others need to be set flush. Read your kit’s instructions carefully.
- Install your original bolt. If you did everything right, it’ll feel snug, and your hardware is as strong—or even stronger—than before.
Let me give you a tip: Don’t rush. More thread repair fails come from impatience than anything else. Take your time with each step, especially tapping the new threads and starting the insert straight. That way, you won’t end up troubleshooting crooked or jammed inserts later.
Common Problems and How to Avoid Them
Even the best repair jobs can go sideways if you skip a step or get careless. Here are some classic mistakes people make with thread inserts, and how to dodge them:
- Cross-threading the insert: If the insert isn’t lined up straight, you’ll end up in the same mess you started with. Always start by hand, not by force.
- Drilling too deep or too shallow: Follow the recommended depth from your insert kit. Drilling too deep can mean your insert sinks in and disappears—too shallow, and it sticks out.
- Using the wrong size tap or insert: Double-check bolt size, thread pitch, and insert length. Guessing leads to loose fits or broken bolts later.
- Not cleaning out shavings: Metal chips left in the hole can jam the insert or damage your new threads.
Here’s my honest advice: If it feels wrong, stop and check your setup before going any further. It’s like trying to pair a remote and not getting the “sync” confirmation—don’t keep pushing buttons hoping for the best. Troubleshoot, reset, and go again.
Are There Alternatives to Thread Repair Inserts?
You might be wondering if thread repair inserts are always the answer. In truth, they’re the go-to for a reason—especially in metal hardware. But a few alternatives might fit in some cases:
- Oversize bolts: You can expand the hole and cut new, larger threads, but you’ll need an even bigger bolt. This isn’t practical for tight spaces or matching hardware.
- Epoxy or thread-locking compounds: These give a temporary fix for light loads or rarely-used connections. They’re a last resort, not a real repair.
- Welding and re-tapping: For thick metal and skilled welders, you can fill the hole with weld, then drill and tap new threads. It’s effective, but overkill for everyday repairs.
Here’s my take: Thread repair inserts hit the sweet spot—they’re strong, permanent, and don’t require you to redesign the hardware. Unless you’re working on something highly specialized, inserts are the everyday hero solution.
When to Call in a Professional
Let’s be real: Not every repair should be tackled at home. If you’re working on critical hardware—like the cylinder head of a car engine, or a load-bearing bracket in industrial equipment—it’s worth considering a pro. These repairs aren’t just about getting a bolt to hold; if they fail, the results could be dangerous.
- If the metal around the hole is cracked or badly corroded, repairing the thread won’t be enough.
- Some applications have super-tight tolerances (think: engine blocks). A pro can make sure inserts are installed perfectly straight and to spec.
- If you try fixing it yourself and the insert fails, a mechanic or machinist can still help—but it might be a trickier (and more expensive) job by then.
Don’t be afraid to ask for help. Sometimes, calling in an expert saves you time, money, and a whole lot of headache down the road. Think of it like bringing in an electronics whiz when your universal remote just refuses to pair—sometimes, a pro’s touch makes all the difference.
Closing Thoughts: Why Thread Repair Inserts Matter
Stripped threads can feel like the end of the road for your favorite hardware, but thread repair inserts give you a second chance—no need to toss expensive parts or make do with wobbly fixes. Whether you’re a weekend tinkerer or just solving a midweek emergency, these little inserts offer a “reset button” that’s strong, reliable, and surprisingly easy to use with a bit of patience.
So next time a bolt just won’t catch, don’t give up so fast. With the right kit and a careful approach, you’ll be back in action—no troubleshooting guides or late-night panic required. It’s a small fix that can save a big repair, and honestly, there’s a certain pride in knowing you brought something back from the brink.