Lead paint is a concern in homes built before 1978, when its dangers became widely recognized. Addressing door hardware in these homes isn’t just about fixing a squeaky hinge or a stubborn knob; it’s about doing it safely. Think of it as navigating a minefield—one wrong step, and you could expose yourself (or your home) to harmful dust or paint chips. So, let’s dive into how to repair that hardware properly, while keeping safety at the forefront of your DIY project.
Understanding Lead Paint: Why It Matters
Lead paint was commonly used because it dries fast and provides a nice finish. However, it’s also toxic, especially to kids and pets. If you accidentally chip or sand a door with lead paint, tiny lead particles can become airborne. You might be wondering how serious that can be. Well, exposure can lead to serious health issues, including developmental delays in children and various ailments in adults.
When you’re dealing with older doors, it’s crucial to confirm whether lead paint is present. You can buy a lead test kit from the hardware store or hire a professional for a thorough evaluation. If the door tests positive, don’t panic. It just means you need to take extra precautions.
Preparing for repairs in a house with lead paint involves gathering safety gear. This means gloves, masks, and goggles. You wouldn’t go swimming without a swimsuit, right? Proper gear is essential to ensure you don’t accidentally ingest or inhale harmful particles while working.
Preparing the Area for Repair
Before you touch that door, it’s smart to prepare your workspace. Start by clearing the area around the door. You want to create a clean, safe zone where paint dust and debris won’t spread. Lay down plastic sheeting or old towels to catch any chips or dust that could occur during the repair process.
Next, ensure proper ventilation. Open windows and doors to allow fresh air to flow through the space. This way, if there is any lead dust, it can dissipate rather than linger. Fans can help circulate air, but they shouldn’t blow directly on the area you’re working on. You want to avoid stirring up dust unnecessarily.
After prepping the space, gather your tools. You’ll typically need:
- Replacement hardware (if necessary)
- Screwdriver
- Plastic sheeting
- Moist cloth
- Painter’s tape
- Paint scraper (if necessary)
Having everything at hand will ensure a smooth repair process.
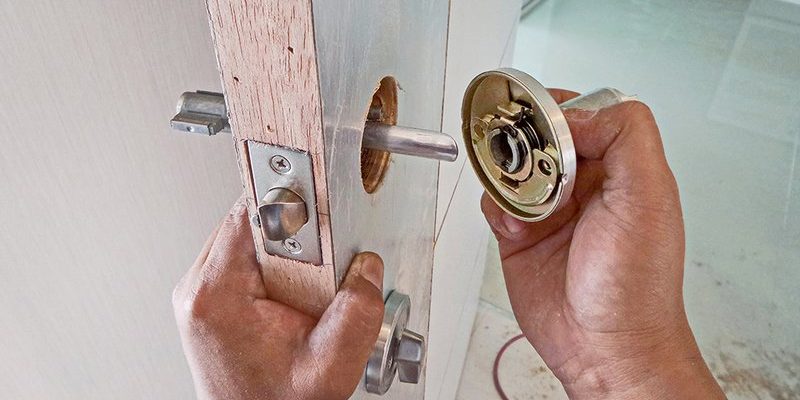
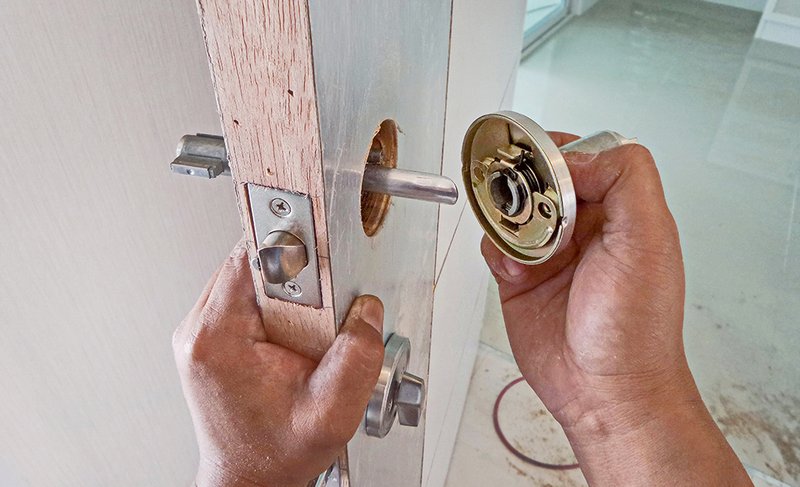
Removing the Old Door Hardware
Now that your workspace is set up, it’s time to tackle the door hardware. Begin by carefully removing the components like the doorknob or hinges. Keep in mind the screw types—some may be Phillips, while others could be flathead. Using the wrong screwdriver can strip the screws and make your job much harder.
As you unscrew each piece, place them in a container or bag so they don’t get lost. If you notice any paint flaking off the door, gently dampen a cloth with water and wipe it away, rather than sanding it dry, which could create dust. Remember, the goal is to minimize lead dust.
If the hardware is stuck due to paint buildup, carefully scrape around the edges. This might take a little elbow grease, but be patient. Rushing can lead to accidents or more paint chips.
Installing New Hardware Safely
Once you’ve removed the old hardware, it’s time to install the new pieces. Before doing so, make sure the new hardware aligns correctly with the existing holes. You don’t want to drill new holes if you can avoid it. If you have to, try to keep the drilling to a minimum to prevent further paint damage.
Begin with the hinges. Place them in the same position as the old ones and attach them lightly at first. Tighten them once you ensure everything is aligned correctly. Then, move on to the doorknob or handle. Follow the manufacturer’s instructions for installation for a secure fit.
When everything is in place, give the door a gentle test. It should swing or open easily without resistance. If you hear any noises, check the tightness of the screws and make adjustments as necessary.
Cleaning Up After Repairs
Cleaning up might seem straightforward, but in a lead paint scenario, it requires extra care. Start by sealing all the plastic sheeting and debris in a bag labeled for hazardous waste, even small bits can pose risks. Make sure not to vacuum the area immediately, as this could stir hazardous dust into the air. Instead, use a damp cloth to wipe down any surfaces that could have been exposed to dust.
Once you’ve cleaned the area thoroughly, wash your hands and any clothes that may have come in contact with the lead dust. Double-check any tools you used; they also need to be cleaned properly to prevent cross-contamination.
Finally, take a moment to reflect on your repair job. It might feel satisfying to fix that door, but it’s only safe when done properly!
Consider Professional Help
Sometimes, the best approach is to call in a pro. If you’re feeling uncertain about repairing the door or if you’re dealing with larger lead paint issues, consider hiring a certified contractor. They have the proper training, equipment, and experience to handle the situation safely.
Professionals can also ensure that (if necessary) the paint is removed and replaced following EPA guidelines. It’s an investment that can save you headaches down the road, especially if you live in an older home.
Understanding the Risks and Responsibilities
Living in a home with lead paint means being aware of the risks involved in various home repairs. It’s essential to take responsibilities seriously—not just for yourself but for anyone who might be affected by your work. If children or pregnant women are nearby, err on the side of caution and prioritize safety above all.
Being informed and cautious can make a significant difference in managing lead paint hazards. Always do your research before starting any projects and familiarize yourself with local regulations regarding lead paint removal.
Repairing interior door hardware in a home with lead paint isn’t just about fixing functionality; it’s about doing it safely. By understanding the risks and taking the proper precautions, you can tackle your DIY projects with confidence. Whether you decide to do it yourself or call in an expert, remember that safety should always come first.
So, next time that door gives you trouble, think about how you can resolve it while protecting both yourself and your home. With the right approach, you’ll not only have a smoothly operating door but peace of mind knowing you’ve handled it safely.