You might have noticed that your door hardware is a mix of metal, plastic, and sometimes wood. Each material reacts differently to moisture, which is why understanding how to repair them after a water leak is crucial. Just like a gardener tends to their plants after a rainstorm—nurturing them back to health—you can restore your door hardware with a bit of care and the right approach.
Assessing the Damage
Before diving into repairs, it’s a good idea to assess the damage. Look closely at the door hardware and see what’s affected. Is it just a little rust on the hinges, or does the lock feel sticky? Check for signs of visible damage:
- Rust: Look for orange or brown patches, especially on metal components.
- Corrosion: Beyond surface rust, corrosion can weaken the metal and affect functionality.
- Sticking Mechanisms: If your door handle or lock feels tight, moisture might have created a barrier.
Take note of these issues. If it’s just a few rusty spots, you might be able to clean them up easily. But if you notice significant damage, such as a lock that won’t turn or hinges that have completely seized, it might be time to replace those parts.
Gathering Tools and Supplies
Now that you’ve assessed the damage, it’s time to gather your tools and supplies. Having everything on hand before starting will make the process smoother. Here’s a handy list to help you prepare:
- Cleaning Supplies: Use vinegar or a rust remover for cleaning.
- Screwdriver: A basic set will help you remove the hardware.
- Lubricant: Silicone spray or graphite lubricant is great for keeping things moving smoothly.
- Replacement Parts: If necessary, buy new hinges, locks, or handles that match your door’s aesthetic.
Having these tools ready is like laying out your art supplies before you start painting—you want to set yourself up for success.
Cleaning and Treating Rust
Let’s tackle rust first. You may be thinking, “Can I really fix this?” Absolutely! Cleaning rust from your door hardware is often a straightforward task. Here’s how you can do it:
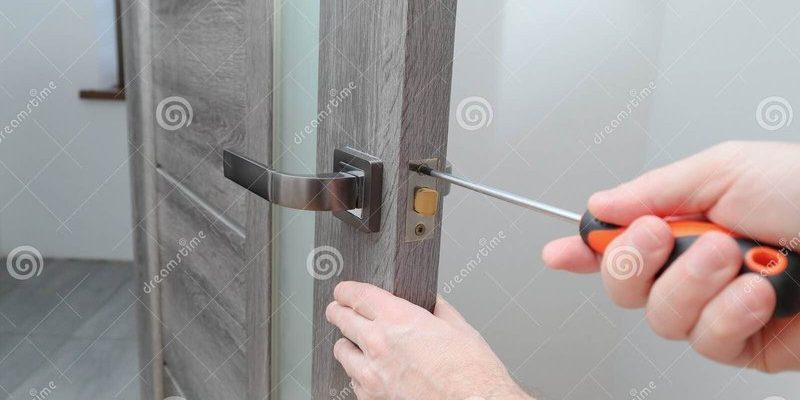
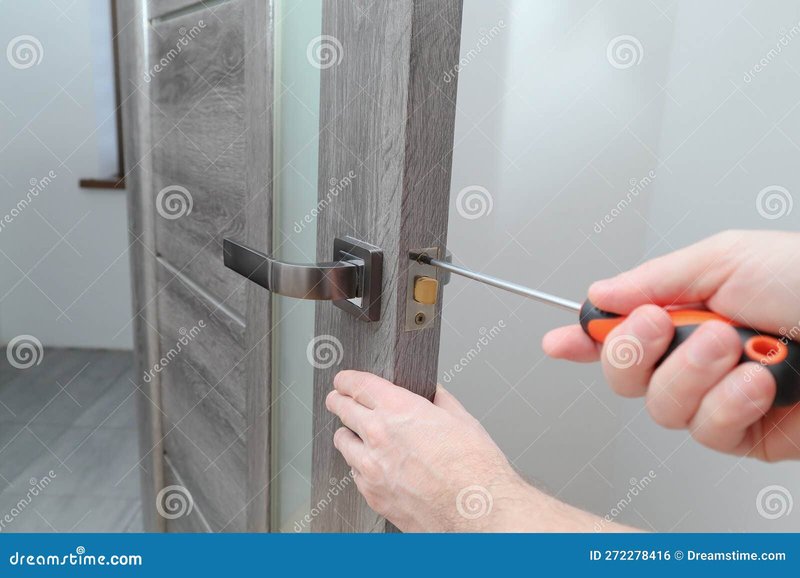
1. Remove the Hardware: Use your screwdriver to carefully remove any hinges, handles, or locks that show signs of rust.
2. Clean the Rust: Apply vinegar or a specialized rust remover to the affected areas. Allow it to sit for a few minutes before scrubbing gently with steel wool or a brush.
3. Rinse and Dry: Once the rust is removed, rinse the hardware with water and dry it thoroughly to prevent further corrosion.
Remember, cleaning is like giving your door hardware a spa day—it revitalizes and prepares it for a longer lifespan.
Lubricating Moving Parts
Once the hardware is clean, it’s time to lubricate those moving parts. Lubrication is key to ensuring that your door hardware functions smoothly, especially after being exposed to water. Here’s what to do:
1. Choose the Right Lubricant: Silicone spray works wonders without attracting dirt. Graphite is also an excellent choice for locks.
2. Apply Sparingly: A little goes a long way! Spray or apply a small amount to hinges, locks, and the handle mechanism.
3. Work the Mechanism: Open and close the door a few times to evenly distribute the lubricant. It’s like stretching before a workout—getting everything ready for action.
Proper lubrication is essential. If you skip this step, your hardware may begin to stick or seize up again, leading to frustration later.
Replacing Damaged Hardware
Sometimes, cleaning and lubricating aren’t enough. If you’re dealing with severely damaged hardware, replacement is the way to go. Here’s how to make that happen:
1. Buy the Right Parts: Ensure that the replacements match your existing hardware. If you’re unsure, take the old parts to the store for comparison.
2. Remove Old Hardware: Use your screwdriver to take off the damaged parts carefully.
3. Install New Hardware: Follow the manufacturer’s instructions to install the new pieces. Secure them firmly, but avoid over-tightening, which can lead to future issues.
Replacing hardware can feel daunting, but think of it like swapping out an old light bulb—you’re just refreshing what you have.
Testing the Repairs
After you’ve cleaned, lubricated, or replaced your hardware, it’s time to test everything. Close and open the door a few times and check whether all mechanisms operate smoothly. If the door locks securely and the handle turns without resistance, you’ve done a great job!
Don’t forget to inspect the door frame for any signs of lingering moisture. If you notice any dampness, address it immediately to prevent future leaks and damage. Think of it as a final check-up after a long appointment; you want to leave feeling confident everything is okay.
Preventing Future Damage
To keep your door hardware in great shape after a water leak, consider these prevention tips:
- Sealant: Apply a door sealant to the edges of your door to help repel moisture.
- Regular Maintenance: Schedule quarterly checks to inspect for rust or corrosion.
- Immediate Repair: If you find any water leaks, fix them as soon as possible to avoid damage.
Just like you wouldn’t ignore a check engine light in your car, staying proactive with your door hardware can save you from bigger problems down the road.
In conclusion, repairing interior door hardware after a minor water leak is entirely manageable. By assessing the damage, cleaning and lubricating your hardware, or replacing it when necessary, you’ll restore functionality and extend the life of your door. Remember, small efforts now can lead to big rewards later. So next time you notice a leak, roll up your sleeves and tackle the problem head-on!