Here’s the thing: most people don’t realize how much a simple strip of rubber or foam can impact their comfort (and energy bill). Over time, weatherstripping wears down—maybe from pushing the door too hard, sun damage, or just the usual opening and closing day after day. If you have a classic steel or wood entry door from brands like Therma-Tru, Masonite, or JELD-WEN, the process to fix up your weatherstripping isn’t complicated, but it does need a little know-how. Grab a cup of coffee, and let’s break down everything you need to know to repair damaged weatherstripping on your front entry door.
Why Weatherstripping Matters For Your Front Entry Door
Let me explain why weatherstripping has such a big job. Imagine trying to heat or cool your house while Mother Nature pokes holes in your walls. That’s basically what happens when weatherstripping fails. It forms the barrier that keeps outside air where it belongs and inside air trapped, saving you from high energy bills and uncomfortable drafts.
A damaged seal not only means discomfort, but it also allows moisture and dirt to sneak inside. Over time, this can lead to warped floors, peeling paint, or even mold—none of which you want greeting you when you step through the door. Honestly, weatherstripping is such an easy victory when it comes to home maintenance. It’s a small thing that makes a massive difference, especially during those blazing summers or icy winters when your HVAC system is working overtime.
You might be wondering if all doors use the same kind of weatherstripping. The answer? Not at all. There are magnetic strips for metal doors, foam tape for wood, and even special “bulb” types for higher-end models. Each type, no matter the brand, does the same thing: close the gap and give your door a comfortable “thunk” when it closes.
And here’s a pro tip—if you ever find yourself fiddling with the thermostat and still feeling drafts, check the weatherstripping before blaming your furnace or A/C. Nine times out of ten, that’s where the trouble starts.
How To Spot Damaged Weatherstripping On Your Front Door
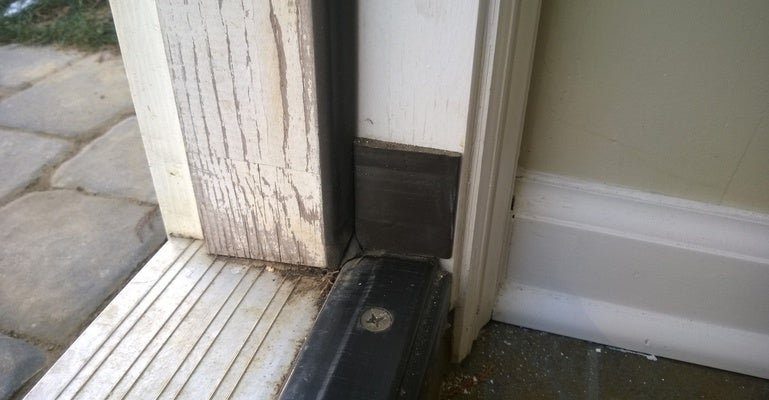
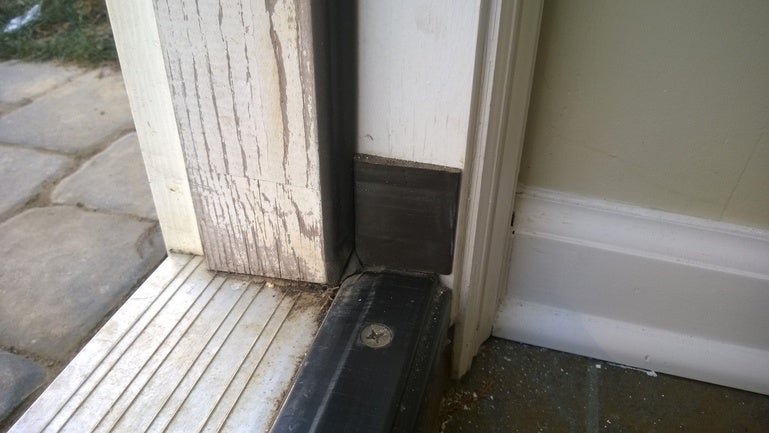
So how do you know when it’s time to roll up your sleeves? First off, look and feel—literally. Run your hand around the edges of the door, inside and out. If you feel a draft, that’s your first clue. Next, visually inspect the weatherstripping. Is it cracked, torn, or flattened? Maybe it’s pulling away from the frame or looks faded and brittle. If you see *any* daylight coming through when the door’s closed, that’s a red flag.
Another old-school trick: close the door on a sheet of paper. If you can pull it out too easily, your weatherstripping isn’t sealing tightly. Some folks even notice water stains or a change in how their door sounds when it closes (less “seal,” more “slam”).
Don’t just check the sides—look at the top and especially the bottom sweep. That’s where a lot of damage hides since those areas get the most friction and exposure. If you’ve got a Masonite or older Therma-Tru door, the bottom sweep may slide right off once it wears down.
Even if only one section seems damaged, it’s smart to replace the whole strip so you get a uniform seal and don’t have to redo the job a few months later.
Choosing the Right Replacement Weatherstripping
You’ve confirmed the problem, so what kind of weatherstripping should you buy? Here’s where it can get a little confusing. There are dozens of shapes and materials out there, and not all brands use the same sizes. Most entry doors—especially newer ones from JELD-WEN or Masonite—use a kerf-in style, which means the strip fits into a little slot (the kerf) around the door frame. These are super common and easy to swap, but you’ll still want to measure carefully.
- Foam tape: Great for quick fixes on wood doors, but less durable against heavy use.
- Vinyl or rubber bulb strips: Standard for modern entry doors, providing a flexible but tight seal. They last longer and handle temperature swings well.
- Magnetic strips: Used mostly for steel doors. They have a fridge-door-like closure, which is perfect for energy efficiency but a bit pricier.
Before you buy, remove a small section of the old weatherstripping and take it with you to the store. Match not just the thickness but also the profile—the way it bends or “bulbs” out. If you shop online, check your door’s brand and model for recommendations. A universal weatherstripping kit is tempting, but in my honest opinion, you’ll get a better result sticking with the exact size and style your door was designed for.
Gathering Tools and Supplies
Now that you’ve got the right replacement, you’ll need a few simple tools. No need to raid the toolbox—just grab what’s handy.
- Flathead screwdriver or putty knife: For prying out the old weatherstripping, especially if it’s stuck in a kerf slot.
- Scissors or utility knife: To cut the new strip to length.
- Measuring tape: Double-check the width and total run of each section before you buy and before you cut.
- Soap and water: For cleaning the door frame before installing new weatherstripping—trust me, don’t skip this step.
If your door uses adhesive-backed foam tape, you might need a little rubbing alcohol to remove any sticky residue from the old strip. For kerf-in styles, a gentle tug usually does the trick, but for glued-on strips, patience pays off. Don’t pull too hard or you might damage the underlying door or frame.
A clean frame makes a world of difference. Any leftover dust or old adhesive will keep the new weatherstripping from sealing properly.
Step-By-Step Guide: How To Repair and Replace Weatherstripping
Let’s walk through the process together. Even if you’ve never replaced weatherstripping before, take it slow and don’t rush. Here’s a detailed, beginner-friendly walkthrough:
1. Remove The Old Weatherstripping
- Open your door fully.
- Starting at one end (usually the top), gently pry out the old strip using your flathead screwdriver or fingers. Don’t force it—work slowly to avoid damaging the kerf slot or frame.
- If you have glue or nails holding it in place, loosen those carefully.
- Dispose of the old strip.
2. Clean The Door Frame
- Wipe the area down with a damp cloth. Remove all dust, dirt, and old adhesive.
- Let the frame dry completely.
3. Measure and Cut The New Weatherstripping
- Hold the new strip alongside the door frame and measure with your tape.
- Cut each piece (sides, top, and bottom if needed) so there’s no gap but no bunching either.
- If you’ve got a kerf-in type, make sure the rib lines up with the slot.
4. Install the New Strip
- Starting at the top, press the new weatherstripping into the slot or press the adhesive firmly onto the frame.
- Work your way down, making sure the strip sits flush and straight. Don’t stretch it—let it relax into place.
- If you’re doing the bottom sweep, follow the same process or slide the new sweep into its track.
5. Test Your Door
- Close the door gently. It should seal snugly—there shouldn’t be resistance, but it should feel like a soft “push” against the new strip.
- Check for any gaps, drafts, or hitches. If needed, adjust the strip or trim off a tiny bit from the ends.
Take your time with each step, and if something feels off, back up and check your alignment. Weatherstripping is forgiving—if you mess up, you can usually tug it off and try again.
Common Problems (And How To Troubleshoot Them)
Even with the best intentions, a few hiccups can pop up. Sometimes the door won’t close all the way. Maybe you notice the new strip is bunching up or peeling after a few days, or you still feel a draft. Let me explain some quick fixes.
- Door is hard to close: The new weatherstripping might be too thick. Double-check that you bought the right profile. Try trimming it bit by bit, or choose a thinner strip.
- Gaps remain: Check for dirt or old adhesive in the slot, or see if the strip is too short. In some cases, your door or frame has warped—sometimes a little sandpaper or minor adjustment to the door reveals a better fit.
- Peeling adhesive: The frame probably wasn’t cleaned enough. Remove and re-clean, then try again with a fresh strip.
- Draft persists: Don’t forget the threshold! The sweep on the bottom gets the most wear and handles the most trouble. Replacing this might solve stubborn drafts.
If you tried everything and the door still isn’t sealing, it could be the door itself—warped, hung unevenly, or with a bent frame. Sometimes, a few shims or re-screwing the hinges can do wonders.
Comparing DIY Repair To Replacing The Whole Door
You might be thinking, “If my weatherstripping is this beat up, maybe I should just get a new door?” Here’s my take: in almost every case, replacing the weatherstripping is faster, much cheaper, and just as effective as a whole new front entry door. Unless the door is rotting, rusted, or doesn’t latch at all, there’s no need to go down the expensive route.
Modern doors from brands like Therma-Tru or Masonite are designed so all the seals and sweeps are replaceable. Universal weatherstripping kits fit 90% of standard door frames. Only in rare cases—major frame damage, broken glass, or serious water rot—do you need to look at a full replacement.
Even if you call in a pro, you’ll save hundreds by sticking with a weatherstripping repair or replacement. Plus, it’s a quick project you can finish in less than an hour.
Keeping Your Weatherstripping In Good Shape
Now that your door is sealed and draft-free, let’s keep it that way. Weatherstripping doesn’t need much attention, but a little TLC once or twice a year makes it last.
- Wipe down the strips whenever you clean the door. Dirt and grit wear them out faster.
- Every spring and fall, check for cracks, gaps, or flattening—especially after harsh weather.
- Lubricate vinyl or rubber strips with a little silicone spray to prevent drying and sticking.
- Avoid slamming the door—gentle closing helps the seal keep its shape.
If you keep an eye out for early signs of damage and fix little problems right away, your weatherstripping can work quietly in the background for years. And you? You’ll stay comfy inside, with lower energy bills and fewer bugs for company.
A tight seal on your front door is one of those tiny home upgrades that pays off every time you walk through it—warm in winter, cool in summer, and a whole lot quieter year-round.
Wrapping it all up: repairing damaged weatherstripping on a front entry door is simple, satisfying, and totally doable for a beginner. With the right materials, a little patience, and some careful troubleshooting, your home will feel tighter, cozier, and more energy-efficient—just the way it should be.