Honestly, repairing an exterior door with water damage—especially when it affects your locks, handles, or keypads—isn’t just about making things look nice again. It’s about keeping your home secure and avoiding bigger headaches down the road. Think of it like fixing a cracked phone screen before the damage spreads and kills the touchscreen. You might be wondering if you really need to replace that snazzy Ring keypad or if some troubleshooting and a little elbow grease can save you money. Let me walk you through how to spot the problem, weigh your options, and tackle the repairs like a pro—no expert tools or skills required.
How Water Damage Affects Exterior Door Hardware
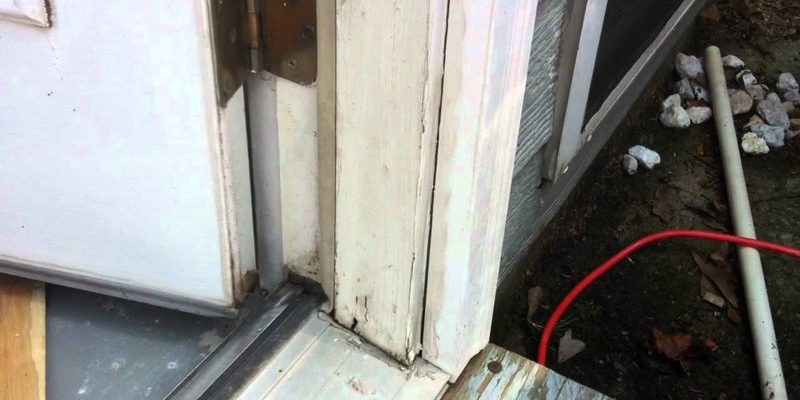
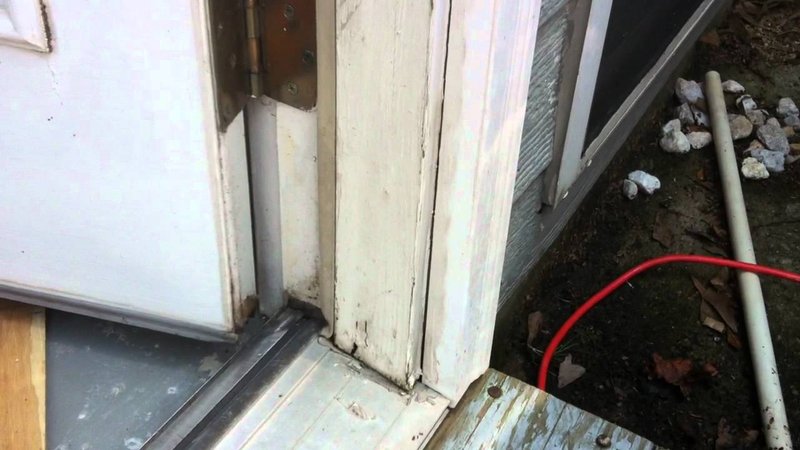
Water and exterior doors don’t play nice together, especially when it comes to your hardware. When moisture creeps into the door—whether through worn weatherstripping, a failed paint job, or just years of battling the elements—it does more than make things soggy. Over time, water causes the door material around your hinges, lockset, or keypad to swell, rot, or even split. That’s when you’ll notice your deadbolt getting harder to turn, your keypad remote not connecting, or even the whole lock feeling wobbly.
Metal hardware isn’t immune either. Exposure to constant moisture can lead to rust, corrosion, and even make screws lose their grip. If you’ve got a smart lock, water damage can interfere with electronic contacts, causing battery drain or sync issues that leave you locked out or troubleshooting error codes. All of these issues make your door less secure and more frustrating to use.
Here’s the kicker: water damage rarely stays in one spot. If the wood around the strike plate or latch is soft, the lock can shift out of alignment, making code entry or remote pairing a pain. If you ignore it, you might end up needing a whole new door and hardware set. That’s why catching and repairing water damage early—before it dominoes into bigger problems—matters for both your sanity and your home’s safety.
Signs Your Door and Hardware Have Water Damage
You might be wondering what to look for if you suspect your door is dealing with water damage. Sometimes it’s pretty obvious—peeling paint, warped panels, or swollen door edges. Other times, the clues are sneakier. The lock could suddenly be harder to code, the keypad might not respond unless you press really hard, or your remote fails to sync even after a reset.
- Sticky or misaligned locks: If your deadbolt doesn’t slide in easily, or you need to lift the door to make the latch connect, swollen or shifted wood is likely to blame.
- Corroded or rusted hardware: Look around hinges, screws, and lock faceplates for signs of rust. With smart locks, check the battery compartment—water can sneak in and corrode the contacts, leading to all sorts of pairing problems.
- Soft or spongy wood: Press gently near the hardware. If the wood gives or feels mushy, it’s taking on water. That’s especially bad news around security hardware, since the screws may not hold under force.
- Paint or finish damage: Bubbling, peeling, or discolored paint often means water is getting in somewhere and causing trouble.
One strange tip: if your keypad or code entry system starts acting up after a storm, don’t just reach for a battery change or factory reset. Water damage can trip up even the best electronics—and sometimes drying out the hardware is the real fix.
Removing Water-Damaged Hardware Safely
Let me explain how to get that hardware off your exterior door without making things worse. First, you’ll want to gather a screwdriver (usually Phillips or flathead), needle-nose pliers, and a cup or tray for the screws. If you’ve got a smart lock or remote keypad, grab the instructions from the manufacturer—Schlage, Kwikset, and Ring all have downloadable guides online, and they often warn against forcing or prying.
Start by disconnecting any electronic parts. If you’re dealing with a battery-powered lock, power it off and remove the batteries. Take a minute to check for corrosion or moisture inside the battery compartment—if you spot any, gently dry it with a soft cloth before moving on. For traditional hardware, unscrew the handle, lockset, and strike plate. If you feel resistance (maybe the screws are rusted or the metal is fused to swollen wood), resist the urge to muscle through—use a little penetrating oil or a rubber mallet to ease things loose.
Keep track of the order you remove parts and set them aside safely. If you find water-damaged or rotten wood under the hardware, you’ll need to clean out the worst bits before reinstalling anything. This whole process is less stressful if you stay organized—tiny screws and smart lock components have a way of vanishing mid-project, turning the repair into a frustrating code-breaking mission.
Drying Out and Repairing the Door Material
Once your hardware is out of the way, you’ll want to let the door dry completely. Prop the door open (or even remove it from the hinges, if possible) and let it air out for at least a day—it’s the only way to make sure you’re not just sealing in moisture. You might be tempted to use a hair dryer or space heater, but go slow; too much heat can warp or crack the wood.
If you spot soft, rotten, or bulging wood, use a flat tool or chisel to scrape away the damaged sections until you reach solid wood. Don’t be shy—if the area around the latch or keypad feels spongy, you need to get rid of all the mush. Sometimes, there’ll be a gap or hole left behind. That’s where wood filler or epoxy putty comes in handy. Squish it into the gap, smooth it level with a putty knife, and let it cure for a few hours.
Once the filler is dry, sand the area smooth. Don’t skip this part—even a little lump can make your hardware hard to reset, code, or pair later. For composite or fiberglass doors, patching might mean using a repair kit from the manufacturer. When in doubt, check the brand website for the right product code and instructions. The goal is to rebuild the area so your hardware sits flush and tight, just like it did before the water got in.
Restoring, Syncing, and Reinstalling Your Door Hardware
Now comes the fun part: putting everything back together. Honestly, reinstalling hardware after fixing water damage is like resetting a remote—you want everything in the right spot before you power things up. Start by wiping down all the metal or electronic parts with a soft cloth. If you found rust, gently sand or brush it off. For battery-powered locks, check that the contacts are clean and dry; swap out batteries if there’s any sign of corrosion or power drain.
Next, position the hardware over the repaired area and screw it back in securely. Don’t overtighten—especially if you’re dealing with patched wood or epoxy, since you can strip the material. For smart locks and keypads, this is the perfect time to reset or re-sync your device. Follow the pairing steps in the manual (sometimes you’ll need to enter a code or press a sync button). If the remote or app-controlled lock doesn’t power on, double-check the batteries and pairing process before you panic.
Test everything: lock and unlock the door, enter your key code, check if the remote works as expected. If you’re still having trouble with code entry or sync issues, try a troubleshooting step from the manufacturer’s site—sometimes a factory reset or re-pairing is all it needs. Repainting or sealing the patched area around the hardware is the final touch; it keeps future water out and makes the repair look invisible.
Preventing Future Water Damage on Your Exterior Door
Here’s a bit of tough love: even the best repair won’t last if you don’t tackle the root of the problem. Water usually gets in because of worn-out weatherstripping, gaps in the caulk, or damage to the door finish. After you’ve fixed your hardware, take a few minutes to inspect the rest of your door setup.
- Weatherstripping: Replace any pieces that are cracked, missing, or peeling away. You can find universal strips at hardware stores; just match the code on your old strip for a perfect fit.
- Paint and sealant: Use exterior-grade paint or sealant, and make sure to cover all edges—especially near the bottom, which takes the brunt of the wet weather.
- Caulking: Re-caulk any gaps between the door frame and the wall. This keeps water from sneaking in and messing with your WiFi or Bluetooth remote signals.
If you’re using a smart or remote-entry lock, consider a weather shield or cover. Most brands—like Schlage, Kwikset, or Ring—sell them online. They help prevent water from getting inside the electronics and messing up your code, sync, or battery life.
When To Replace Hardware or the Door Entirely
Not every water-damaged door can be saved, and sometimes hardware is too far gone. If the wood around your lock crumbles to powder, or your smart keypad refuses to reset or pair even after cleaning, it might be time for an upgrade. Replacement makes sense if the repair would cost as much as a new door—or if you’re worried about home security.
Look for these signs:
- Repeated hardware failures (locks, remotes, or keypads won’t hold a sync or code, even after troubleshooting)
- Extensive rot that affects more than a small section around the hardware
- Visible warping or bending that makes the door tough to close and seal
Sometimes, swapping to a universal lock (instead of sticking with your old Schlage or Kwikset brand) can be easier if you’re already replacing everything. Universal models fit standard cutouts, so you don’t have to code or pair from scratch if you prefer a simple key. If you go with a smart lock, follow the manufacturer’s pairing and sync instructions closely—resetting everything after installation helps avoid battery and troubleshooting headaches down the line.
Why Fast Water Damage Repairs Matter for Door Security
Let me be blunt: ignoring water damage is like leaving your front door open with a “please rob me” sign. Hardware that’s loose, corroded, or unreliable isn’t just annoying—it’s a real risk. A swollen door with soft wood around the latch can be forced open even with a working deadbolt. Remote keypads and smart locks? If water’s gotten inside and fried the electronics, they might not even lock correctly.
Household security relies on solid, functioning hardware. That means everything from the basic lock and handle to your remote, code, or app-powered system. Fast repairs help prevent bigger issues—like failed batteries, stubborn codes, or total lockouts—especially during bad weather.
It’s not just about the hardware, either. Water-damaged doors can make it hard for smart systems to sync, pair, or reset, leaving you fumbling for keys in the rain or troubleshooting connection problems when you just want to get inside. Fixing the issue early saves you time, stress, and money in the long run.
Wrapping Up: Keeping Your Exterior Door Healthy and Secure
Repairing an exterior door with water damage—especially when it messes with your hardware—is all about staying ahead of bigger problems. Catching the signs early, removing damaged hardware gently, and taking care to dry, patch, and rebuild the door material means you can keep using your favorite lock or keypad, whether it’s a simple keyed entry or the latest battery-powered smart system.
Here’s my best advice: don’t rush. Take a slow, thorough approach when dealing with water damage. Let the door dry fully, use the right filler or epoxy if needed, and make sure everything (hardware, remote, batteries) is clean and dry before putting it back. Once everything works the way it should—snug, responsive, and secure—seal up your door against the weather so you’re not repeating the repair next season.
A little attention now means fewer headaches later, and a door that opens, closes, and syncs with your routine for years to come.