Imagine trying to open a door that won’t budge. You pull and twist, but nothing happens. This is often due to a worn-out spring assembly. The good news? You can do something about it! In this guide, we’re going to take a walk through the steps involved in repairing that little spring mechanism so your door can function like new again. We’ll cover everything from the tools you need to the steps for replacement. Whether it’s a standard knob or a more specialized model, you’ll get the hang of it in no time.
Understanding the Spring Assembly in a Door Knob
Before diving into repairs, let’s break down what the spring assembly actually does. Every time you turn a door knob, that spring works to return the knob to its original position. Think of it like a rubber band — it stretches when you turn the knob and then pulls back when you release it.
When this spring becomes worn out, it can lose its elasticity. This causes the knob to feel loose or to stick in one position. You might be wondering why this matters. A properly functioning spring ensures that your door latches securely. If it’s not working, you could find your door ajar when you expect it to be closed, posing a security risk.
Gathering Your Tools
Before you start the repair, grab a few essential tools. Here’s a quick list of what you’ll need:
- Flathead screwdriver
- Phillips screwdriver
- Replacement spring assembly
- Lubricant (like WD-40)
- Towel (to catch any screws or small parts)
Having everything in one place makes the process smoother. Imagine trying to cook a meal without all your ingredients — it’s just frustrating. With the right tools, you’re setting yourself up for success.
Removing the Door Knob
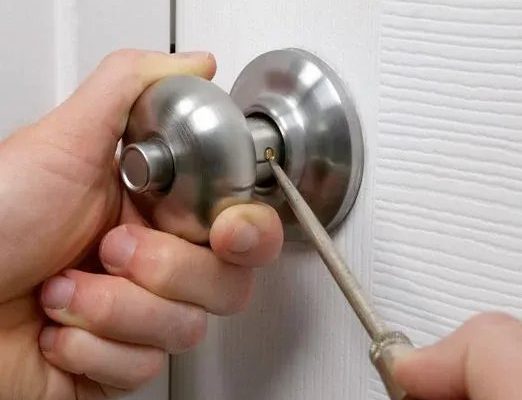
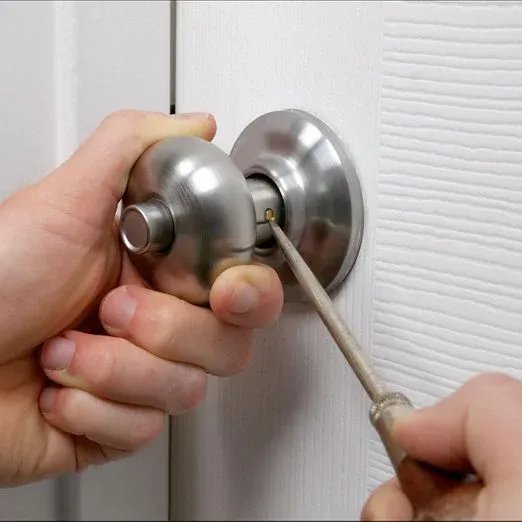
Now, let’s get to the nitty-gritty of removing the door knob. This step is crucial because you need access to the inner workings of the knob. Follow these steps:
1. Locate the screws: Most door knobs have screws on the side or back. Use your Phillips screwdriver to remove them carefully.
2. Take off the knob: Gently pull the knob off the spindle. You might encounter some resistance due to the spring tension, but don’t force it. Just wiggle it a bit.
3. Remove the plate: If there’s a decorative plate, loosen it gently to expose the inner mechanism.
Once you have the knob and plate off, you’ll see the spring assembly, which is where the real work begins.
Inspecting the Spring Assembly
With the assembly exposed, take a moment to inspect it. You’re looking for signs of wear and tear. The spring should be intact and slightly flexible. If it’s stretched out or broken, it’s time to replace it.
Here’s how to tell if it’s worn out:
– If it doesn’t snap back into place when released, it’s likely worn.
– Look for any rust or corrosion — this can also interfere with function.
– If the knob feels loose or won’t engage properly, that’s a clear sign too.
Be thorough in your inspection; you want to make sure you identify the right issues before moving forward with a replacement.
Replacing the Spring Assembly
Once you’ve confirmed the spring is indeed the problem, it’s time to replace it. Here’s how to do it step by step:
1. Get the new spring assembly: Make sure it’s compatible with your door knob. If you’re unsure, take the old one with you to the store.
2. Install the new spring: Insert it into the mechanism, ensuring it fits snugly. You should hear or feel a slight click when it’s in place.
3. Reassemble the knob: Position the knob back on the spindle. Ensure everything aligns correctly before tightening any screws.
Remember, it’s often the little things that make the biggest difference. Tighten the screws securely but don’t overtighten as this could cause damage.
Testing Your Door Knob
After you’ve put everything back together, it’s time to test the knob. This is a rewarding moment because all your hard work is about to pay off.
– Turn the knob: Does it feel smooth and spring back like it should?
– Close the door: Make sure it latches correctly when you close it.
– Keep an eye out for sticking: If it still sticks, you might want to apply a bit of lubricant to the mechanism.
Testing ensures that your repair is successful. A well-functioning door knob can make your home feel more secure and welcoming.
Maintaining Your Door Knob Assembly
Once your door knob is functioning properly, you’ll want to keep it that way. Regular maintenance can help extend the life of your knob and its spring assembly. Here are a few simple tips:
– Lubricate regularly: A little WD-40 or similar lubricant can go a long way in keeping the moving parts free and easy.
– Check for wear: Every six months or so, inspect your knob. Keep an eye out for any signs of wear or sticking.
– Dust and clean: Sometimes dirt and grime can build up around the knob, causing it to malfunction. Wipe it down regularly.
Just like any other part of your home, a little attention can prevent bigger problems down the line.
Repairing a worn-out spring assembly in a door knob may seem daunting at first, but with the right tools and a bit of patience, it’s a manageable DIY project. You’ve taken the time to understand how your door knob works, gathered the right gear, and tackled the replacement process. This is a big deal!
Not only have you saved yourself some money by avoiding a professional repair, you’ve also gained a valuable skill. The next time something feels off with your door hardware, you’ll have the confidence to address it. So, here’s to smooth-turning knobs and the satisfaction of a job well done!