Let me explain: Most folks run into this with common brands—think Andersen, Pella, Schlage, or the sturdy remote-entry doors you see on garages and patios. The rubber or foam weatherstrip is designed to keep everything sealed tight, but at the hinge side, years of opening and closing can make it give way. It doesn’t matter if your door has a smart lock and syncs with your phone or is a classic manual model; the basic fix is the same. A clean, tight weatherstrip is one of those little things that makes your whole home feel more solid and well cared for.
Why Weatherstrips Tear Near Door Hinges
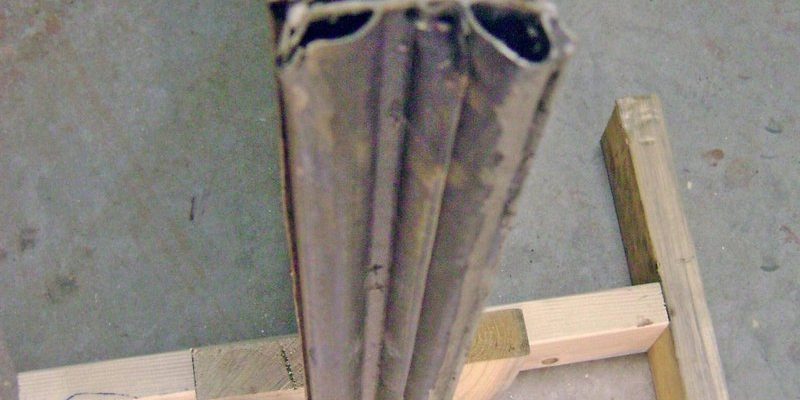
Here’s the thing—weatherstripping is built to be tough, but the *hinge barrel* area is a known weak spot. Every time you swing your door open and closed, the part of the weatherstrip near the hinges gets bent, crunched, and sometimes even pinched. Unlike the weatherstrip along the top or latch side, which just sits there most of the time, the hinge-side weatherstrip is constantly getting flexed.
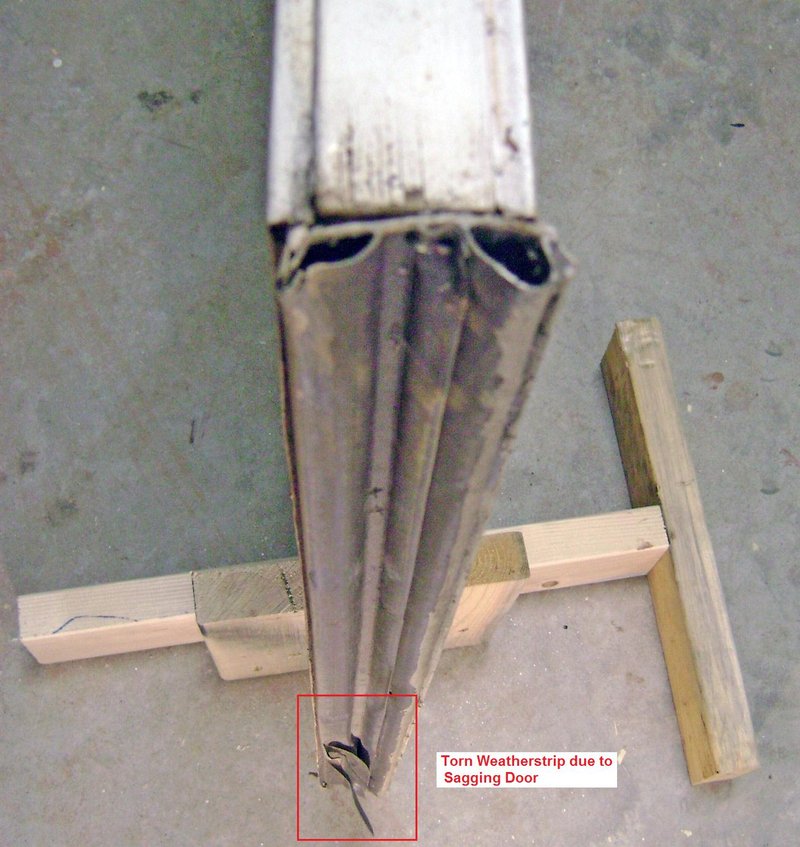
Over time, this flexing wears down the material. If you’ve noticed that the tear always seems to start right next to where the barrel curves out, you’re not alone. The barrel creates a little gap, and as the weatherstrip gets compressed and released with every use, small cracks can form. Extreme temperatures—hot summers, freezing winters—only speed up this breakdown.
Different brands use slightly different materials for weatherstrips. Some use a soft rubber (which stays pliable but can rip), while others use foam with a plastic skin (which seals well but can split at the seam). No matter the brand—be it a Schlage entry door or an Andersen storm door—the issue is almost always caused by repeated motion and pressure at the hinge.
How to Identify a Torn Weatherstrip Near a Hinge Barrel
Spotting a torn weatherstrip isn’t rocket science, but it’s worth taking a slow, careful look. First, open your door wide so you can see the hinge barrel and where the weatherstrip runs alongside it. You’re looking for any of these signs:
- Gaps or splits right where the strip meets or curves around the hinge.
- Loose, bunched-up rubber that looks out of place.
- Visible light shining through the edge—even tiny cracks can let in a draft.
Some people notice the problem because the door starts to close with a *thud* instead of a nice, quiet seal, or because the latch feels a bit loose. Honestly, if you can run your finger along the weatherstrip and feel a dip or rough spot, it’s probably torn. If your door’s got a remote entry system or a battery-powered lock, even a small gap can cause trouble, like letting in moisture that messes with the electronics.
It’s easy to ignore a little tear, but even a half-inch split can turn into a bigger problem fast. In my own home, I skipped checking for months—until one stormy night when a chilly breeze came right through. Lesson learned: a quick check saves way more trouble than it causes.
Tools and Materials You’ll Need for the Repair
Before you start, it helps to gather everything you’ll need. Here’s what most basic repairs require, whether you’re working on a modern electronic-entry door or just a simple wood model:
- Replacement weatherstrip or patch material (match your door’s brand and type, if possible)
- Scissors or a utility knife—for cutting the strip cleanly
- Adhesive or double-sided tape (sometimes optional, depending on the style)
- Small flat-head screwdriver (for prying up any stuck pieces)
- Rubbing alcohol or mild cleaner—to clean the area before you patch
- Soft cloth for wiping everything down
For most modern doors—those that use a code, sync with a remote, or have a fancy smart lock—the weatherstrip is usually a press-in type. That means you can pry out the old piece and push in the new, no screws or glue required. Some older doors might have a glued weatherstrip; in that case, a little patience and some extra adhesive will help.
It’s always smart to check your owner’s manual or the brand’s website for specifics—especially if you’re dealing with a specialty remote system or need a very particular fit. No shame in double-checking before you cut anything!
Step-by-Step Guide: Fixing a Torn Weatherstrip at the Hinge Barrel
Now for the main event. Honestly, this job is easier than changing the batteries in your garage remote. Let’s break it down step by step.
- Remove the Door (Optional but Helpful): If you want room to work, pop out the hinge pins and lay the door flat. Not necessary, but it does make things easier, especially if the tear is hard to reach. If your door has a wired battery lock or remote system, just be gentle and don’t snag any wires.
- Peel or Cut Out the Damaged Section: Use a screwdriver or your fingers to gently work out the torn part of the weatherstrip. If it’s glued, slice it out with your utility knife. Try to make a clean, straight cut on each side of the tear.
- Clean the Area: Wipe the hinge and weatherstrip groove with rubbing alcohol or a mild cleaner. This gets rid of gunk and helps the new piece stick or seat properly.
- Cut and Fit the Replacement Weatherstrip: Using your old piece as a template, cut a new section of weatherstrip to match. Make sure it’s just a hair longer than the gap so it fits snugly. If your door’s brand sells pre-cut kits, go with that for peace of mind.
- Install the New Piece: Press it into the groove, or if yours is an adhesive style, peel the backing and stick it firmly in place. Work your way from one end to the other, smoothing as you go.
- Test the Door: Open and close the door a few times. You shouldn’t feel resistance, and there should be no gaps. If you notice a bulge near the hinge, trim the piece carefully with scissors until it sits flush.
Tip: If you have a remote-entry or code-enabled door, double-check that nothing interferes with electrical components. A bunched-up weatherstrip can cause issues with the sync or battery compartment.
Common Problems When Repairing Hinged Door Weatherstrips
You might be wondering—what if the new weatherstrip doesn’t stay put? Or what if the door won’t close right after the fix? These snags are way more common than you’d think, but they’re all fixable.
One typical issue is that the new strip pops out every time you close the door. This usually means it’s just a bit too thick, or you didn’t seat it fully in the groove. Try pressing it in with the backside of a spoon or a plastic tool—never a sharp metal object—or trim off a tiny sliver until it fits flat.
Another thing: sometimes, especially with older doors that get coded remotes or a smart-lock upgrade, you’ll find that the weatherstrip sits right up against a battery compartment or sensor. If that’s the case, make sure the strip isn’t pinching any wires, and check your system’s manual before you close everything up.
If your patch doesn’t match the color of the old strip, don’t sweat it too much. Honestly, no one’s going to notice except you—and your house will thank you for sealing out drafts and saving energy. If the strip keeps tearing in the same spot, you might want to check the hinge alignment. Sometimes a sagging door puts extra pressure on the weatherstrip and creates a weak spot.
Should You Replace or Repair the Weatherstrip?
Here’s a question I get a lot: “Can’t I just patch the torn weatherstrip? Or do I have to replace the whole thing?” The honest answer depends on how bad the damage is.
- If it’s a small tear (less than an inch), a patch should work fine. Use a self-adhesive weatherstrip or a little super glue to hold the edges together. It won’t be perfect, but it’ll stop the immediate problem.
- If the tear is larger or right next to the hinge barrel, a full replacement is usually better. The hinge gets a lot of stress, and a patch might peel off after a few weeks.
- If your door is older and you notice cracks along the whole length, replacing the entire weatherstrip is smart. Most brands—like Pella or Schlage—sell compatible strips at the hardware store or online.
- If you have a remote or electronic lock, replacing is usually safest to avoid future battery or syncing problems from moisture leaks.
I once tried to patch a rip with duct tape—don’t make my rookie mistake! It did the job for a week, then peeled off and made the sticky mess even harder to clean up when I finally did it right.
Tips for Keeping Your Weatherstrip Intact Longer
After you’ve fixed the tear, it only makes sense to keep your weatherstrip in good shape as long as possible. Here’s what I’ve learned (sometimes the hard way):
- Lubricate your hinges regularly. This reduces the strain on the weatherstrip every time the door moves.
- Check the door alignment twice a year. If the door starts to sag, it puts extra pressure on the strip at the hinge barrel.
- Clean the weatherstrip with a mild soap and water every few months. Dirt can break down rubber faster than you’d think.
- Replace the strip at the first sign of major cracks. Don’t wait for a big tear—early action saves time and money.
- If you have a remote keypad or battery-powered lock, check for condensation around the hinges after storms or cold snaps. Moisture can sneak in through tiny gaps.
A little regular TLC can easily double the life of your weatherstrip. It’s one of those chores that pays off every time the wind howls or the rain pours down.
Comparing DIY Repairs vs Professional Replacement
You might be weighing whether to do this yourself or call in a professional. Here’s my honest take: repairing a weatherstrip near the hinge barrel is almost always a doable DIY project—even for beginners. The parts are cheap, the tools are basic, and there’s not much risk.
Still, there are some cases where it’s smarter to call a pro:
- Custom or oversized doors: If your door is huge, arched, or has a rare brand (especially those with integrated remotes or security codes), getting the right fit can be tricky.
- Repeated weatherstrip failures: If you’ve fixed the strip twice and it keeps tearing, you might have a problem with the hinge itself or the door frame. A pro can spot and realign things quickly.
- Extensive water damage or warping: Major leaks or swelling near the hinge barrel mean you should get a full inspection—sometimes the weatherstrip is a symptom, not the cause.
For most folks, though, a DIY fix works just fine. There’s something satisfying about hearing your door close with a soft “thunk” again—no rattle, no draft, no fuss.
Wrapping Up: Keeping Your Doors Sealed and Secure
Repairing a weatherstrip that’s torn near the door hinge barrel isn’t just about comfort—it’s about protecting everything inside. Even if you’ve got the latest remote-entry lock, a good seal keeps you warmer in winter, cooler in summer, and prevents those annoying issues with syncing or battery failures from water leaks.
Taking the time to fix that little tear is a true win-win: your door works better, your energy bills go down, and your home feels a notch more solid and cared for. If you’ve made it this far, you’re more than ready to handle a weatherstrip repair on any Andersen, Schlage, or Pella door that comes your way. And who knows? The next time you close the door on a windy day, you might just notice how quiet—and cozy—your house feels.