Here’s the thing: weatherstripping isn’t just about comfort. When it starts to shrink and let in drafts or moisture, it can drive up your energy bills and even cause problems for your doors, windows, or the remote-operated garage entry you rely on every day. Many popular brands—like Frost King or M-D Building Products—use foam, rubber, or silicone to seal up those cracks, but none are immune to the effects of time, sunlight, or temperature swings. Fixing a shrunken weatherstrip is one of those classic home maintenance moments: easy to ignore, but surprisingly satisfying to tackle. Let’s break down exactly why this happens and how to repair a weatherstrip that’s shrunk over time, step by step.
Why Do Weatherstrips Shrink and Form Gaps?
Let me explain what’s really going on. Most weatherstrips are made from flexible materials—think foam tape, rubber, or silicone. These are chosen because they can compress easily and block out air, moisture, and dust. But, like a rubber band that’s been left in the sun too long, these materials eventually start to break down. Sunlight, heat, and even the cleaning products you use can all speed up this process.
Shrinking usually shows up as small gaps along the edge of a door or window. At first, you might just notice a faint breeze or see dust collecting in a line where the seal used to be tight. Over the years, the weatherstrip’s constant cycle of expanding and contracting—especially around frequently-used doors, like your garage entry or basement—causes it to lose its shape. High-traffic areas get hit the hardest, leading to drafts that can sneak in and make your HVAC work overtime.
What makes things tricky is that different brands and types of weatherstripping shrink at different rates. Foam may crumble and compress, silicone might get stiff and pull away from the frame, while older rubber can turn brittle. If your door uses a fancy smart lock or keyless remote, a loose seal can even let in enough moisture to affect those sensitive electronics. Here’s an important tip: if you can see daylight through a closed door, or hear the wind whistling on a blustery day, it’s probably time to inspect the weatherstrip up close.
Spotting Signs of a Shrunken Weatherstrip
You might be wondering how you can tell if your weatherstrip’s really at fault, especially if drafts are subtle. Here’s what I look for:
- Visible gaps: Stand back and scan the edges of your door or window in daylight. Notice any thin lines of light shining through? Those are red flags.
- Feeling for drafts: Run your hand slowly along the edge. Can you feel cool or warm air sneaking in? Even a tiny draft adds up over months.
- Difficulty locking: If your door’s suddenly harder to lock with a remote or key, shrunken weatherstrip could be changing the way it closes.
- Water or dust intrusion: Unexplained puddles or dusty lines inside your home often point to a failing seal, especially after rain or strong winds.
Let’s get real: some people ignore these signs until they notice a spike in their utility bill, or their garage remote starts acting up on rainy days. But catching it early keeps repair simple and cheap. I always keep an eye out for these clues, especially after a big temperature swing or a heavy cleaning session, since harsh chemicals can cause a cheap foam strip to shrink or peel away.
Should You Repair, Replace, or Patch a Shrinking Weatherstrip?
Once you spot an issue, you’ve got a few options. Honestly, it’s tempting to grab some duct tape or shove a towel in the gap, but that’s just a short-term fix—and it won’t help your energy bill or comfort in the long run. Here are the main routes you can take:
- Patch: For tiny gaps, you can sometimes add a small piece of matching weatherstrip or use weatherproof adhesive foam “gasket” tape as a temporary solution. It’s not pretty, but it’ll get you through a cold snap.
- Repair: If the strip has just pulled away or shrunk slightly, you can try re-gluing or reseating it. Some brands make it easy to re-stick the material, especially if it’s only come loose at the ends or corners.
- Full Replacement: If the weatherstrip is brittle or has shrunk more than 1/4 inch, replacement is usually best. Foam, rubber, and silicone all have a shelf life. If you see cracks, flattening, or missing sections, it’s time to start fresh.
Here’s what I’ve learned: repair is only worth it if the weatherstrip is still soft and flexible. The moment it feels brittle or cracks when you bend it, save yourself some headaches and go for a replacement. Classic DIY types might try to “reset” or “sync” a warped strip using heat (with a hairdryer), but that rarely works long-term—think of it as trying to re-inflate a popped balloon.
How to Repair a Shrunk Weatherstrip: Step-by-Step Guide
So, you’ve decided to fix that draft. Here’s how to repair a weatherstrip that’s shrunk over time, using simple tools and a little patience.
1. Clean the area: Use mild soap and water to wipe the surface where the weatherstrip sits. Let it dry completely. Any dust or grease will keep new adhesive from sticking.
2. Inspect and measure: Check how much the weatherstrip has shrunk. If the gap is less than 1/4 inch and the material’s still flexible, you can patch or slightly reposition it. Otherwise, plan to replace it.
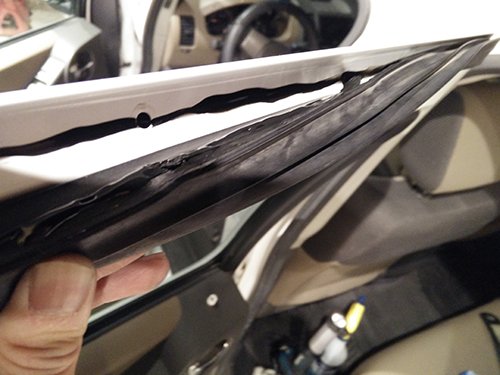
3. Remove the strip (if needed): Gently peel away the weatherstrip, starting at a corner. For old adhesive, you might need a plastic scraper. Don’t force it—if it tears, that’s another sign full replacement is best.
4. Re-glue or reposition: For slight shrinkage, try to re-seat the weatherstrip. Add a small amount of weatherproof adhesive or double-sided foam tape to fill the gap. Press firmly for 30 seconds.
5. Patch excessive gaps: For larger gaps, cut a matching piece from a spare length of weatherstrip (most hardware stores sell 7-10 foot rolls). Overlap slightly where possible, and glue the new piece in place.
6. Test the fix: Close the door or window and check for light, airflow, or water with a flashlight or a sheet of paper. Adjust as needed.
Pro tip: If your home uses a smart or remote-controlled door, make sure the repair doesn’t block any sensors. Some weatherstrips can snag on the bottom of a garage door, causing the code to reset or the door to refuse to sync.
Take your time—rushing usually leads to lumpy results and more drafts. If things still don’t line up after your repair, it’s probably time to replace the strip entirely.
Choosing the Right Replacement Weatherstrip
Picking out a new weatherstrip isn’t always straightforward, especially with all the types, sizes, and brands on the shelf. Here’s how I approach it:
- Material matters: Foam is cheap and easy to apply, but it doesn’t last as long as silicone or rubber. If your door gets a lot of use (like a garage you remote open daily), spend a bit more for higher durability.
- Match the profile: Look at the original weatherstrip—does it have a “D” shape, flat strip, or bulb-end? Using the wrong shape can actually cause more gaps.
- Pay attention to length and width: Measure carefully (twice!) to make sure you get enough to cover the whole frame in one go. Most brands offer 7, 10, or 17-foot rolls.
- Self-adhesive vs. insert: Self-adhesive is easy to apply for beginners, but may peel sooner in humid or high-traffic areas. Insert types, which slide into a groove, tend to outlast stick-on versions but require more effort up front.
If you’re not sure what to buy, bring a chunk of the old weatherstrip to your hardware store. Staff can usually help you find a close match. Don’t forget compatibility with any sensors or remotes—some extra-thick strips can actually block a garage door from closing if they trip the safety sensor.
Maintenance Tips to Keep Weatherstripping From Shrinking Again
You’ve fixed the gap—now, how do you keep it from coming back next year? Honest answer: most weatherstripping has a lifespan of 3–5 years, but a little care can stretch it out.
- Regular cleaning: Wipe down your weatherstrip with a soft, damp cloth every few months. This keeps dirt and chemicals from breaking down the foam or rubber.
- Avoid harsh chemicals: Skip bleach or strong cleaners. They can eat away at adhesive and make even the best brand shrink and peel.
- Check after seasonal changes: Big swings in temperature mean expansion and contraction for both doors and strips. Do a quick visual check in spring and fall.
- Test door sensors and remotes: After any repair or replacement, double-check that your garage remote, smart lock, or keyless entry still works smoothly. A tight weatherstrip shouldn’t interfere with electronics, but it’s good to be sure.
If you notice new gaps forming, act quickly. The sooner you repair a weatherstrip that’s shrunk, the less likely you’ll need to sync, reset, or replace any connected smart home devices.
Comparing Quick Fixes vs. Full Replacement
You might be tempted by those “quick fix” foam gaskets or adhesive strips that promise a 5-minute solution. I get the appeal—especially if it’s snowing outside and you just want that draft gone. But here’s the truth: patching only buys you time. A full replacement may seem daunting, but it’ll hold up far better against constant opening, closing, and the battering ram that is your toddler’s tricycle.
Full replacement also lets you:
- Upgrade to better materials: Newer silicone and hybrid strips last longer and are more resistant to shrinking and UV damage.
- Fix the frame if needed: Sometimes it’s not the weatherstrip, but the frame itself that’s shifted. Replacing everything at once lets you straighten things out and add insulation if needed.
- Ensure proper fit: When you line up a fresh strip from end to end, you avoid the “patchwork” effect that can lead to more air leaks down the line.
If you only need to seal one tiny section—like a gap under your rarely-used basement door—a patch is fine. But for main entries, or anywhere you unlock with a remote or keyless code, go for quality and peace of mind.
Repairing a Weatherstrip: Worth the Effort?
Let’s wrap up. Repairing a weatherstrip that’s shrunk over time might sound like a hassle, but honestly, it’s one of those jobs that pays off every single day. No more drafts tickling your ankles, no more mystery spikes on your energy bill, and one fewer thing to worry about every time a storm rolls in. Whether you patch a small gap or go for a full replacement, you’re protecting your comfort—and the lifespan of your doors, windows, and even your trusty garage remote.
Most repairs take less than an hour, cost under $20, and require nothing fancier than scissors and adhesive. But the reward is a home that feels tighter, warmer, and quieter. Next time you catch wind of a draft—or your remote-controlled door starts acting up—remember: sometimes the smallest fix can make the biggest difference.