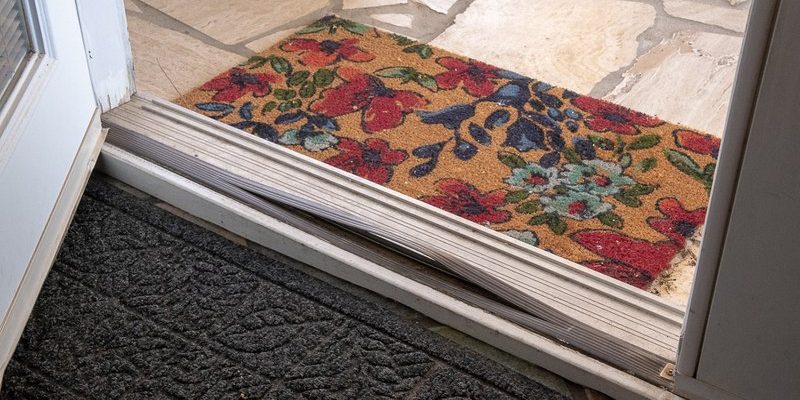
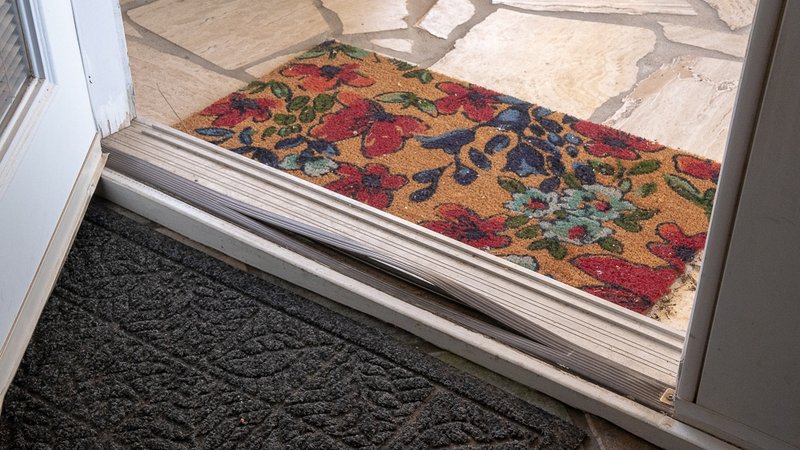
When people talk about thresholds, they often mean the raised strip of metal, wood, or composite at the bottom of an exterior door—like those found on many popular doors from brands like *Therma-Tru* or *Masonite*. These thresholds almost always include a vinyl insert: a flexible strip tucked in the middle to seal out water, dust, and air. Over time, the vinyl gets brittle or splits, leaving a gap. Here’s the thing: you don’t have to replace the entire threshold, or even call a pro. Swapping out the cracked vinyl insert is a straightforward DIY project. You’re about to see how to get it done from start to finish.
Why a Cracked Vinyl Insert Matters More Than You Think
You might be wondering: “Is a tiny crack in the threshold insert *really* a big problem?” Let me explain. The vinyl insert is more than just a strip of plastic—it’s a main line of defense against the outside world. When the insert cracks, it breaks the seal, which means outside air, water, and even bugs have a straight shot into your house. If you notice the floor near your door getting unusually cold in winter, or if you’ve spotted a trail of ants making themselves at home, your threshold is probably to blame.
Here’s the thing: even a small gap can make a big difference in comfort and energy costs. It’s a bit like trying to keep a bike tire inflated with a slow leak—it just doesn’t work. Over time, water can seep under the threshold and damage your subfloor, or, worse, create a cozy environment for rot and mold. Honestly, for such a small, inexpensive part, the vinyl insert packs a punch in terms of importance.
You don’t need any fancy tools or years of experience to replace it either. Just a willingness to tackle a small, precise project and a few supplies from your local hardware store. It’s kind of like changing the batteries in your remote: sounds intimidating until you do it once, and then it’s easy every time after.
How to Identify a Cracked or Failing Threshold Vinyl Insert
Before you can fix something, you have to know what you’re looking at. What does a cracked vinyl insert actually look like? Usually, you’ll spot a thin, flexible strip running lengthwise through the center of your threshold. On door brands like Therma-Tru, this insert usually sits tightly in a channel, right where the door bottom lands when closed.
Take a close look. Are there visible splits, tears, or areas where the vinyl looks thin and brittle? Run your finger along it—if you feel sharp edges or the insert moves loosely, it’s probably shot. Sometimes, especially on older thresholds, the vinyl discolors, curls at the edges, or doesn’t “spring back” into shape when you press on it.
Here’s a tip: Check the area inside and outside. If you see light leaking through when the door is closed (especially on a sunny day), that’s a dead giveaway. And if you feel a draft coming under the door—even when it’s shut tight—the insert is almost certainly the culprit.
Pro insight: Don’t be fooled by a dirty insert. Sometimes what looks like a crack is just years of grime. Give it a quick wipe first to be sure.
Choosing the Right Replacement Vinyl Insert
This step can trip people up. Not all threshold vinyl inserts are one-size-fits-all. Brands like Masonite, Therma-Tru, and others often use specific shapes or “profiles”—some inserts are T-shaped, others are flat, bulbous, or have odd grooves. Honestly, nothing is more frustrating than getting home with a new insert and realizing it won’t fit.
Here’s what to do:
- Measure the length and width of your current insert. A tape measure will do the trick—aim for accuracy down to the millimeter if possible.
- Check the profile shape. Pull a section of the old insert out and compare it to replacement samples at the store, or snap a photo for reference. Hardware staff can usually help match it.
- Note the brand of your door or threshold. Sometimes, you’ll even see part numbers on the bottom of the old insert. That can be a lifesaver for getting the right replacement code.
If you’re stuck, search for “door threshold vinyl insert replacement” along with your brand name online. There are universal threshold inserts, but honestly, if you can get the exact match, it’ll save you troubleshooting and future headaches. A universal insert might work in a pinch, but it could leave tiny gaps that defeat the purpose.
Gathering Tools and Materials for the Job
You don’t need a huge toolkit to repair a threshold with a cracked vinyl insert, but having the right items makes the process a lot smoother. Here’s a quick DIY checklist:
- Replacement vinyl insert (matched to your threshold type and brand)
- Flathead screwdriver or pry tool
- Utility knife
- Measuring tape
- Scissors or heavy-duty snips
- Soapy water or silicone spray (helps the new insert slide in)
- Paper towels or rags
Set everything by the door so you’re not running back and forth mid-project. Think of it like getting ready to reset or sync a finicky remote—you want all the codes and batteries on hand before you start, not mid-way through.
If your threshold is especially old or stuck, you might need a small pliers or needle nose tool. Most inserts aren’t glued in, but some might have a dab of adhesive at the ends. That’s where a utility knife comes in handy to carefully slice through any stubborn spots.
Step-by-Step: How to Remove and Replace a Cracked Vinyl Insert
Here’s the real core of the job—swapping out that split vinyl insert for a fresh seal. Go slow and steady. Here’s how you do it, step by step:
1. Remove the Old Insert
- Open the door for full access to the threshold.
- Use a flathead screwdriver or pry tool to gently lift one end of the old vinyl insert.
- If it resists, wiggle the tool or slide it along the edge; sometimes a little brute force is needed, but don’t bend the metal threshold itself.
- Pull the insert out. If it’s brittle and breaking apart, remove each chunk carefully.
2. Clean Out the Channel
- Use a rag or paper towel to wipe away dirt, dust, and debris.
- For really sticky gunk, a tiny bit of soapy water on a cloth helps. Dry the channel completely before installing the new insert.
3. Cut the New Insert to Size
- Lay the new insert flat and cut it just a hair longer than your threshold. It should fit snug, not loose.
- If needed, trim the width or notches to match any weird curves or corners—don’t rush this step.
4. Lubricate (Optional, But Smart)
- Spray a little silicone spray or dab soapy water in the channel and along the insert. This makes it easier to slide in, sort of like greasing the battery contacts on a sticky remote.
5. Install the New Insert
- Push the insert into the channel, starting at one end and working slowly to the other.
- Use your fingers (not tools) to avoid tearing the vinyl. If it’s especially stiff, a wooden spoon handle can help push it in without damage.
- Check that the insert sits flush with the threshold surface and forms a complete seal.
That’s it—the hard part is done! Take a step back and admire your new, gap-free threshold.
Testing and Troubleshooting After Repair
Now for some troubleshooting. Think of this like testing a remote after you swap the batteries—don’t skip the check or you might be left with the same old problem.
First, close the door and look for any daylight under or around the insert. A proper seal should block out all light. If you see gaps, try reseating the insert or double-checking that it’s the correct size. Walk over the threshold and make sure it doesn’t pop loose or wiggle. If your door is hard to shut, the new insert might be too thick. In that case, try trimming a tiny bit off the bottom until the door closes smoothly.
Next, check for air movement. Wet your hand and slowly move it along the threshold with the door closed—if you feel a cool draft anywhere, you might need to troubleshoot further. Sometimes, older doors need a little extra foam or a fresh door sweep along with the vinyl insert for a perfect seal.
If you still can’t get rid of the gap, the threshold itself may be bent, warped, or just too old. If that’s the case, replacing the whole threshold could be your next step—but start small and simple first.
When to Repair vs. Replace the Entire Threshold
There are times when a cracked vinyl insert is just the tip of the iceberg. If your threshold is dented, warped, or corroded (especially with metal types), a vinyl insert alone won’t fix bigger problems. Here’s how to tell if you need a full replacement:
- The threshold moves under your weight or rocks when you step on it.
- There’s visible rust, deep pitting, or rot around the screws or base.
- The channel for the insert is loose or broken, so new inserts don’t stay put.
Full threshold replacement is more involved and usually means unscrewing the old one, cleaning the sill, and installing a fresh piece to match your door and flooring level. Compared to just swapping an insert, it’ll take more time and a little more skill. But honestly, if you’re already handy with tools, it’s doable as a weekend project.
If you want a quick fix or are renting, just repairing the vinyl insert is a fast, budget-friendly move that doesn’t require code expertise or special skills. For long-term comfort and energy savings though, don’t ignore a badly damaged threshold—sometimes, you just have to start over.
Tips to Extend the Life of Your Threshold Insert
Once you’ve replaced the vinyl insert, a few simple habits can make it last much longer. Think of it like resetting or syncing your habits with your door. Here’s what actually helps:
- Keep it clean. Dirt and sand are rough on vinyl. Sweep or vacuum around the threshold regularly.
- Check for damage seasonally. Peek at your insert every spring and fall, especially after wet or snowy weather.
- Lubricate occasionally. A dab of silicone spray keeps vinyl flexible and easier to clean.
- Fix alignment issues. If your door is dragging or slamming on the insert, adjust the door or hinges. Forced contact wears out vinyl quickly.
Small steps really do make a difference. Kind of like replacing the batteries in your remote before it dies—proactive care pays off in fewer surprises.
Closing Thoughts: Keep That Threshold Strong
Repairing a threshold with a cracked vinyl insert isn’t just a fix—it’s a quick investment in your home’s comfort and protection. Whether you’re working with a Therma-Tru, Masonite, or any other common brand, swapping out the insert is a DIY job that doesn’t require special codes, resets, or fancy batteries. It’s all about slowing down, picking the right replacement part, and following a few careful steps. If you run into trouble, there are always alternatives (like universal inserts), and if need be, you can upgrade the entire threshold for a deeper reset.
Honestly, it’s one of those small repairs that can make your whole entrance feel fresher—and when you see how much smoother it is, you might even start looking for other little fixes around the house. So next time you spot that annoying crack, you’ll know exactly what to do, and you’ll probably enjoy the feeling of a job well done every time you step through your door.