Think of this process like patching a hole in a wall. Just as you fill in the gaps to make the wall sturdy again, you can repair the stripped holes to provide a strong anchor for your door knob. Whether you’re dealing with a simple knob or a more complex lever handle, the steps are generally the same. Let me explain how to get started.
Understanding Stripped Screw Holes
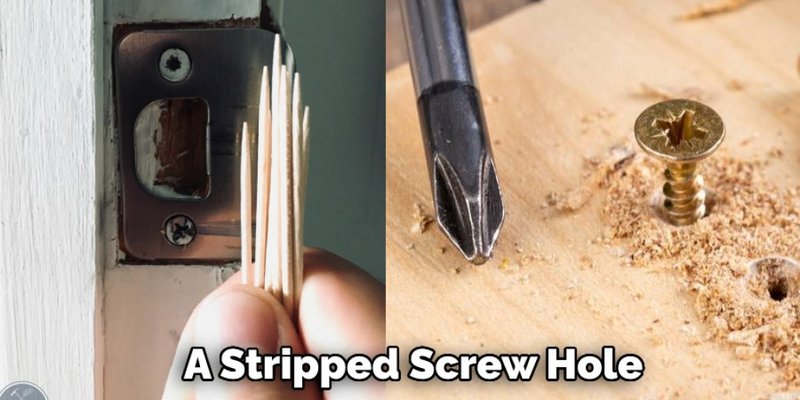
A stripped screw hole occurs when the threads inside the hole are worn or damaged. This can happen for several reasons: maybe the screw was over-tightened, or perhaps it’s just a result of years of use. It’s like when you wear down the treads on your favorite pair of shoes—the screw just can’t grip anymore.
You might be wondering why this is such a big deal. A door knob that doesn’t fit securely can lead to all sorts of issues. For instance, it may cause the door to be difficult to close or lock. Over time, it can even lead to more significant problems, like damaging the door itself. So, addressing a stripped screw hole isn’t just about the knob; it’s about keeping your door functional.
Before diving into the repair process, it’s essential to assess the extent of the damage. If the screw hole is merely stripped, you can usually fix it without replacing the entire knob. But if the damage is too extensive, you may need to consider replacing the backplate or even the doorknob itself.
Tools You’ll Need
Before you start, gather the right tools. Having everything handy makes the process smoother and more efficient. Here’s a quick list of what you’ll need:
- Wood filler or epoxy: This will help fill in the stripped hole.
- Drill: Useful if you need to create new holes.
- Screwdriver: Choose one that fits your screws properly.
- Sandpaper: This will help smooth out any rough patches.
- Clamps (optional): Helpful if you need extra stability while the filler dries.
These tools are fairly common, and you might even have them lying around the house. If not, they’re relatively cheap and easy to find at your local hardware store. Honestly, having the right tools makes the job feel less daunting—it’s like having the right ingredients for a recipe!
Step 1: Assess the Damage
Before diving into repairs, take a step back and closely examine the problem. Remove the door knob and backplate by unscrewing them carefully. Look at the screw holes. How bad is the stripping? Are they just slightly worn, or are they completely unable to hold a screw?
If the hole is still somewhat intact, you may just need to fill it in. If not, you may need to drill a new larger hole for more stability. It’s like deciding whether you should patch a tiny hole in your wall or if it’s time for a complete repaint.
Taking a moment here helps you determine the best course of action. Remember, this isn’t a race. Assessing the situation thoroughly saves you time in the long run and prevents any further complications.
Step 2: Filling the Stripped Hole
Now comes the fun part: filling the stripped hole. You have a couple of options here. One common method is to use wood filler, which works great if your door is wooden. If you’re dealing with metal or a more durable material, epoxy might be the way to go. Here’s how to proceed:
1. Clean the area: Make sure there’s no dust or debris in the hole. This will help the filler stick better.
2. Apply the filler: Use a putty knife to fill the hole. Press it in firmly to eliminate air bubbles.
3. Smooth the surface: Once filled, use the putty knife to level the surface with the rest of the door. It should be neat and even.
Let it dry according to the manufacturer’s instructions. It’s like waiting for dough to rise—patience is key here! You’ll want it to be completely solid before moving on.
Step 3: Re-drilling Pilot Holes
Once the filler is dry, you’re ready to re-drill pilot holes for your screws. This is crucial because it prevents the filler from cracking when you insert the screws. Here’s how to do it:
1. Choose the right drill bit: The bit should be slightly smaller than the screw diameter to create a snug fit.
2. Mark where to drill: If you’re following the original screw holes, ensure they’re centered. If the old holes are too damaged, you may need to create new ones nearby.
3. Drill carefully: Steady your hand and drill straight. This will help the screws go in more easily.
Think of this step as creating a sturdy foundation before building a house. A well-placed pilot hole ensures your doorknob will have a reliable grip.
Step 4: Installing the Doorknob
With your pilot holes ready, it’s time to put everything back together. Reattach the backplate and door knob by following these steps:
1. Align the parts: Make sure everything is lined up correctly before you start screwing.
2. Insert screws: Start by hand-tightening each screw, then use the screwdriver to secure them. Don’t over-tighten, as this can cause the filler to crack.
3. Test the knob: Once everything is in place, test the knob. It should turn smoothly without any wobble.
If it feels secure, congratulations! You’ve successfully repaired the stripped screw hole on your interior door knob backplate.
Alternative Solutions
Sometimes, filling a stripped hole isn’t enough. If the damage is extensive, or if you find yourself facing this issue frequently, you might want to explore a couple of alternative solutions:
- Tapping new threads: This involves using a tap to cut new threads into the stripped hole. It requires a bit more skill and the right tools, but it can provide a strong hold.
- Using a larger screw: If the hole is too wide, you might use a slightly larger screw that fits securely. Just ensure it’s not too large for the backplate.
These alternatives can help if traditional methods don’t hold up. Just keep in mind that while DIY repairs are great, sometimes calling in a professional is a smart move when you’re unsure.
Keeping Your Door Knob Secure
After making these repairs, you’ll want to ensure that your door knob stays secure. Here are a few tips for maintenance:
– Check screws periodically: Give them a gentle turn to ensure they’re not coming loose.
– Avoid over-tightening: This can lead to another stripped hole. Just snug them up enough to be secure.
– Use a lubricant: Occasionally applying a light lubricant can keep the mechanism working smoothly.
By following these simple practices, you can help prolong the life of your door knob and prevent future issues.
In the end, fixing a stripped screw hole is a manageable task that can save you time and money. It also empowers you to tackle other home repairs with confidence. With a little patience and the right tools, you can keep your door knobs—and your doors—working perfectly. Happy repairing!