In this guide, we’ll walk through the entire process step-by-step. Whether your door is from a popular brand or just a standard model, the methods you’ll learn here apply broadly to most metal door frames. So grab your tools, and let’s get to work!
Identifying the Problem
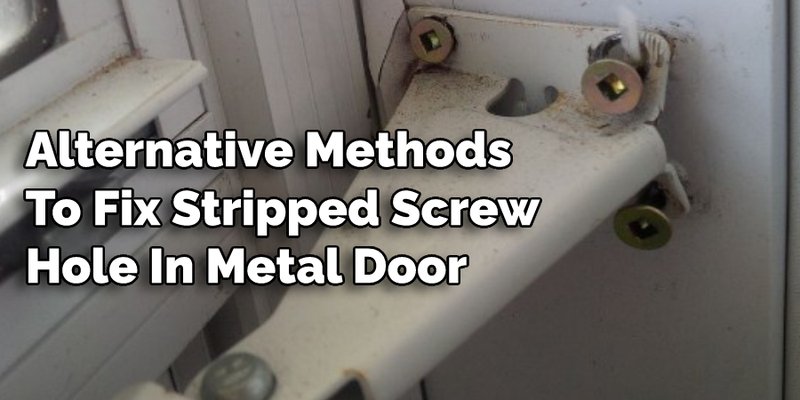
Before diving into repairs, it’s essential to understand what you’re facing. Stripped screw holes happen when the metal thread that usually grips a screw becomes worn down, preventing a tight fit. You might notice that the hinge doesn’t hold the door securely, causing it to sag or even swing open unexpectedly.
Now, you might be thinking, “How did this happen?” Common causes include:
- Frequent use of the door over time.
- Improper screws that don’t fit snugly in place.
- Rust or corrosion that weakens the metal.
If you see any of these symptoms, don’t worry! You’re not alone, and you can fix it with a few simple steps.
Gathering Your Tools and Materials
Before starting any repair, having the right tools is crucial. Think of it as collecting your ingredients before baking a cake; you wouldn’t want to realize halfway through that you’re missing flour, right? Here’s what you’ll need:
- Replacement screws (preferably a larger size)
- Tissue or cloth for cleaning
- Drill with metal drill bits
- Wood filler or metal epoxy
- Utility knife
- Sandpaper (medium and fine grit)
Once you have everything at hand, you’re ready to tackle that stubborn screw hole!
Cleaning the Area
Now that you’ve got your tools, let’s prepare the site for repair. Just like you wouldn’t paint a wall without first cleaning it, you don’t want to work on your door without getting rid of the debris.
Start by removing the hinge from the door. You’ll typically need a screwdriver or drill for this. Once the hinge is off, clean the area around the stripped screw hole. Use a cloth or tissue to wipe away any dirt, dust, or rust. This step is important because any residue can interfere with your repair materials.
Choosing Your Repair Method
You have a couple of options here depending on how badly stripped the hole is. Kind of like deciding between patching a tire or getting a new one based on the damage! Here are two popular methods:
1. Using Larger Screws: If the original screw hole is only slightly stripped, you might get away with just using a screw that’s slightly larger in diameter. This can work great for minor issues.
2. Filling the Hole: For more severe cases, you’ll want to fill the hole first. You can opt for wood filler (if you have a wooden door frame) or metal epoxy for metal frames. These materials can provide a new base for the screw.
Both methods have their merits. If you’re unsure, filling the hole can be a more permanent fix.
Repairing with Larger Screws
If you decide to go with larger screws, here’s how to proceed:
1. Select the Right Size: Make sure the new screws are thicker than the old ones.
2. Drill a New Hole: Use a drill bit to create a new hole adjacent to the stripped one. The goal is to avoid any existing compromised threads.
3. Insert the New Screw: Carefully drive the new screw into the fresh hole, ensuring it’s tightly secured.
Here’s the thing—taking your time is key. You want that screw to hold firm without damaging the surrounding area.
Filling the Hole and Replacing the Hinge
If you chose to fill the hole, here’s what to do:
1. Apply Filler or Epoxy: Mix the filler or epoxy as per the manufacturer’s instructions. Use a utility knife or putty knife to apply it into the stripped hole. Press it down to make sure it fills all gaps.
2. Let It Cure: Allow the filler or epoxy to dry completely, often taking several hours. This step is crucial because it allows the material to harden.
3. Sand the Surface: Once dry, sand down the filled area with medium-grit sandpaper for a smooth finish. Follow up with fine-grit sandpaper to achieve a seamless surface.
4. Reattach the Hinge: Finally, align the hinge correctly over the newly filled screw hole and secure it with the original or larger screws.
Testing Your Repair
After everything is in place, it’s time for the moment of truth! Gently open and close the door a few times to test the repair. You want to confirm the door swings smoothly without sagging. If you hear any creaking or feel resistance, you might need to adjust the screws or check the hinge alignment.
If everything feels right, congratulations! You’ve successfully repaired a stripped hinge screw hole in a metal door frame. It’s like giving your door a little makeover!
Preventing Future Damage
Now that the repair is done, how can you prevent this issue from happening again? Here are some tips:
- Regularly check the screws to ensure they’re tight.
- Use a door closer or stopper to minimize wear.
- Avoid hanging heavy items on the door, like towels or bags, which might strain the hinge.
Taking these small precautions can save you a lot of hassle down the road.
Repairing a stripped hinge screw hole in a metal door frame doesn’t have to be a daunting task. With the right tools and a little patience, you can give your door a second life. Whether you choose to install larger screws or fill the hole, the key is to take your time and ensure everything is secure.
So, next time you encounter this common issue, remember that you’re not just fixing a door; you’re also learning a valuable DIY skill. Happy repairing!