
This little piece of hardware is crucial for keeping your door aligned and moving smoothly along its track. When it gets out of whack, which can happen due to dirt buildup, improper installation, or wear and tear over time, it can be a real pain. But don’t worry! Fixing it is usually an easy task, even if you’re not a DIY expert. In this article, we’ll walk through the steps to troubleshoot and repair a sticking barn door floor guide so you can get back to enjoying that lovely door without the hassle.
Understanding the Barn Door Floor Guide
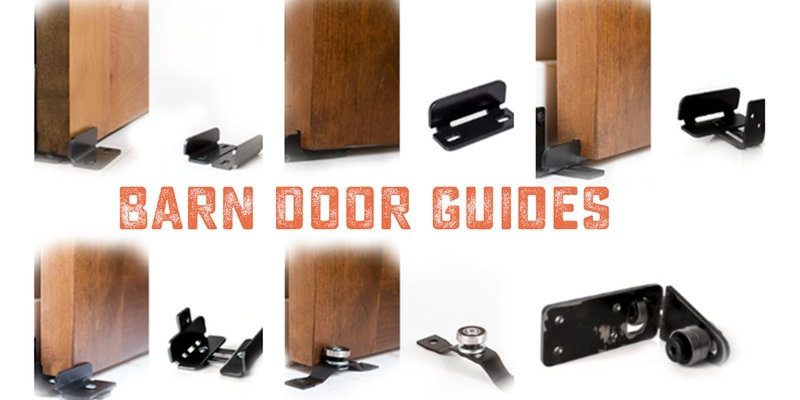
Before we dive into repairs, let’s clarify what a barn door floor guide is. Think of it as the steady hand that keeps your door aligned as it slides open or closed. It’s usually a small piece that sits on the floor, guiding the door along the track above. But when it sticks, it can cause all sorts of issues.
The floor guide can be either a U-shaped channel or a simple pin that fits into a hole on the bottom of the door. This part is essential, especially for larger or heavier doors, as it prevents swaying or wobbling. If you’re noticing your door dragging or not moving smoothly, it’s time to check that floor guide!
Common Causes of a Sticking Floor Guide
There are several reasons your barn door floor guide might be sticking. Understanding these causes can help you troubleshoot effectively.
First, dirt and debris are often the main culprits. Over time, dust, pet hair, and other gunk can accumulate, hindering movement. It’s like having a clogged drain—nothing flows smoothly when there’s a blockage!
Second, the floor guide might be misaligned or improperly installed. If it’s not positioned correctly, it can cause friction as the door moves over or past it. Imagine trying to walk on a bumpy road—it just doesn’t feel right.
Lastly, wear and tear can also lead to issues. Like any mechanical component, floor guides can wear down over time, resulting in a less effective guide. Checking for cracks or breaks is essential in determining your next steps.
Tools Needed for Repair
Okay, so maybe you’re not sure you want to tackle this project yet. But before you decide, let’s talk about what’s needed for the job. First off, you won’t need an entire toolbox filled with fancy gadgets. Here’s a simple list of items you’ll need:
- Screwdriver – You may need either a Phillips or flathead, depending on your floor guide.
- Vacuum cleaner or broom – To remove any dirt or debris.
- Level – To ensure your guide is aligned properly.
- Replacement parts – If your floor guide is cracked or broken.
- Lubricant – A silicone-based spray can help ease sticking doors.
Having these tools on hand will make the repair process smoother and more efficient.
Step-by-Step Guide to Repair the Floor Guide
Let’s get into the nitty-gritty of repairing that sticking floor guide! Here’s a straightforward, step-by-step approach you can follow.
Step 1: Clear the Area
Start by cleaning the space around the floor guide. Use a vacuum or broom to clear out dirt and debris. This step is crucial because, without a clean area, you can’t effectively assess the situation. It’s like trying to fix a car in a muddy driveway. Not ideal!
Step 2: Check for Alignment
Next, examine the alignment of your floor guide. Use a level to check if it’s sitting straight. If it’s tilted or not in the correct position, loosen the screws and adjust it. Sometimes, even slight misalignments can cause significant sticking issues.
Step 3: Inspect for Damage
Now, take a close look at the floor guide itself. Look for any cracks or breaks. If you find any damage, you’ll need to replace it with a new floor guide. You can usually find replacements at hardware stores or online.
Step 4: Lubricate the Area
After adjusting or replacing the guide, apply a small amount of silicone-based lubricant. This will help reduce friction and keep things moving smoothly. Just remember—less is more. A little goes a long way!
Test the Door
With everything in place, it’s time for a test run. Gently slide the barn door back and forth to see how it moves. Ideally, it should glide effortlessly along the track. If it still sticks, you might need to revisit the alignment or check for any further blockages.
When testing, keep an ear out for any unusual sounds, like grinding or scraping. These noises can indicate that something’s still off, so don’t hesitate to check again.
Preventing Future Issues
To keep your barn door floor guide in top shape, consider regular maintenance. Here are some tips to help prevent sticking in the future:
- Regular Cleaning – Make it a habit to clean the area around the floor guide every few months.
- Check Alignment – Periodically check the alignment, especially if you notice any changes in how the door moves.
- Lubrication – Reapply lubricant as needed, especially if you notice it starting to drag again.
By staying proactive, you can help prolong the life of your barn door and keep it functioning smoothly.
Repairing a sticking barn door floor guide isn’t as daunting as it may initially seem. With a little knowledge and the right tools, you can keep your door moving smoothly and looking great. Just remember to clean, check, and lubricate regularly to avoid any future headaches.
Getting that barn door back to its charming, functional self will not only improve your space but also give you that satisfying feeling of taking care of your home. Happy fixing!