
Here’s the thing: smart locks aren’t just fancy door candy. Inside that sleek exterior is a real mix of old-school mechanical parts and sensitive electronics. If you’re new to repairing electronics or locks, trying to fix physical damage can feel overwhelming. But don’t worry—I’ll walk you through the process, step by step, like you’re troubleshooting with a friend right there in your entryway. Let’s break it down, get your lock sorted, and talk about when you can DIY and when it’s time to call in a pro.
How Physical Impact Damages a Smart Lock
Physical impact sounds pretty straightforward, but what does it actually do to a smart lock? Imagine your smart lock as a tiny robot: it’s got gears, circuits, and sensors all carefully lined up inside. When a smart lock gets smacked, dropped, or bent, that balance gets thrown off. Sometimes, it’s just a matter of a loose battery or a wobbly mounting plate. Other times, the internal gears or electronic components inside the lock can break or lose their connections.
Here’s why this matters: your smart lock relies on both mechanical and electrical systems working together. A knock to the outside can scramble the way it syncs with your phone, break the battery contacts, or jam the deadbolt. If your lock suddenly stops working after an impact, don’t panic. Most issues—like misaligned parts or broken battery terminals—are fixable at home with a bit of patience and the right steps. But cracks in the main lock body or fried circuit boards? Those usually need professional help.
You might be wondering, “Can’t I just reset or re-pair the lock?” Sometimes, sure. But if the lock isn’t responding or is physically crooked, you’ll need to dig a little deeper to fix the core problem. Think of it like trying to use a remote that’s been dropped in water: you might need to open things up and deal with the hardware first, before even thinking about codes or syncing.
Initial Inspection: What to Check First
When you see your smart lock looking sad or acting dead after a hit, it’s tempting to start guessing what’s wrong. Before you do anything, take a close look and look for obvious signs of damage. Here’s what to check:
- Exterior casing: Are there cracks, dents, or missing pieces in the plastic or metal shell?
- Keypad or touchscreen: Is it loose or unresponsive, or does it show error codes?
- Mounting plate and screws: Are they still tight, or is the lock hanging crooked?
- Battery compartment: Are the batteries properly seated, or did the impact bend or pop the terminals?
Give the lock a gentle wiggle—does it move more than it should? Try locking and unlocking with the app or keypad. Does the deadbolt move freely, or does it stick? If the lock buzzes, clicks, or flashes strange lights, take note of that. This checklist helps you decide: is this a simple fix, or do I need to open it up? And trust me, sometimes, you’ll find that a simple screw tightening or battery reseating solves the whole problem.
If you spot something obviously broken—like a split casing or snapped mounting bracket—stop and think. Forcing it to work might make the damage worse.
Removing the Smart Lock Safely
Honestly, this is the step that makes a lot of beginners nervous: taking the smart lock off the door. But it’s not much harder than changing the batteries on a remote, as long as you go slow. Most smart locks, whether you’re dealing with August, Schlage, or Yale, follow a similar design: there’s an external face (with the keypad or reader) and an internal face (where the batteries and mechanism go).
Start by gathering a small screwdriver (usually Phillips-head), a soft cloth, and a bowl for screws. Then:
- Open the battery cover and remove the batteries. This avoids accidental electrical shorts or motor movement.
- Look for screws on the inside face. They’ll usually be hidden under a plastic panel or faceplate.
- Unscrew and carefully pull off the interior housing. Support it with one hand to avoid dropping.
- Check for a wire harness. If there’s a cable connecting the front and back, gently unplug it. Don’t yank.
- Remove the outside face if needed. For a full inspection, release any additional screws holding the outside keypad or faceplate.
Set everything down on that soft cloth to keep parts from rolling away. If anything falls out or seems loose, make a note of how it was attached. Taking photos with your phone can help you remember how things fit back together.
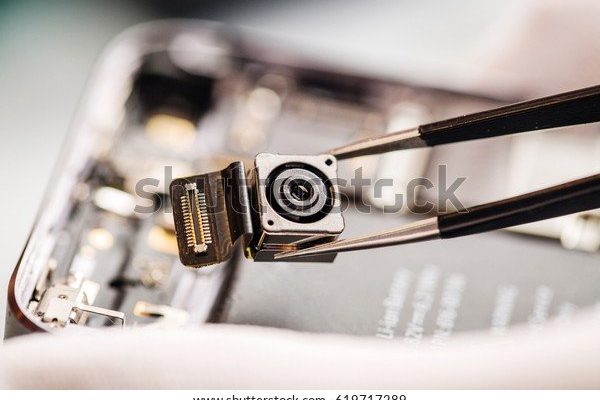
Diagnosing Internal Smart Lock Damage
Now that you’ve got the smart lock open, you can see what’s really going on inside. This part feels a little like peeking into the guts of a remote after you’ve dropped it—you’re looking for things that just don’t look right. Key things to look for:
- Loose or broken wires: Sometimes a hard hit will dislodge the cable that connects the keypad to the control board. If you see anything disconnected, gently push it back into place.
- Bent or broken battery terminals: Check where the batteries sit. If the metal tabs are twisted or missing, your lock won’t get power even with fresh batteries.
- Jammed gears or misaligned parts: The lock uses plastic or metal gears to turn the deadbolt. If a gear is out of place or snapped, you’ll feel resistance, or the lock won’t move at all.
- Burn marks or odd smells: If you spot any burns or smell something burnt, the circuit board might be fried. Don’t try to power it up—this usually means a replacement is needed.
You might also spot dust, dirt, or debris—give it a gentle brush-out with a clean, dry paintbrush or compressed air. Don’t use liquid cleaners, because water and electronics are never a good mix.
If everything looks normal but the lock still won’t work, try popping in a new set of batteries. It’s simple, but low batteries after a hit can cause all sorts of weird behaviors, from error codes to failed sync.
Common Repair Steps for Smart Locks After Impact
So, what’s actually fixable after a smart lock’s been damaged by physical impact? Here are some common DIY repairs you can try before calling it quits. These apply to most major brands, from August to Schlage and beyond.
- Tighten screws and mounting plates: If the lock is wobbly or shifted, line it up with the original holes and tighten all mounting screws. This alone can solve syncing and jamming issues.
- Reseat or replace batteries: If the impact popped the batteries loose, reseat or swap them. Make sure the battery terminals (the metal tabs) are straight and make contact.
- Reconnect cables: Push any loose wire harnesses or plugs firmly back into place. Don’t force them—if they seem stuck, double-check their orientation.
- Realign the deadbolt: If the lock won’t engage or feels stiff, check that the deadbolt lines up with the strike plate on the doorframe. A small nudge can make a big difference.
- Update or reset the lock: Sometimes, the electronics get confused after a shock. Most locks have a reset button (check your manual). Hold it as instructed to reset the code or re-pair with your app.
Most smart locks will beep, blink, or show a light pattern if you’ve got things back together properly. If your lock still won’t work after these steps, the damage may be beyond what you can fix at home—especially if a gear is broken or the control board is toast.
When to Call a Professional for Smart Lock Repair
Here’s where it pays to be honest with yourself: there’s a point when DIY stops saving money and starts risking more damage. If you’re staring at frayed wires, a shattered circuit board, or a cracked lock body, it’s time to call in a pro or contact your lock’s support team. Locksmiths with smart lock experience (ask before booking!) can sometimes replace broken gears or re-solder connections.
Here’s how to know when to hand things off:
- The lock won’t power up at all after battery replacement and cable checks.
- You see damaged circuit boards, severe cracks, or burnt components.
- No response to resets, re-pairing, or code changes after you’ve put everything back together.
- You’re uncomfortable opening the lock further or don’t have the right tools.
If your lock’s still under warranty (or covered by home insurance), don’t be shy—reach out to the brand’s support. Many top brands, like Yale or Schlage, will offer guidance, replacement parts, or even swap the lock if it’s clear the damage wasn’t your fault.
It’s way better to swallow your pride and get help than to turn a $200 smart lock into a paperweight.
How to Prevent Smart Lock Damage in the Future
Nobody wants to repeat this whole process, so let’s talk prevention. Smart locks look slick, but they’re still vulnerable to bumps, knocks, and harsh treatment—especially on busy doors or in homes with kids, pets, or moving furniture.
- Install bumpers: Silicone door bumpers or felt pads behind the lock body can absorb small impacts and help keep the lock flush with the door.
- Avoid over-tightening: When reinstalling, tighten screws just enough to hold the lock securely. Over-tightening can crack plastic housings or warp the lock’s body, making it more fragile.
- Keep the area clear: Encourage gentle handling of the door, and try to keep the path free from carts, strollers, or anything that might crash into the lock.
- Check the lock regularly: Every few months, give your smart lock a once-over for loose screws, battery issues, or minor misalignments before they become big problems.
- Buy brand-name or universal models: While off-brand smart locks can be tempting, reputable brands often use sturdier materials and have better customer support for repairs.
Simple steps now can save you a ton of troubleshooting and stress later.
Comparing DIY Repair to Replacement
Sometimes, you hit a wall: the lock is just too far gone, and you have to decide between more repairs and buying a new one. Here’s how to compare your options.
- DIY repair makes sense if the problem is minor—loose parts, battery issues, or a simple alignment fix. You save money and get the satisfaction of fixing it yourself.
- Replacement is better if the cost or effort to repair exceeds the value of the lock. Cracked casings, dead circuit boards, or ongoing problems usually mean it’s time to swap it.
- Professional repair sits in the middle; it’s smart if you love your lock, it’s high-end, or out of warranty but you’re not quite ready to buy new.
Here’s a quick table to help you decide:
| Issue | DIY Repair | Professional | Replace |
| Loose parts | Yes | No | Rarely |
| Broken gears/wires | Maybe | Yes | If parts unavailable |
| Cracked housing | No | Maybe | Yes |
| Dead electronics | No | Maybe | Yes |
If you’re on the fence, factor in your time, comfort level, and the smart features you need. Sometimes, starting fresh with a newer model ends up being the best choice—especially if syncing, coding, or pairing new remotes is easier with the latest tech.
Final Thoughts on Repairing a Damaged Smart Lock
Dealing with a smart lock that’s been damaged by physical impact can feel like a hassle, but most issues are less scary than they seem. With a careful inspection, some basic tools, and a bit of patience, you can fix many problems right at home. Always start simple: check the batteries, tighten what’s loose, and only move deeper if you really need to. And if things look too complicated or you spot real electrical damage, there’s no shame in calling in a pro or replacing the lock entirely.
Smart locks are here to make life easier—so don’t let a bit of bad luck turn yours into a source of stress. With a little care, you’ll be back to keyless entry (and peace of mind) in no time.