Here’s the thing: a sagging compression seal on an exterior door (whether it’s a Therma-Tru, Jeld-Wen, Pella, or some no-name brand you inherited with the house) doesn’t mean your door is garbage or that it’s time to call a contractor. With patience and a little know-how, you can repair that droopy seal, bring back the airtight fit, and avoid spending big bucks on a full replacement. Let’s break down what causes this, why it matters, and how to get your door sealing like new.
What Is a Compression Seal, and Why Does It Sag?
Let me explain what we’re dealing with here. A compression seal is that squishy strip running along the edges of your exterior door. Most folks only notice it when it fails. Think of it like the gasket on a fridge—its job is to squeeze tight when the door closes, blocking out the stuff you don’t want inside.
So, why does it start to sag? Over time, compression seals can:
- Lose their springy shape from years of being squished
- Get pulled loose by sticky paint or humidity changes
- Detatch at the corners if the adhesive fails or the door warps
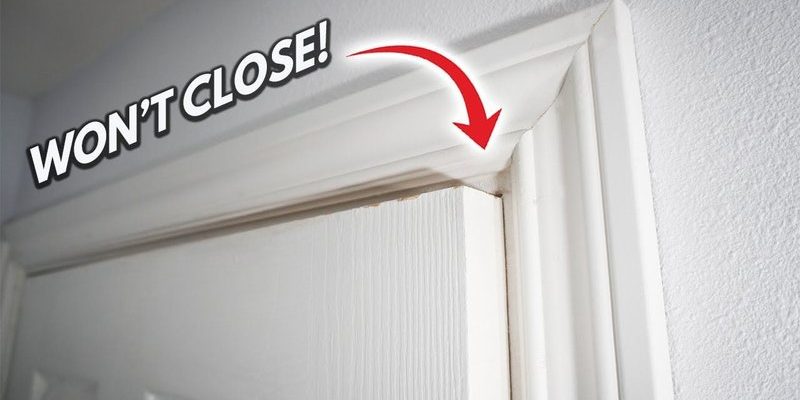
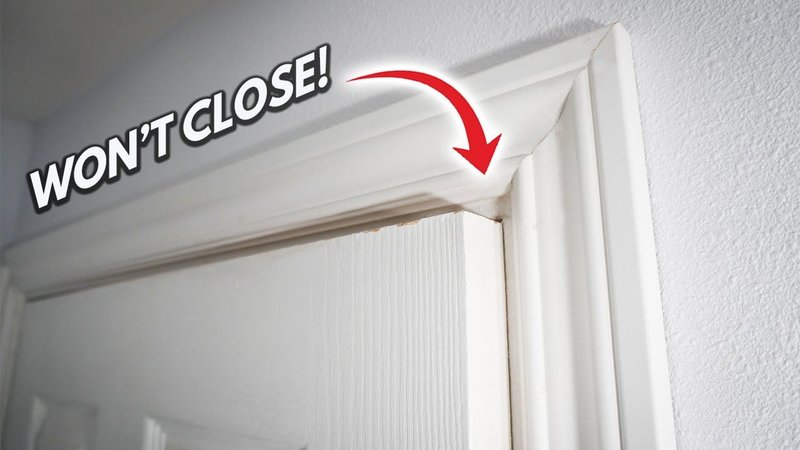
When that happens, you might see the seal drooping down at the top or corners, or even sticking out from the frame like a stubborn bit of bread crust. Not only does this look sloppy, but it lets in drafts, noise, and sometimes even bugs. *Honestly*, a sagging seal is way more than a cosmetic issue.
Signs Your Exterior Door’s Compression Seal Needs Repair
You might be wondering how to tell if your door’s compression seal is actually the culprit. The symptoms aren’t always obvious—sometimes it’s just a slightly higher energy bill, or your dog staring at the crack under the door on a windy day.
Here are some classic signs:
- You feel a draft, especially near the edges or corners of the door
- Light peeks through where the seal used to be flush
- The door rattles or closes with a weird clack instead of a satisfying seal
- You spot saggy, droopy, or even torn weatherstripping around the frame
If your door’s remote-operated lock (like a Schlage code lock or August Smart Lock) seems finicky, a bad seal can even cause the latch to misalign, making it hard to sync or reset. A leaky seal can also let in moisture, which is bad news for wooden doors—or any electronics around them.
Tools and Supplies You’ll Need Before You Start
Before you get your hands dirty, let’s talk gear. You don’t need a full-blown carpenter’s kit to repair a sagging compression seal. Here’s what I recommend:
- Replacement compression seal (find the same size or brand as your current one—brands like Pemko, M-D Building Products, and Frost King make universal fits)
- Flathead screwdriver or putty knife (for prying up the old seal)
- Scissors or utility knife (to cut the new seal to length)
- Adhesive or caulk (if your new seal needs extra sticking power)
- Cleaning supplies (water, mild soap, rag—for wiping away old gunk)
I’d also keep a flashlight handy. You don’t want to miss any tiny gaps or cracks, especially if you’re troubleshooting in a dim entryway.
How to Remove a Sagging Compression Seal
Ready to start? Here’s how you “reset” your door’s seal—no code or pairing needed, just a little elbow grease.
- Open the door wide so you have room to work along the entire edge. This is where you’ll spot every bit of the sagging weatherstrip.
- Locate the ends. Start at the corner where the seal is sagging the most. With a flathead screwdriver or your fingers, pry gently under the edge. Most seals slide out of a groove or pull off with just a bit of effort.
- Work slowly down the length of the seal, peeling it up as you go. If it’s glued in, you might need your putty knife to help. Don’t yank—old weatherstripping can rip or leave sticky bits behind.
- Clean the groove or surface. Use your rag and soapy water to scrub away grime, old adhesive, and residue. Let it dry completely. Think of this as “resetting” the surface so your new seal will sync up and stick right.
Tip: Take a photo or jot down which way the seal was installed before removing it. Some brands have a lip or bulb facing a specific direction.
Installing a New Compression Seal on Your Exterior Door
Now for the fun part—pairing your door with a fresh, springy compression seal. Compare this to swapping a dead battery in your remote: straightforward, but it helps to do it right the first time.
- Check the fit. Lay your new seal against the doorframe. Line up one end and make sure it reaches all the way around. Trim any extra length with scissors or a sharp knife. Too long? It’ll bunch. Too short? You’ll have leaks.
- Insert or stick it in place. If your frame has a groove, press the seal’s “tail” into it, working your way along the edge. For adhesive-backed seals, peel off the backing and stick as you go—pressing firmly for a good bond.
- Secure the corners. The corners are the main trouble spots for sagging. Press them in tightly. If you have extra adhesive or caulk, dab a bit there for backup.
- Test the door. Close it slowly. You should feel a gentle “push” as the seal compresses, but the door should still latch and lock easily (including any code or smart remote systems you use). If it’s too tight, the seal may be oversized—try a thinner one.
Here’s what you want: a door that closes smoothly, with no visible gaps and a solid, weatherproof fit. That’s your sign the seal is doing its job.
Troubleshooting Problems After Replacing the Seal
Sometimes, even after a careful install, things don’t feel quite right. Maybe the door is harder to close, or the new compression seal doesn’t seem to sync up along the full edge.
Here’s what to check:
- Seal too thick or thin? If you have to slam the door, the new seal might be too bulky. If you still see daylight, it’s too thin. Try another size or brand.
- Seal bunching at the corners? Make sure it’s trimmed to length and tucked in fully. Bunched seals will eventually sag, putting you back at square one.
- Smart locks or remotes not working? A new, firm seal might shift the latch slightly out of position. Adjust the striker plate or try re-syncing your code lock. In rare cases, you’ll need to reset the battery or connection settings on fancier locks.
- Drafts or leaks still coming through? Inspect for gaps—especially at the corners or threshold. Sometimes the door itself is warped, or there’s a secondary weatherstrip (like a door sweep) that needs attention too.
Don’t get discouraged if you have to tweak a few things. Even pros have to troubleshoot after a fresh install.
Maintenance Tips for a Long-Lasting Door Seal
You might think you’re done, but a little upkeep goes a long way—in fact, it’s not much different than swapping out the batteries in your garage remote before they die.
- Clean the seal every few months with a damp rag. Dust and dirt wear it down faster.
- Check for sagging or gaps seasonally, especially after heavy rains or big temperature swings. Wood frames swell and shrink, which can loosen the seal.
- Lubricate vinyl or rubber seals with a silicone spray if they start to dry out or squeak. Don’t use oil-based sprays—they attract dust and can break down the material.
- Inspect your locks and remotes after repairs. Smart locks, code pads, and battery-powered remotes can be affected by changes in door alignment. Make sure everything still pairs and syncs smoothly after repairs.
Maintenance isn’t glamorous, but it’s worlds cheaper than replacing a drafty door or shelling out for sky-high energy bills.
When Should You Call a Pro or Consider Alternatives?
Let’s be real: not every sagging compression seal can be fixed with a simple swap. Here’s when to throw in the towel—or at least call in backup.
- Your door frame is warped or rotten. No weatherstrip will pair up with a frame that’s falling apart. You might need a carpenter or a full replacement.
- Custom or odd-shaped doors. Some high-end brands or old homes use custom compression seals. Universal seals might not fit, and tracking down a match could mean working with the manufacturer.
- Repeated leaks or drafts. If a new seal doesn’t fix your problems, you might have issues with the threshold, hinges, or even your home’s foundation. A pro can troubleshoot these faster.
Sometimes, trying to repair a sagging seal is like swapping in new batteries for a dead remote when the remote itself is broken. Know when to cut your losses.
Closing Thoughts: Keeping Your Exterior Door Sealed Tight
Fixing a sagging compression seal on an exterior door is one of those home repairs that feels more intimidating than it is. With a little time and the right supplies, you can restore that airtight seal and keep your home cozy, your smart lock in sync, and your energy bills in check. Think of it as a tune-up your door needs every few years—simple, satisfying, and totally worth the effort. If you run into problems or your door is just too far gone, don’t be afraid to reach out for help. Your home (and your wallet) will thank you for keeping that weather outside, right where it belongs.