
Think of a pocket door like a little magician. With a flick of your wrist, it slides away to reveal the room behind it. However, when it doesn’t work, it can feel more like a trick gone wrong. Whether you’re dealing with a misaligned door, a jammed track, or worn-out hardware, we’ll cover each issue step-by-step. Just grab your toolkit, roll up your sleeves, and let’s get to work!
Common Issues with Pocket Doors
Before diving into repairs, it’s essential to understand some common problems you might face with pocket doors. These issues can vary from minor annoyances to major headaches. Here are some frequent troubles:
- Misalignment: Sometimes the door doesn’t sit correctly in the pocket. This can cause it to get stuck when you try to slide it open or closed.
- Stuck on the Track: Dirt, debris, or a bent track can prevent the door from moving smoothly.
- Broken Hardware: The rollers or brackets may wear out or break over time, leading to a door that won’t slide at all.
Understanding these issues is your first step in troubleshooting and repairing your pocket door. The good news is that most of these problems can be resolved with some simple tools and a bit of patience.
Gathering Your Tools for the Job
Before you start the repair process, you’ll need to gather a few tools and materials. Having everything ready will make the job smoother and save you from scrambling around mid-repair. Here’s a basic checklist:
- Flathead screwdriver
- Phillips screwdriver
- Level
- Tape measure
- Replacement hardware (if necessary)
- Lubricant (like WD-40)
Each tool plays a specific role in the repair process. The screwdrivers will help you remove and tighten any hardware, while the level ensures your door is aligned correctly. A tape measure will help you confirm the dimensions of the opening and the door itself. And let’s not forget about that lubricant—a little oil can go a long way in ensuring smooth operation.
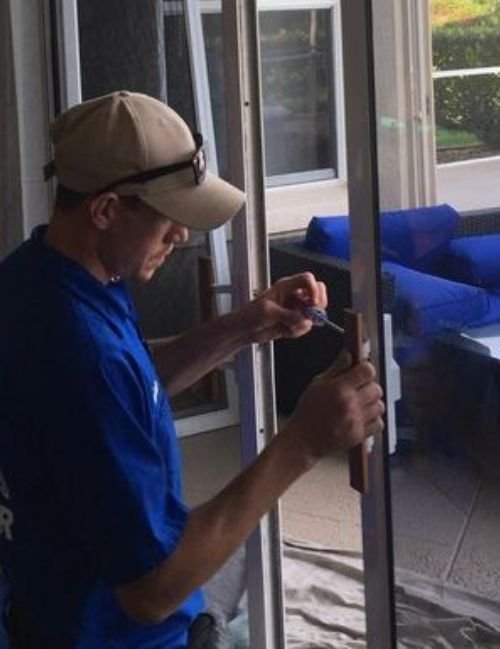
Step 1: Inspecting the Pocket Door
Now that you have your tools ready, it’s time to inspect the door. Start by closing the pocket door and carefully observing its movement. Does it slide easily, or does it feel rough? Look for gaps between the door and the wall—as this may indicate misalignment.
Make sure to check the hardware too. Open the door fully and inspect the rollers and tracks. If you see any dirt or debris, remove it with a cloth. Sometimes, simply cleaning the tracks can solve the problem. If everything looks clear, but the door is still having issues, you might need to make some adjustments.
Step 2: Aligning the Door
If misalignment is the issue, aligning the door is straightforward. Locate the adjustment screws on the rollers, which are often situated at the top of the door. These screws can help raise or lower the door to ensure smooth movement.
Here’s how to do it:
1. Use a flathead screwdriver to turn the screws.
2. If the door is too low, turn the screws clockwise to raise it.
3. If it’s too high, turn counterclockwise to lower it.
4. After each adjustment, test the door to see if it slides better.
Keep adjusting until the door is level and slides smoothly. It might take a few tries, but you’ll be amazed at how much of a difference this can make!
Step 3: Fixing the Track
If your pocket door is still sticking, it might be time to check the track. A bent or damaged track can cause all sorts of problems. Here’s how to address it:
1. Inspect the track: Look for any bends or blockages.
2. Clear debris: Use a soft cloth or vacuum to clean out dust and grime.
3. Realign the track: If the track is bent, you can gently straighten it with your hands or a pair of pliers. Just be careful not to apply too much pressure.
Once you’ve cleaned it up and fixed any bends, apply a light spray of lubricant to the track. This will help the rollers glide smoothly.
Step 4: Replacing Broken Hardware
If your door still doesn’t slide properly, you might need to replace some hardware. This could include the rollers, brackets, or even the door handle. Here’s how to do it:
1. First, remove the old hardware using your screwdrivers.
2. Take the broken pieces to a hardware store to find exact replacements.
3. Install the new hardware by following the reverse steps of removal, making sure everything is tight and secure.
Replacing worn or broken hardware can breathe new life into your pocket door, making it operate like new again.
Step 5: Lubricating for Smooth Operation
After making adjustments and replacing any broken parts, lubrication is key. This small step can drastically improve the door’s functionality. Use a silicone-based spray or a dry lubricant rather than grease, which can attract dirt. Here’s how to do it:
1. Spray a small amount on the track and move the door back and forth to spread it evenly.
2. Don’t forget to lubricate the rollers as well!
3. Wipe away any excess to prevent buildup.
Regular lubrication will keep your pocket door functioning smoothly, so make it a part of your home maintenance routine.
Final Thoughts on Pocket Door Repairs
Repairing a pocket door doesn’t have to be a daunting task. With the right tools, a bit of patience, and some troubleshooting know-how, you can tackle most problems yourself.
Remember, the key steps involve inspecting the door, aligning it properly, fixing the track, replacing any broken hardware, and ensuring everything is well-lubricated. With these simple repairs, you’ll have that pocket door gliding effortlessly in no time.
You might find that the satisfaction of fixing your door yourself adds a little magic back to your home, just like that pocket door sliding into the wall. Happy repairing!