You might be wondering how something that’s supposed to protect your door can end up causing problems. It’s usually down to the constant push and pull of door movement—picture the way your favorite pair of sneakers get worn in the same spot over time. Whether you have a sturdy solid wood door or a lighter steel one, and whether your kick plate is brass, stainless steel, or aluminum, the effect is much the same. Let me walk you through why this happens and exactly how you can fix it, step by step, using some common tools, a little patience, and a touch of know-how.
What Causes a Kick Plate to Loosen Over Time?
Kick plates are designed to take a beating—literally. Every time you nudge open the door with a shoe, a stroller, or even your pet’s nose, you’re relying on that plate to protect the lower part of the door. But here’s the thing: doors aren’t static objects. They swing open and closed, often yanked, pushed, or even slammed. Each movement flexes not just the door but the screws and adhesive holding the kick plate in place.
Over time, these constant movements work small gaps around the fasteners. Maybe a screw wiggles loose a fraction of a millimeter with every use, or perhaps the adhesive slowly gives way to gravity and motion. Even temperature changes—think hot summers or cold winters—can cause the door and kick plate to expand and contract at different rates, making things worse. If your door is a heavy-duty model or sees a lot of activity (like a busy front door), this is even more likely to happen.
Sometimes, it’s not just about movement. If your kick plate was installed in a hurry or with the wrong kind of hardware, that can speed things up. Screws that are too short, mismatched metal types (leading to corrosion), or poor-quality adhesive can all set the stage for future looseness. And let’s be honest, sometimes manufacturers don’t prioritize longevity when picking materials or installation methods.
How to Inspect a Loose Kick Plate
Before you jump into repairs, it’s smart to take a close look at what’s actually happening. You don’t want to start tightening screws only to find the real problem is a warped door or stripped holes. Here’s how to do a thorough inspection:
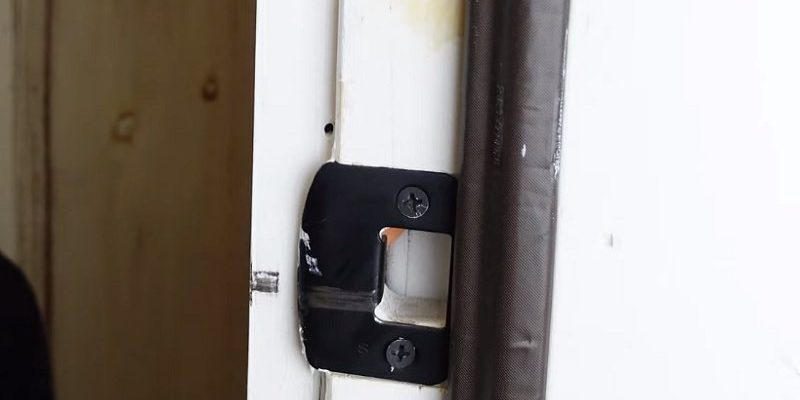
- Check all the screws: Give each screw a little wiggle with your fingers or a screwdriver. Are they actually loose, or are some missing entirely?
- Look for gaps: Run your hand along the top and bottom edges of the kick plate. Can you slide a fingernail (or a piece of paper) underneath in places? That’s a sure sign of detachment, either from screws worked loose or failed adhesive.
- Assess the door itself: Sometimes a warped or swollen door pushes the kick plate out of alignment. Sight down the length of the door—does it look bowed or uneven?
- Check for rust or corrosion: If the hardware is rusty, it won’t hold as well, and the problem will keep coming back unless you fix it. Likewise, if there’s old adhesive, is it crumbly, sticky, or cracked?
A careful inspection now saves you from fixing the same problem twice. Think of it like diagnosing the sound your car makes—it’s much easier to fix when you know what’s wrong and why.
Which Tools and Materials Do You Need?
Let me explain what you’ll want on hand before you tackle this project. Honestly, having everything lined up makes the whole repair smoother and less frustrating. Here’s what I recommend:
- Screwdriver (Phillips or flat-head): Match the screw type you have. If you’re replacing screws, bring one to the hardware store for comparison.
- Replacement screws: Go for corrosion-resistant types like brass or stainless steel. If holes are stripped, you might need slightly longer or thicker screws.
- Adhesive: If your kick plate uses glue, a construction adhesive or heavy-duty double-sided mounting tape works well. Just avoid anything that could damage the door’s finish.
- Wood filler or toothpicks: These help repair stripped screw holes.
- Drill and bits: Only needed if new pilot holes are required or if you’re replacing hardware.
- Measuring tape and pencil: For lining up the kick plate perfectly when you reattach it.
- Cleaning supplies: A mild cleaner or rubbing alcohol for removing dust, grease, or old adhesive.
And don’t forget a step stool if your door is extra tall or you need to reach the lower panel comfortably. Trust me—straining your back trying to reach the bottom screws is not a good time.
Step-by-Step: How to Fix a Loose Kick Plate
Alright, let’s get into the nitty-gritty. Here’s a straightforward, beginner-friendly process for repairing a kick plate that’s loosened due to door movement.
- Remove the kick plate (if possible): Unscrew all the hardware and gently pry off the plate. If it’s glued on, use a putty knife to break the seal. If it just won’t budge, you can work with it in place, but removal makes repairs more thorough.
- Clean the surface: Wipe down both the door and the back of the kick plate. Remove any old adhesive, dust, and debris. A clean surface helps everything stick and hold better.
- Address stripped holes: If screws have wallowed out the holes, fill them with wood filler (for wood doors) or jam in a couple of toothpicks coated with glue, then let it dry. For metal doors, use a special metal filler or tap new holes if needed.
- Re-fit and mark: Dry-fit the kick plate on the door to make sure it sits evenly and covers any old marks or damage. Use a pencil to mark the screw holes, especially if you need to drill new ones.
- Reattach the kick plate: Secure it using fresh screws. If you’re using adhesive, apply it evenly on the back, press the plate firmly into place, and let it cure (according to the directions) before using the door repeatedly. If your screws have decorative caps, snap them on last.
Take your time lining everything up—nothing looks worse than a kick plate that’s crooked by a centimeter. A level or even just careful eyeballing can make the difference.
Tips for a Long-Lasting Repair
Here’s the thing: you don’t want to be fixing your kick plate every few months. A few simple tricks can help your repair last much longer, no matter how often that door swings open.
- Use the right screws: Stainless steel or brass won’t rust out like basic steel. Longer screws reach deeper into the door for more holding power.
- Double up on fastening: If your door sees heavy use, combine both screws and adhesive. This spreads out the stress and keeps movement from working things loose so quickly.
- Consider rubber washers: Placing small rubber or nylon washers under the screw heads can absorb shock and keep screws from loosening with every slam.
- Check regularly: Every month or so, give the kick plate a gentle tug to check for looseness. Tighten any screws that start to back out before the problem gets worse.
- Keep it clean: Dirt and grit can collect behind the plate, especially at the bottom. Quick wipe-downs help prevent corrosion and buildup that can push the kick plate away from the door.
Honestly, a little preventative care goes a long way. It’s a small time investment that means you won’t have to haul out your toolbox nearly as often.
When to Replace Instead of Repair
Sometimes, it’s just not worth fixing the same old kick plate. If yours is dented, rusted, or just plain ugly after years of wear, swapping it out for a new one is smart—and often easier than you’d think.
You might notice deep scratches, cracked edges, or a finish that’s peeling off. In these cases, repairs will only last so long. Modern kick plates come in a ton of finishes and sizes, and most are simple to install with just a screwdriver and a drill. If you’re feeling stylish, you can even upgrade to a plate that matches your hardware for a quick curb-appeal boost.
When picking a new kick plate, measure your door’s width and match the thickness of the old plate, so you don’t end up with gaps or exposed screw holes. As for installation, follow the steps above—it’s basically the same process, just with shiny new materials.
Dealing With Special Door Types and Kick Plates
Every door is a little different. Maybe you have a steel entryway door, a classic wooden panel, or even a fiberglass model. The type of door changes how you’ll approach the repair.
- Wood doors: Easy to patch with filler or toothpicks. Holds screws well, but can swell and contract with humidity.
- Metal doors: You’ll need special metal screws and might have to use metal epoxy or tap new holes if the old ones are stripped.
- Fiberglass doors: Usually need plastic anchors behind screws, and you’ll want to use adhesives that won’t damage the outer coating.
Kick plates also come in brass, stainless steel, aluminum, and even vinyl. Each has its quirks. For example, brass can tarnish but usually just needs a polish, while stainless steel resists rust but shows dings more easily. Paintable kick plates are awesome if you want a specific color match but be sure your repair doesn’t cover any movable joints or hardware.
Are There Alternatives to Traditional Kick Plates?
Maybe you’re tired of the metal plate look. Or, perhaps you’re curious if there’s a way to protect your door without all the hardware. There are alternatives, though each comes with its own pros and cons.
- Clear plastic kick guards: These are less visible but still shield your door from dirt and scuffs. They usually attach with adhesive instead of screws, so there’s less risk of things loosening due to movement.
- Heavy-duty adhesive films: Think of these like a phone screen protector, but for your door. They’re invisible and peel off when you want to replace them, but won’t offer as much impact resistance as metal.
- Paint-on coatings: Some DIYers use durable paints or liquid plastic coatings to resist scratches. This only works if you don’t mind the maintenance every year or so.
If you have a premium or historic door and don’t want holes, these options can protect your investment without committing to visible hardware. Just keep in mind most adhesives will eventually give way under heavy use—you may trade one fix for another.
Final Thoughts: Keeping Your Kick Plate Secure for Good
Fixing a loose kick plate isn’t the kind of task you’ll brag about at parties, but it makes a big difference in your home’s comfort and durability. When each piece of hardware does its job—no rattles, no gaps, no drafts—you barely notice it’s there. And really, isn’t that the sign of a job well done?
Now that you know exactly why a kick plate loosens, how to diagnose the issue, and the steps to repair or even replace it, you should find the process a lot less intimidating. Whether your door is vintage oak, sturdy steel, or somewhere in between, a handful of tools and a little attention can keep your kick plate secure for years. So next time you hear that telltale rattle, don’t reach for the earplugs—reach for your screwdriver and fix it right the first time.