If you’re thinking, “How on earth do I fix this?” you’re not alone. Whether your kick plate is shiny brass, classic stainless steel, or powder-coated aluminum, the repair process isn’t rocket science. With a few tools, a little patience, and a steady hand, you can make it look nearly good as new—without calling in a pro. Let’s walk through what you’ll need to know before getting started.
Why Kick Plates Get Bent (And Why You Should Fix Them)
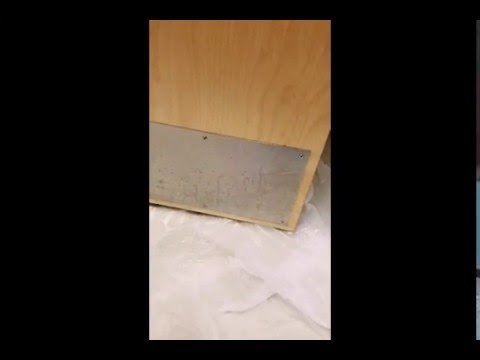
Kick plates are like the shield for your door, taking all sorts of hits so your door doesn’t have to. If you have kids, pets, or heavy foot traffic, the kick plate’s seen its fair share of roughhousing. Sometimes it’s a runaway vacuum, a shoe scuff, or even a delivery cart that leaves a dent right where you least expect it.
Honestly, a bent kick plate is more than just a cosmetic issue. You might be wondering, “Can’t I just leave it?” Not a great idea. When the plate bows out or crumples, it can make the gap under your door uneven. This means more drafts, dirt, and sometimes even difficulty closing the door. Over time, bigger bends can weaken the screws or adhesives holding it on, leading to rattling or, worse, the plate falling off entirely.
Here’s the thing: repairing a bent kick plate isn’t just about looks. It’s about maintaining the door’s integrity and making sure the whole setup works smoothly. Besides, leaving it bent can be a magnet for more damage and even more difficult repairs down the line.
What You Need Before You Start the Repair
Before you grab a screwdriver, it pays to line up your tools. Don’t worry; you don’t need a full-blown workshop. Most bent kick plates can be fixed with some basic household items. Here’s a quick checklist to make things go faster:
- Screwdriver or drill (usually Phillips-head, but check your screws)
- Rubber mallet or soft hammer (for gentle straightening)
- Flat, clean work surface (like a table or sturdy floor)
- Soft cloth or towel (to protect the kick plate’s finish)
- Pliers (for tricky bends or corners)
- Level (optional) (to make sure the plate goes back on straight)
If your kick plate is glued instead of screwed on, you might need a putty knife or heat gun to loosen the adhesive. For scratches or dings, a little metal polish can help at the end.
Gathering all this ahead of time keeps you from having to stop mid-fix, with the door half-off and your patience running thin. Trust me, it makes the repair go so much smoother.
Safely Removing the Bent Kick Plate
First things first: you’ll want to take the kick plate off the door. I know it’s tempting to try hammering it back into shape while it’s still hanging there, but that tends to do more harm than good. Here’s the best way to tackle this step:
- Find all the screws holding the plate in place. They’re usually spaced along the top and bottom edges.
- Unscrew gently and keep the screws in a small dish or bag. You don’t want to lose one halfway through.
- If it’s glued on, use a putty knife to carefully pry the plate off. A little patience goes a long way here—don’t rush and bend it even more.
Once the plate’s off, check the door itself. Make sure there’s no hidden damage or leftover adhesive. If there is, give the area a quick wipe down. Think of it like prepping a canvas before painting—it’ll help everything go back together better in the end.
If you come across stubborn screws that refuse to budge, a quick shot of penetrating oil and a few minutes of patience can save you from stripped screwheads or scratched finishes.
Straightening Out the Bent Kick Plate
Here’s where you get hands-on. Lay the kick plate flat on your work surface, preferably on a soft cloth to avoid new scratches. Take a moment to look at the dents or bends from the side—this makes it easier to see what you’re working with.
For most bends:
- Use gentle, even pressure with your hands to push the metal back flat. Start at the edges and work towards the center.
- Stubborn areas can be tapped gently with a rubber mallet. Don’t use a regular hammer unless you really want new dents.
- If the plate is creased or curled, use pliers covered with a soft cloth to squeeze the fold back out. Slow and steady pressure works best.
Don’t expect perfection right away; metal has a memory and sometimes wants to spring back. It’s better to make several light passes than to go all-in and risk cracking or stretching the metal. For deeper gouges, you might smooth things out a bit, but sometimes a little imperfection just adds character.
Checking the Plate for Fit Before Reinstalling
Before you bolt it back onto the door, let’s make sure everything lines up. Hold the straightened kick plate up to the bottom of the door to see if it sits flush. If some bends remain, don’t be afraid to do a bit more gentle adjusting.
This is also a good time to check if the screw holes still match up. If a screw hole got warped by the impact, gently reshape it with a screwdriver or a reaming tool. Worst case, you can use a slightly larger screw, but that’s usually not necessary unless the hole is badly damaged.
If you had to scrape off any old adhesive, you might want to use new double-sided tape or a bit of construction adhesive to get a snug, rattle-free fit. The goal is that when you press the plate against the door, it hugs the surface without any new gaps.
You might be tempted to skip this step, but it’s like test-fitting puzzle pieces before gluing them down—it saves you from surprises once the plate is permanently reattached.
Reattaching the Kick Plate Securely
Once everything looks good, it’s time to reinstall. This step is pretty straightforward, but a few tricks can help it go smoothly:
- Start by holding the plate in position and inserting the center screw first. This anchors the plate and keeps it from sliding around as you add the rest.
- Work your way outwards, adding screws along the edges. Don’t overtighten—just enough to hold it snug.
- If you’re using adhesive, apply it thin and even, then press the plate into place for at least a minute to let it bond.
After all the screws are in, step back and make sure the plate sits level and tight against the door. If it’s still sticking out at any spot, a little more gentle tapping with your mallet (covered, of course) can help it settle in. Give the door a few test opens and closes to make sure nothing rubs or rattles.
Finishing Touches: Cleaning and Polishing
Once the plate is back where it belongs, it’s time for a little cleanup. Even if your kick plate took a beating, a quick polish can bring back most of its original shine.
- Wipe down the plate with a soft cloth and some mild cleaner. For brass or bronze, use a metal polish. For stainless steel, a dab of vinegar and water removes fingerprints and grime.
- If you spot any leftover scratches, try buffing them out with a gentle abrasive pad—nothing too rough, or you’ll just make new marks.
- Finish with a dry microfiber cloth for a streak-free look.
This is also a good time to clean up the area around the door, picking up any stray screws or bits of debris. A tidy workspace is an underrated part of a job well done.
When to Replace Instead of Repairing
Honestly, sometimes a kick plate is just too far gone to salvage. If the metal has cracked, split, or twisted so badly it won’t go flat, replacement is a better option. The good news is that kick plates aren’t too expensive and swapping them out uses the same skills as repairing.
You’ll find plenty of styles at your local hardware shop—just make sure to match the size and shape of your original. Most standard plates come pre-drilled, so lining up new screws is easy. If you want to switch things up, now’s the perfect time to pick a different finish or even upgrade to a heavier-duty material.
If you do go for a new kick plate, save your old screws—they almost always fit, and it’s one less thing to worry about during installation.
Keeping Your Kick Plate Looking Good in the Future
Now that your kick plate is back in shape, you probably want to keep it that way. A little regular care makes a big difference. Every so often, wipe off dirt and scuff marks before they get ground in. If your kick plate gets lots of daily abuse, consider adding a small weather strip or bumper to help absorb future blows.
For doors that see tough duty—think garages, commercial entries, or workshop doors—it might be worth upgrading to a thicker or reinforced plate. Brands like Schlage and Prime-Line have models designed for heavy impact, and they’re made to stand up to more serious knocks.
And if you ever need to repeat this fix, you’ll already know the routine. Like any home repair, it gets easier (and faster) each time.
Repairing a kick plate that’s bent from impact isn’t the world’s toughest DIY job, but there’s a certain satisfaction in restoring something that takes such a beating every day. With the right tools and a bit of know-how, you’ll have your door looking sharp again—ready to handle the next round of bumps, scrapes, and daily traffic. That’s one home fix that pays off every time you step through the door.