
Honestly, a loose handleset isn’t the kind of thing you should ignore. The good news is, fixing it is less about brute force and more about a bit of patience and the right steps. Whether you’ve got a keyed entry set or a fancy electronic smart lock, tightening up the hardware where the handleset attaches to the door usually follows the same basic logic. Let me walk you through what’s going on, why it matters, and how to get your door feeling sturdy again.
Why Handlesets Get Loose in the First Place
Over time, even the best handlesets can work themselves loose. Every time you turn the knob or pull the lever, you’re putting a little bit of torque on the screws holding the hardware in place. If your door slams a lot or if the installation was a little rushed, those tiny movements can add up faster than you’d think. You might start to notice the handle jiggling, the lock feeling “off,” or a gap between the plate and the door itself.
Most handlesets, regardless of brand, use a couple of long screws that run from the inside to the outside of the door to hold things together. If those screws back out—even by a millimeter—you’ll feel it. Sometimes, wood around the screw holes compresses or even cracks, making it hard for the screws to stay tight. This is especially common on older doors, or if someone’s over-tightened or stripped the hardware during a past repair.
Here’s the thing: a loose lock isn’t just a cosmetic issue. It can make it harder to open or close your door, but more importantly, it can be a security risk. If the hardware’s not anchored tightly, a hard yank could pull it free, or at the very least, make the lock itself less effective. That’s why this job is worth 10 minutes of your time.
Tools You’ll Need for Tightening a Handleset
Before you start, gathering the right tools will make the job smooth and efficient. Most modern handlesets from big brands like Kwikset, Schlage, or Defiant use common screws, but sometimes you’ll find specialty fasteners depending on the style—especially with sleeker, contemporary models.
- Screwdrivers: You’ll want both a Phillips and a flat-head screwdriver. Many sets use Phillips screws, but some have decorative covers that need a small flat-head to pry off.
- Allen wrench (hex key): Some handlesets, especially those with lever handles or thumb latches, use small set screws that require a hex key—often provided with the original hardware.
- Flashlight: Good lighting makes seeing tiny screws and set holes much easier, especially if your entryway is dim.
- Optional extras: If the mounting holes are stripped, a couple of wooden toothpicks and wood glue can help rebuild them. For very old or painted-over hardware, a utility knife can help break old paint lines.
You probably won’t need a drill unless things are seriously damaged or you’re planning to replace the set altogether. Take a look at your specific handleset before starting so you know exactly which tools to grab.
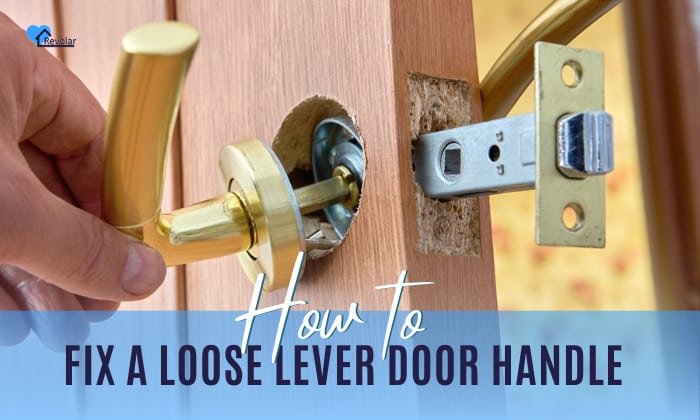
How to Remove the Handleset for Inspection
To really fix a loose handleset, sometimes you have to take it apart—don’t worry, it’s easier than it sounds. The screws holding everything together are usually on the inside of the door. If you’ve never taken your lock off, you might be surprised at how it all fits together.
First, check for any decorative covers. Manufacturers like Yale and Schlage love to hide screws under snap-on or twist-off plates for a cleaner look. Gently pry these off with a plastic tool or your fingernail to avoid scratching the finish. You’ll usually find two long screws running from the inside handle assembly through the door and into the exterior plate.
Unscrew these slowly, supporting the outside part of the handleset as you go. Once the screws are out, you can wiggle both halves of the handleset free. Pay attention to how things fit together, especially if there are extra washers or springs inside.
If your handleset has a separate deadbolt, you may not need to remove it to tighten the handle, but sometimes the plates overlap. In that case, take both off and set the parts aside in order—they only fit one way.
A quick tip: snap a photo of the assembly before you take it apart. That way, if you forget which part went where, you’ve got a reference.
Identifying and Fixing the Source of the Looseness
Once you have the hardware off, it’s time to play detective. You’re looking for anything that might explain why the handleset is loose where it attaches to the door. Most commonly, you’ll see the screw holes are a little chewed up, or the screws themselves are stripped or too short.
Check the following:
- Screw holes: If they’re enlarged or the wood is shredded, the screws won’t hold fast. A quick fix is to fill the holes with wood glue and wooden toothpicks, let it dry, then re-insert the screws.
- Screws: Make sure they’re straight and undamaged. If they’re stripped, swap them for new ones the same length and gauge (a hardware store can help match them).
- Backplate: Some handlesets have a metal or plastic plate that sits between the hardware and the door. If it’s cracked or warped, you may need a replacement for a truly solid fix.
Once everything looks good, reattach the handleset. Tighten the screws evenly and firmly, but don’t go overboard—especially if you’ve just repaired the holes. Snug is perfect; you shouldn’t feel any give when you test the handle, but you also don’t want to deform the hardware or compress the door.
Common Mistakes and How to Avoid Them
You might be wondering if there are any pitfalls to watch out for. Honestly, most DIY repairs go sideways because of a few classic mistakes. Here’s what to avoid so you get it right on the first try:
- Over-tightening screws: It’s tempting to crank them as hard as possible, but this can strip the wood or even crack the handle’s mounting plate. A firm, controlled snugness is your goal.
- Forgetting about alignment: If the handleset or deadbolt isn’t lined up perfectly when you put things back together, you might find the latch doesn’t work smoothly or the key won’t turn. Take your time getting everything straight before tightening down the screws.
- Mixing up screw lengths: Some sets use different length screws for the handle and deadbolt. Double-check which is which before reinstalling. Putting the long ones in the wrong spot can stop the handle from working properly or even damage the lock’s internals.
- Ignoring worn components: If the latch or the spindle that turns the lock is worn out, tightening the handleset won’t solve the underlying problem. In that case, consider replacing the damaged part or the whole set.
Honestly, patience is your best friend here. Take it slow, double-check your work, and you’ll avoid most of the issues people run into when repairing a handleset that’s loose where it attaches to the door.
Special Issues: Electronic & Smart Handlesets
If you have a smart lock—something like a Schlage Encode, Yale Assure, or Kwikset Halo—the process of tightening a loose handleset is mostly the same, but you’ll need to be cautious about the electronics. Removing the battery pack first is a must, both for safety and to avoid resets or accidental code erasing.
Pay attention to how the wiring and electronics fit into the assembly. Some electronic locks have more delicate connections, and you don’t want to pinch or strain these when removing or reinstalling the hardware. If you need to sync or pair your lock again after reassembly, follow the manufacturer’s instructions.
Electronic handlesets are built to tighter tolerances, but they’re still vulnerable to the same issues—loose screws, stripped holes, and misalignment. Just add an extra layer of care for the wiring and battery compartment.
If your smart handleset is still loose after tightening, check for tiny set screws along the handle stem or lever—these are easy to overlook, but they can make a big difference in how secure the handle feels. If the electronic portion seems unstable, confirm all mounting screws are properly seated before re-installing the battery and testing the lock.
When Repair Isn’t Enough: Replacement Options
There are times when tightening things up just won’t cut it. If your door’s wood is splintered, the mounting holes are too far gone, or the handleset itself is cracked or seriously worn, a full replacement might be in order. Luckily, replacing a handleset isn’t much harder than repairing one—especially if you stick with a similar brand and style.
Universal handlesets are an option, but fitting is important. Measure your current handleset—distance from the top of the handle to the bottom, as well as the space between the handle and the deadbolt—and match those measurements with any new hardware. If you stick with the same brand (like swapping Schlage for Schlage), you’ll often find everything lines up with your existing holes.
If you upgrade to an electronic or smart model, pay special attention to how the battery, code pad, and locking mechanisms are installed. These often require a bit more precision—and a few more steps for syncing and setup—but the trade-off in convenience can be worth it.
Keeping Your Handleset Secure Long-Term
Now that your handleset is sturdy again, keeping it tight is mostly about routine upkeep. It doesn’t have to be a big project—just a minute or two every few months makes a difference. Every time you notice a little wiggle or feel the handle shift, grab your screwdriver and check the mounting screws. That small bit of extra attention will keep things solid and help you spot issues before they become headaches.
If your door is exposed to a lot of weather, a quick check for rust or swelling around the handleset can keep small problems from getting worse. For smart locks, swap the battery as soon as you get a low-battery warning, and test the code or remote regularly so you don’t get locked out.
Prevention is always easier than repair. A tight, reliable handleset just feels right—and it helps keep your home secure.
Closing Thoughts
Fixing a handleset that’s loose where it attaches to the door isn’t rocket science, but it does take a little attention to detail. Whether you’re working with a classic Schlage or the latest smart lock, taking the time to tighten things up can restore that satisfying, solid feel every time you open your door. The real trick is going slow, checking for any underlying issues, and not being afraid to replace a worn part if you need to.
At the end of the day, a sturdy handleset is about more than just convenience—it’s a small, everyday victory for your home’s safety and your peace of mind. So the next time your handle feels shaky, grab your tools and give it the fix it deserves. You’ll be glad you did.