If you’re reading this, chances are you were just trying to secure that Kwikset or Yale handleset to keep your front door tight, only to find you’ve made things worse. Over-tightening screws can strip threads, warp metal, crack wood, or even break the handle mechanism inside. The good news? Most damage like this is fixable with some patience, the right tools, and clear steps. Let me walk you through how to identify what’s gone wrong and—more importantly—how to make your handleset feel and look solid again, just like it should.
How Over-Tightening Screws Damages Handlesets
It’s easy to underestimate just how much pressure metal and wood can handle. When you torque a screw past “snug,” you risk more than just a stuck screw. The pressure can strip the threads inside the handleset or the wood of your door, making the screws spin uselessly instead of holding things tight. You might even notice the mounting plate bending, the handle not sitting flush, or the lock mechanism jamming, especially on some popular brands like Baldwin or Defiant that use softer metals or complex internal components.
Here’s the thing: Most screws for handlesets are designed for a specific length and tension. When you go overboard, you could:
- Strip the threading in the screw hole (metal or wood), so screws can’t grip anymore
- Warp or crack the outer handleset casing, making it look crooked
- Damage the internal latch or lock mechanisms, leading to stiff or stuck handles
You might be wondering why the handle suddenly feels loose or won’t turn smoothly. Sometimes it’s just a stripped thread; other times, the internal parts get squeezed so tight they can’t move. That’s why repairing a handleset damaged from over-tightening screws starts with figuring out exactly what’s gone wrong.
Signs Your Handleset Is Damaged from Over-Tightening
Before grabbing your toolbox, it helps to know what to look for. Handleset damage from over-tightening can be sneaky—sometimes it’s just a slight wobble, other times the whole thing feels off. If you’ve noticed any of these symptoms, it’s time to investigate:
- Loose or spinning screws: If the screw just spins and won’t tighten, the internal threads may be stripped.
- Handle feels floppy or uneven: The mounting plate could be bent or the screws might not be anchoring correctly.
- Lock difficult to turn: Extra tension can push internal parts out of alignment.
- Cracks in the metal or door: Overtightened screws can stress the material around them, causing visible damage.
Honestly, if your Schlage handleset stopped feeling “right” right after you installed or “fixed” it, over-tightening is a strong suspect. Gently try to move the handle, check for visible cracks or distortion, and see if the screws will bite when you try to tighten them again. Be methodical—rushing here can lead to more trouble.
Removing a Damaged Handleset Safely
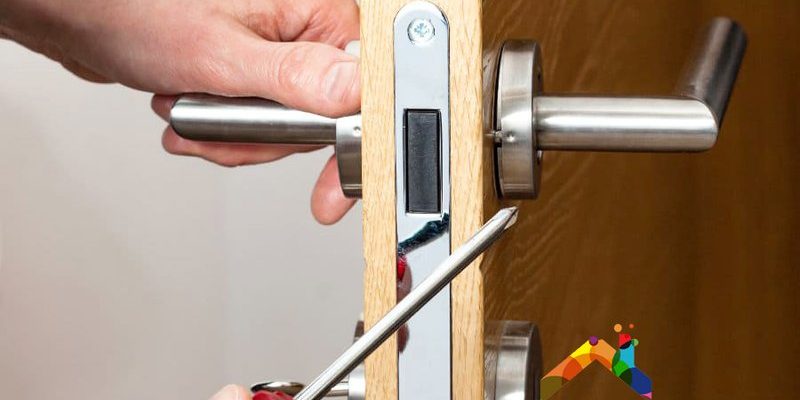
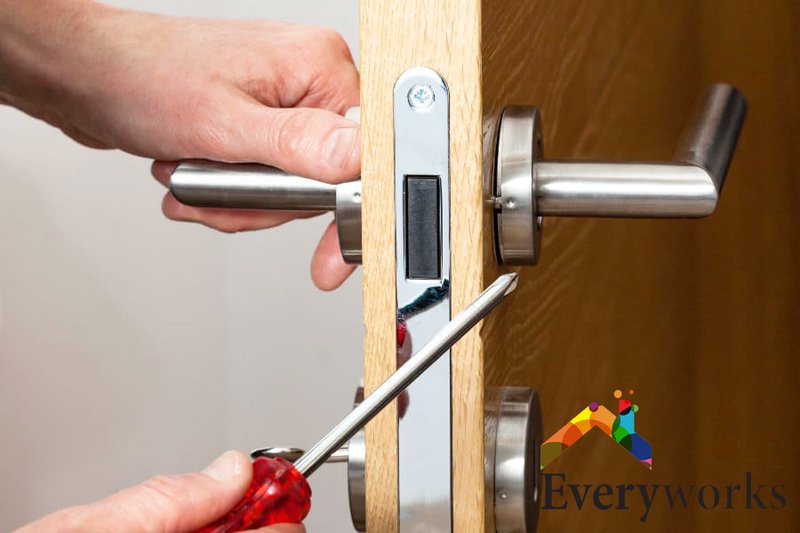
Once you’ve spotted the problem, you’ll need to remove the handleset to really see what’s going on inside. This can feel intimidating, especially if the screws are stripped or the plate is warped. Here’s my step-by-step take:
- Prepare your workspace. Clear the area and put down a cloth to catch screws or small parts. You don’t want to lose anything inside the door.
- Gather tools: You’ll want a screwdriver (Phillips or flathead, depending on your handleset), needle-nose pliers, and possibly a screw extractor for stripped screws.
- Remove the screws. Work slowly. If the screws are stripped, try fitting a rubber band between the screwdriver and the screw head for better grip. If that fails, use the screw extractor.
- Take off the exterior and interior plates. They may be stuck due to warping—gently wiggle them free.
- Slide out the latch/lock mechanism. Some models (like Kwikset) require you to pull out an interior pin or tab.
Don’t force anything. If a part isn’t budging, double-check for hidden screws or tabs. Forced removal can turn a simple repair into a total replacement.
Fixing Stripped Screw Holes in Your Handleset or Door
If the screw holes are stripped—whether in metal or wood—you’ll need to repair them before reassembling the handleset. Otherwise, your fix won’t last. Here’s how I recommend tackling this:
For Wood Doors
- Toothpick or matchstick method: Dab wood glue on wooden toothpicks or matchsticks, stuff them firmly into the stripped hole, break off flush, and let dry. This gives the screw new material to bite into.
- Wood filler or epoxy: For larger gaps, fill the hole with high-strength wood filler or a two-part epoxy, let it cure, then re-drill a fresh pilot hole.
For Metal Handlesets
- Thread repair kit: Use a tap and die set or a dedicated thread repair kit (like Helicoil) to restore stripped threads inside the metal. This can be a lifesaver for expensive handlesets.
- Larger screws: As a last resort, use a slightly larger screw, but make sure it fits the handleset holes and doesn’t crack the metal.
Let me explain: The key here is patience. Rushing the glue or filler means the repair won’t hold, and your handleset will be loose again in a week. Aim for a snug—not overly tight—fit with your repaired holes.
Repairing Warped or Bent Handleset Plates
Over-tightening screws can bend the mounting plate or casing of the handleset, especially on models with softer metal. This makes the handle look crooked and can affect the lock mechanism. Here’s what you can do:
- Remove the plate completely. Place it on a flat, hard surface (like a workbench or even a thick book).
- Gently tap it flat: Use a rubber mallet to tap out minor bends. For more severe warps, clamp the plate between two pieces of wood and gently press it flat.
- Check for cracks: If the plate is cracked or heavily bent, you might need to order a replacement from the manufacturer.
- Sand down rough edges: Lightly sand any sharp or raised areas caused by warping to keep things flush and safe when reinstalling.
Don’t be surprised if the handle feels instantly better after fixing the plate—sometimes this small step makes a huge difference in how the whole handleset feels and functions.
Reassembling and Re-Installing the Handleset
Now that you’ve repaired the damage, it’s time to put everything back together. Here’s how to get your handleset feeling solid, without risking the same mistake:
- Align all parts carefully: Make sure the latch and lock mechanisms are straight and fully seated in the door.
- Insert screws by hand first: Start all screws by hand to avoid cross-threading. Only use your screwdriver—never a drill—for final tightening.
- Tighten evenly: Work in a crisscross pattern if you have multiple screws. Tighten just until snug—stop as soon as you feel resistance.
- Test the handle: Before tightening completely, check that the handle turns smoothly and the lock operates without sticking.
- Make minor adjustments: If something feels off, back out the screws a bit and realign. Perfection here makes a world of difference.
It’s tempting to just “crank things down” for a secure feel, but trust me—most handlesets are actually designed to hold tight with gentle, even pressure.
When to Replace Instead of Repair
Here’s where some honest advice comes in: Not every damaged handleset can—or should—be saved. If you’ve tried the above steps and the damage is severe, it might be time for a new unit. Here’s how to know:
- Multiple cracks or broken sections: If the metal or internal parts are fractured, repairs won’t last.
- Internal latch or lock is jammed: Sometimes, over-tightening damages the locking mechanism so badly it can’t be repaired safely.
- Major threading loss: If you can’t get screws to hold even after filling or using larger screws, replacement is safer.
- Security concerns: If the handleset is a deadbolt on your front door, don’t risk it—a strong, uncompromised lock is worth the investment.
If you do decide to replace your handleset, take the opportunity to look for upgraded security and easier installation options. Some brands, like Schlage or Yale, offer reinforced housings and better screw designs to prevent over-tightening in the future.
Tips to Prevent Handleset Damage From Over-Tightening
Now that you’ve had a crash course in repairs, let’s talk about prevention. Avoiding over-tightening is all about technique and knowing your hardware:
- Always tighten by hand: Skip the power drill. Use a regular screwdriver for better control.
- Listen and feel: When you feel resistance, stop. “Snug” is enough—don’t force it.
- Use the correct screwdriver size: This helps the screw grip properly and reduces the risk of stripping.
- Lubricate components: A dab of graphite powder or light oil keeps mechanisms running smooth, which means you don’t have to over-tighten to get a “solid” feel.
- Check manufacturer guidelines: Some handlesets (like Kwikset SmartKey models) have torque recommendations—worth a look if you want to be extra careful.
Remember, a well-installed handleset should feel firm, not tight. “Tight” is good for jar lids—”snug” is good for handlesets.
The Bottom Line on Handleset Repair After Over-Tightening
Repairing a handleset that’s damaged from over-tightening screws isn’t hard, but it does take some patience and the right approach. Whether you’re fixing a Schlage, Yale, Defiant, or Kwikset handleset, take your time diagnosing the issue, repair stripped holes or warped plates carefully, and always reassemble with a gentle, even hand. Most importantly, remember that good hardware doesn’t need brute force—it just needs a careful touch and a little know-how.
Now your handleset should be back to looking great, feeling secure, and working just the way you want. And next time you reach for that screwdriver, you’ll know: a little goes a long way.