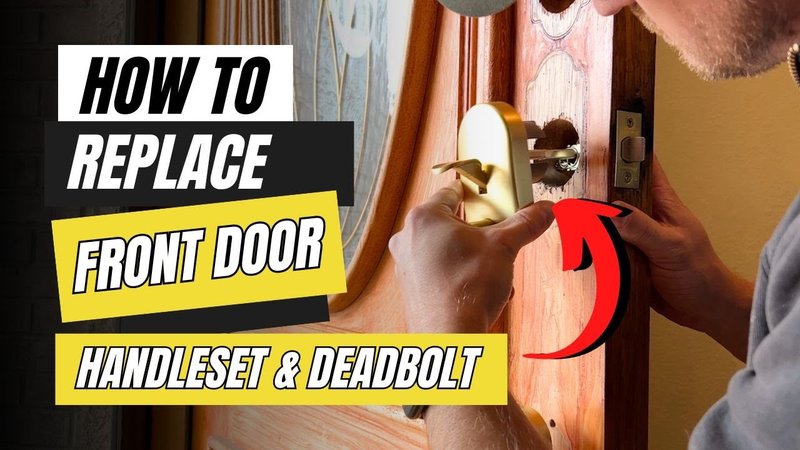
Here’s the thing—repairing a handleset that was damaged during installation is a lot more common than you might think. Whether you’re working with a fancy front door set from Baldwin or a simple Defiant deadbolt, rushing the job or using the wrong technique can leave you with stripped screws, bent latches, or even a misaligned lock. If you’re staring at a crooked handle or a lock that’s suddenly sticky, you’re in the right place. Let me explain how to fix a damaged handleset, what mistakes to avoid, and how to make your door hardware work as smoothly as it should.
Recognizing Damage from Handleset Installation
Before you jump into repairs, it’s important to figure out what actually went wrong. Honestly, you’d be surprised how many problems show up because something wasn’t seated correctly during installation. Here are a few classic signs:
- Loose handles or locks that wiggle, even when tightened
- Misaligned latches that grind or don’t catch the strike plate properly
- Stripped screw heads making adjustment nearly impossible
- Cracked or scratched plates from overtightening or slipped tools
Sometimes the damage is obvious—a rattling handle, or a decorative plate that’s split. Other times, it’s sneaky: the lock sticks, but only when the door is closed. Or maybe your remote lock feature just won’t sync up, even after you try to reset or re-pair it. If you’re dealing with a smart handleset, you might also see battery issues or error codes. The main thing is to slow down, take a close look, and don’t ignore the little stuff—small installation mistakes can turn into bigger troubleshooting headaches later.
Common Installation Mistakes That Cause Handleset Damage
You might be wondering how a brand-new handleset ends up damaged straight out of the box. The truth? Most issues start with a few classic mistakes—especially if you’re new to door hardware. Here are some to watch out for:
- Forcing screws or bolts instead of gently threading them
- Over-tightening until the metal plate bends or the threads strip
- Misaligned holes, which put stress on the handle or latch
- Skipping instructions, especially with smart remotes or coded entry systems
Say you’re installing a keyless remote handleset and you miss a step in the pairing process. Suddenly, your lock won’t respond, or the reset button does nothing. Or maybe you grab the power drill just to speed things up and accidentally strip out the Phillips screws. There’s no shame in it—it happens to everyone at least once. The key is learning what can go wrong, so you know how to avoid repeat problems and keep your code-synced remote handleset working smoothly.
How to Remove a Damaged Handleset Safely
Let me walk you through this: removing a damaged handleset isn’t just about yanking out screws. If you’re not careful, you could make the damage worse or even harm the door. Start by gathering a few basic tools—usually a Phillips screwdriver, a flathead, and sometimes needle-nose pliers for stripped screws. If you’re dealing with a smart handleset (say, one with a battery or electronic sync), make sure you remove the battery first to avoid accidental shorts.
- Unscrew slowly: If a screw is stripped, press the screwdriver in firmly for extra grip. You might need a screw extractor kit for really stubborn ones.
- Pull handles straight off rather than wiggling them side to side. This reduces stress on the latch mechanism underneath.
- Check for hidden fasteners under decorative plates or behind the latch. Brands like Schlage often hide extra screws to keep things looking neat.
Don’t force anything that won’t move. If you’re stuck, take a break and look for hidden tabs or locking pins. This step is all about patience. A little extra time now can save you a ton of troubleshooting and patchwork later.
Repairing Stripped Screws or Threads in a Handleset
Stripped screws are a pain. They usually happen when the screwdriver tip slips or you crank too hard. If the screw head is stripped but still accessible, try using a rubber band for extra grip between the screwdriver and the screw. For more stubborn cases, screw extractors can bite into the damaged head and back it out.
Now, if the screw hole itself is stripped (so the screw won’t hold), you’ve got a few options:
- Wooden dowel fix: Fill the hole with a wood dowel coated in wood glue, let it dry, and re-drill the hole. That gives the screw fresh material to grip.
- Toothpick trick: Jam 2–3 toothpicks in the hole with wood glue, break them off flush, and then re-insert the screw.
- Metal repair kits: For metal doors, use a thread repair insert (like a Helicoil) to restore the screw threads.
Honestly, if you’re facing stripped threads in a smart remote or battery compartment (like on an August or Yale lock), check if the manufacturer offers replacement parts or repair kits. That way, you’re not stuck with an unreliable fix.
Fixing a Bent Latch or Misaligned Handleset
A bent latch or misaligned handleset is usually the result of forcing the hardware when it didn’t line up. Maybe the holes weren’t drilled quite right, or the template was a little off. Here’s what to do:
- Remove the handleset and inspect the latch mechanism. If it’s visibly bent, you can sometimes straighten it gently with pliers (but if the metal snapped, it’s safer to replace).
- Check the strike plate on the door frame. It needs to line up perfectly with the latch. If it’s off, re-position the plate or widen the hole slightly with a file.
- Re-install the handleset slowly. Use the manufacturer’s template to mark fresh holes if needed. Take the time to check that everything operates smoothly before fully tightening the screws.
Let me be clear: if you rush this process, you’ll end up back at square one, troubleshooting sticky locks or fighting with your remote code sync every weekend. Do it once, do it right.
Dealing with Scratched, Cracked, or Cosmetic Damage
Cosmetic damage might not affect how your lock functions, but it’s still frustrating—especially on a brand-new Kwikset or Baldwin handleset. Little scratches, dings, or hairline cracks in decorative plates usually happen when tools slip or metal parts get over-tightened.
- Light scratches: Polish them out with a metal polish or even a bit of toothpaste on a soft cloth.
- Deeper gouges: Try a touch-up marker designed for hardware finishes, or check if the brand sells replacement plates.
- Cracked plates: If a decorative plate is cracked, it’s usually best to replace it. Using glue is a temporary fix at best, and can actually make things look worse.
If you’re working with a smart handleset, be extra careful—cracks near the battery or electronics could let in moisture and wreck the lock’s code or circuit board. Take a little pride in the repair process. The results are worth it.
Testing and Reinstalling Your Repaired Handleset
After you’ve made your repairs, don’t rush to screw everything back and walk away. Testing is crucial. Here’s how to do it, step by step:
- Insert the latch and handleset parts loosely. Make sure everything lines up—especially the remote code sync or battery cover if you’re working with a smart lock.
- Test the handle, latch, and lock movement several times before tightening anything down. The action should feel smooth and natural, not sticky or grinding.
- Once you’re satisfied, tighten the screws gradually, alternating sides for even pressure. Check for any movement or misalignment.
- For smart remotes or code locks, re-insert the battery, then pair or reset the lock following the brand’s instructions. Test the remote and code entry several times.
If you notice any problems, take things apart and double-check your alignment. It’s way easier to fix now, with everything loose, than after you’ve forced it shut.
When to Replace Instead of Repairing a Handleset
Sometimes, repairs just aren’t worth it. Maybe the latch is too bent, the internal code memory is fried, the threads are hopelessly stripped, or the aesthetic damage is too visible. Here’s my rule of thumb: if you’ve tried all the above steps and the handleset still doesn’t work smoothly, it’s usually time to replace.
- If your smart lock won’t hold a code or can’t sync with the remote, that’s a sign of deeper issues—usually a fried circuit or battery terminal.
- If you’re constantly tightening screws that won’t hold, the base material (wood or metal) might be too far gone. That’s a structural problem that’s better fixed with a new handleset or a door repair kit.
- If you’re dealing with a universal set, check if your brand offers replacement parts before tossing the whole thing.
It’s not admitting defeat—it’s about knowing when your time and energy are better spent installing fresh, reliable hardware. Sometimes, starting over is just smarter.
Wrapping Up: Take Your Time for Handleset Repairs
Repairing a handleset that was damaged during installation isn’t a race. Go slow, pay attention to the details, and don’t force what isn’t ready to move. Most issues—stripped screws, bent latches, scratched plates, or trouble syncing a smart remote—can be traced back to rushing or skipping steps. Start by carefully removing the hardware, fix what you can, and always check your work along the way.
If you end up needing a replacement, that’s alright too. Every repair is a chance to learn what works (and what doesn’t) for your specific lock brand or remote. Remember, a smooth, sturdy handleset is worth the effort—and makes every time you open your door feel right.
